Category: Main Meal

  • Tomahawk Steak: A Guide to This Premium Cut of Beef

    Tomahawk Steak: A Guide to This Premium Cut of Beef

    Tomahawk Steak: A Guide to This Premium Cut of Beef

    The tomahawk steak, a showstopper for any occasion, is a premium cut renowned for its elegance, exceptional flavor, and dramatic presentation. This guide will delve into the unique characteristics of the tomahawk, exploring its history, the art of selection, and expert cooking techniques.

    Whether you’re a seasoned griller or just starting your culinary journey with premium beef, this guide will equip you with the knowledge to elevate your steak-cooking game. Discover the secrets behind the tomahawk’s signature long-bone, its exquisite marbling, and the meticulous process that brings this masterpiece to your plate.

    Prepare to embark on a culinary adventure that will tantalize your taste buds and leave you with a newfound appreciation for this truly extraordinary cut of beef.

    The Story and History of the Tomahawk Steak

    A Modern Icon with Ancient Roots

    Despite the glamorous display of the tomahawk steak and indeed for those who deem it as relatively new in preparation it is actually quite the contrary. It was customary to leave the rib bone on while butchering for centuries, and the most likely reasons for this are entirely functional – the bone itself acts as a handle that is useful for carrying and roasting huge chunks of meat.  

    The Cowboy Connection

    While the tomahawk steak’s modern name and status has its roots from with American cowboys. Cowboys of the 19th century often cooked for themselves outdoors and since the bone of the rib is long, it was ideal for holding the meat up to roast directly over the fire. It also probably played a part in the tomahawk steak to be attributed with the Western themes inside the United States of America.

    A Culinary Renaissance

    In recent decades, the tomahawk steak has experienced a resurgence in popularity, thanks in part to its dramatic presentation and the growing interest in high-quality, well-marbled beef. Today, it is a staple on the menus of upscale steakhouses and a favorite among home cooks seeking a truly impressive centerpiece for their meals.  

    A Symbol of Indulgence

    Tomahawk steak is also popular as an example of people focusing more not just on what they are eating, but how it makes them feel. Due to its aesthetic look and taste, it is associated with luxury and means turning an ordinary meal into some kind of feast.

    From Humble Origins to Modern Icon

    Thus, the tomahawk steak’s journey from a practical method of butchering and cooking to a modern culinary icon is a testament to its enduring appeal. Its combination of history, tradition, and impressive presentation continues to captivate meat lovers around the world.

    What Makes a Tomahawk Steak Special

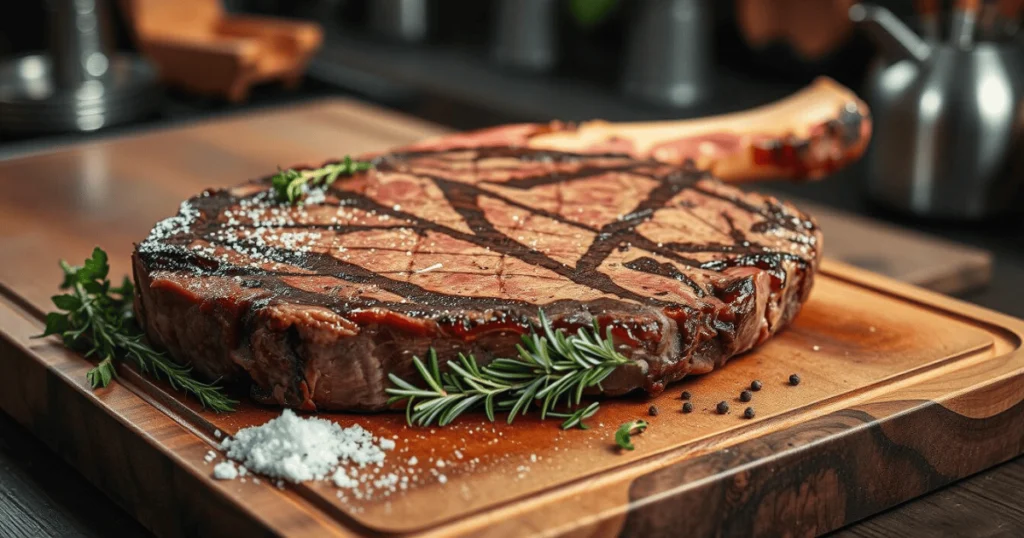
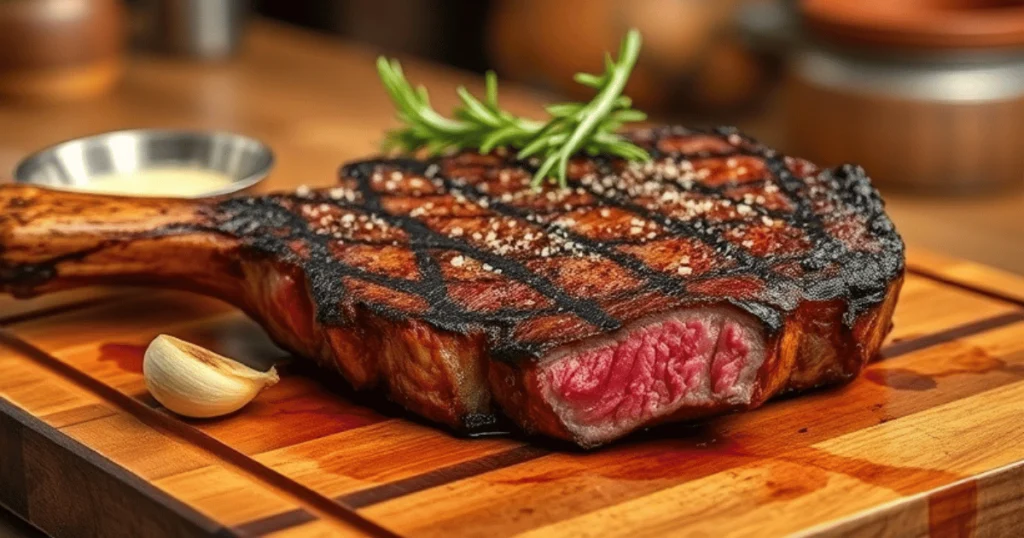
    The tomahawk steak is a showstopper for any meat lover, a premium cut of long bone ribeye that boasts exceptional quality and a truly distinctive appearance.

    A Dramatic Presentation:

    The most striking feature of the tomahawk is its dramatic long bone, extending several inches beyond the meat. This not only creates a visually stunning presentation but also plays a crucial role in maintaining the meat’s moisture and flavor during cooking.  

    Premium Ribeye at its Finest:

    At the heart of the tomahawk lies a premium cut of long bone ribeye, renowned for its exceptional tenderness and rich, beefy flavor. The ribeye’s natural marbling further enhances its juiciness and imparts a depth of flavor.  

    Marbling: A Flavor Symphony:

    The generous marbling throughout the tomahawk steak is key to its unique flavor profile. This interlacing of fat not only adds richness but also helps to keep the meat incredibly moist and tender as it cooks, creating a truly unforgettable flavor experience.

    Understanding the Butchering Process

    The journey of a tomahawk steak begins long before it graces your plate. This exceptional cut of beef is born from a meticulous butchering process that carefully preserves its unique characteristics. Let’s delve into the art of creating a tomahawk steak, from the initial cut to the final, showstopping product.

    From Rib Primal to Culinary Masterpiece

    The tomahawk steak originates from the prized rib primal of the beef, specifically the renowned rib eye section. This area is celebrated for its exquisite marbling and unparalleled tenderness. Skilled butchers meticulously extract the rib eye while preserving a substantial portion of the rib bone, known as a “French-cut” rib.

    The Significance of the Long Bone

    The long rib bone is the defining feature of the tomahawk steak. It not only creates a dramatic visual impact but also serves a practical purpose. The bone helps to conduct heat evenly during cooking, ensuring optimal tenderness and flavor. Additionally, the long bone provides a convenient and secure handle, making it easier to maneuver and grill the steak.

    Quality Standards and Grading

    The quality of a tomahawk steak is determined by its USDA grade, which reflects the amount of marbling and overall tenderness.

    • Prime: The pinnacle of beef quality, Prime-grade steaks boast exceptional marbling, resulting in unparalleled flavor and juiciness.
    • Choice: A highly desirable grade, Choice-grade steaks offer excellent quality at a more accessible price point.

    Understanding these grading standards empowers you to make informed choices when selecting the finest tomahawk steak for your culinary endeavors.

    Selecting the Perfect Tomahawk Steak

    Choosing the right tomahawk steak is crucial for an unforgettable dining experience. When navigating the meat counter or consulting with your local butcher, keep an eye out for these essential quality indicators to ensure you select the finest fresh beef.

    Color: A Visual Cue to Freshness

    First and foremost, assess the color of the meat. A premium tomahawk steak should display a deep, vibrant red hue, indicative of freshness and high quality. Avoid steaks with a dull, gray, or discolored appearance, as these may be past their prime.

    Marbling: The Key to Flavor and Tenderness

    Next, scrutinize the marbling – the intricate network of white fat that permeates the meat. The best tomahawk steaks boast abundant, evenly distributed marbling. This intramuscular fat plays a pivotal role in enhancing the steak’s flavor and ensuring exceptional tenderness. The more marbling, the richer and more flavorful the steak will be.

    • Aim for: A well-marbled appearance with fine, delicate streaks of white fat throughout the meat.
    • Avoid: Steaks with large, thick fat pockets, which can leave an overly greasy mouthfeel.

    Origin and Freshness: Inquiring Minds Want to Know

    When making your selection, consider the origin and freshness of the beef. Don’t hesitate to inquire about the source of the steak and how recently it was cut. Fresh beef offers superior flavor and a more vibrant eating experience.

    Consult the Expert: Your Butcher

    Finally, leverage the expertise of your butcher. They are a valuable resource for selecting the ideal tomahawk steak. Feel free to ask questions about grading systems (such as USDA Prime and Choice), aging techniques, and optimal cooking methods. Their guidance will empower you to make an informed decision and ensure a truly memorable culinary experience.

    Preparing Your Tomahawk for Culinary Triumph

    Proper preparation is paramount to unlocking the full flavor potential of your premium tomahawk steak. Before you embark on the cooking journey, follow these key steps to ensure an unforgettable dining experience.

    1. Embrace Room Temperature:

    Allow the steak to gradually warm to room temperature, approximately 30-45 minutes before cooking. This gradual warming ensures even cooking and helps prevent cold spots within the meat.
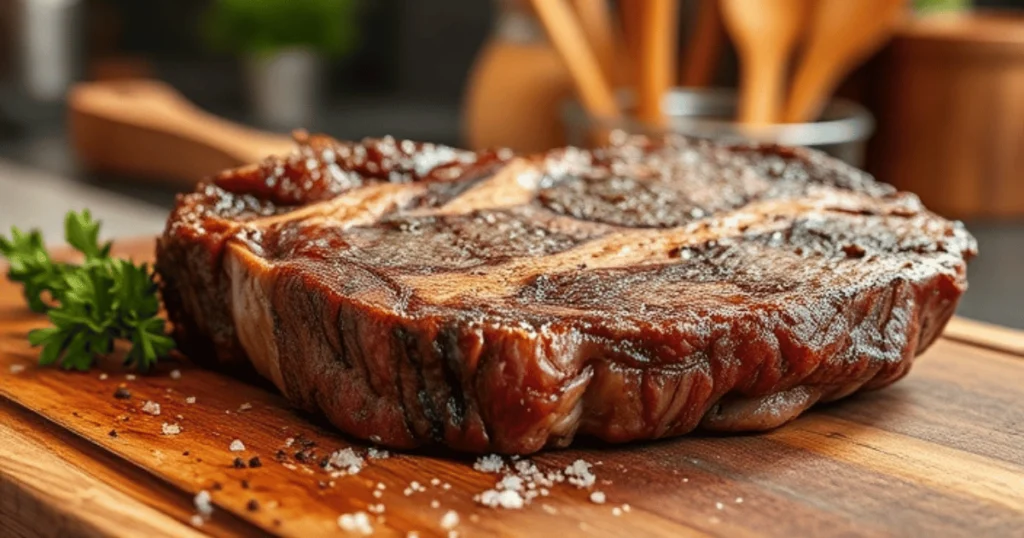
    2. Pat it Dry:

    Thoroughly pat the steak dry with paper towels. This crucial step removes excess moisture, facilitating a superior sear and preventing unwanted steaming during the cooking process.

    3. Season to Taste:

    Season the steak generously with your preferred seasonings. A simple combination of salt and freshly ground black pepper is always a classic choice. Alternatively, experiment with more complex spice rubs or marinades. However, remember to exercise restraint, allowing the steak’s natural flavors to shine through.

    Enhance with Dry Aging (Optional):

    For an even more intense flavor experience, consider dry-aging the steak for 14-28 days prior to cooking. This process concentrates the beef’s umami flavors, resulting in exceptional tenderness and a uniquely complex taste.

    4. Elevate Your Steak Game:

    By diligently following these simple yet crucial preparation steps, you’re well on your way to achieving a truly exceptional culinary experience. Enjoy the succulent, flavorful rewards of your perfectly prepared tomahawk steak.

    Perfect Tomahawk Steak Temperature Guide

    Understanding steak temperatures is crucial for achieving steakhouse-quality results with your tomahawk steak. Here’s your definitive temperature guide for this premium cut:

    Essential Tomahawk Steak Temperature Chart

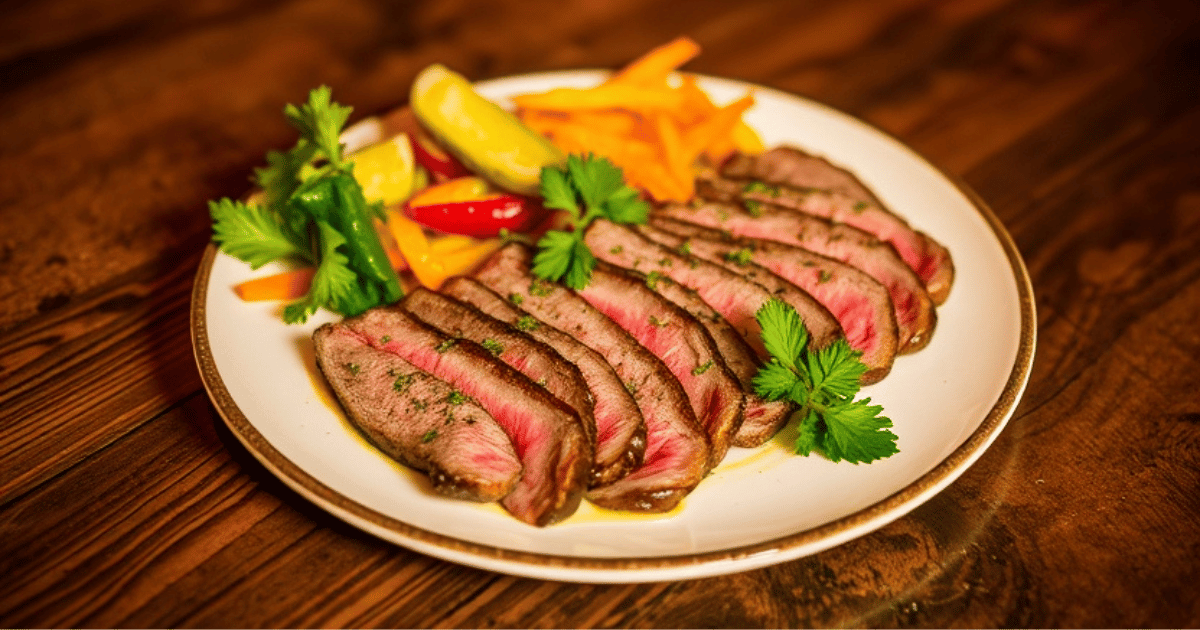
    • Rare: 120-125°F (49-52°C) – Deep red center, seared exterior
    • Medium-Rare: 130-135°F (54-57°C) – Warm red center, steakhouse standard
    • Medium: 140-145°F (60-63°C) – Pink center, firmer texture
    • Medium-Well: 150-155°F (66-68°C) – Slight pink center
    • Well-Done: 160°F+ (71°C+) – Brown throughout

    Pro Tip: The Resting Phase

    Always rest your tomahawk steak for 10-15 minutes after cooking. During this time:

    • Temperature rises 5-10°F through carryover cooking
    • Meat fibers reabsorb juices for maximum flavor
    • Final texture becomes more tender and succulent

    Remember to use a reliable meat thermometer for accurate temperature readings, ensuring your premium tomahawk steak reaches your desired doneness level every time.

    Grilling Methods for Tomahawk Steak

    Cooking a tomahawk steak right needs the right grilling skills. You can use direct or indirect grilling. Each method has its own way to make your steak juicy and full of flavor.

    Direct Heat Grilling

    Direct heat grilling is perfect for tomahawk steak. It creates a tasty crust on the outside and keeps the inside juicy. Start by heating your grill to high. Then, place the steak on the hot grates.

    Sear the steak for 2 to 3 minutes on each side. Turn it 45 degrees halfway to get those nice grill marks.

    Indirect Heat Grilling

    Indirect heat grilling is great for a gentle, even cook. Place the steak away from the flames. This method cooks the steak slowly and evenly, making it tender and juicy.

    Keep the temperature steady to ensure even cooking. Adjust it as needed.

    Grilling TechniqueTemperature RangeCooking TimeIdeal Doneness
    Direct HeatHigh (450°F – 550°F)10-15 minutesMedium-rare to medium
    Indirect HeatMedium (350°F – 450°F)20-30 minutesMedium-rare to medium-well

    Choosing the right grilling method is key. Always check the steak’s internal temperature. Adjust the cooking time to get your steak just right. With the right grilling techniques, you can make a direct heat or indirect heat masterpiece every time.

    Tomahawk Steak Reverse Sear Method

    Steps for Perfect Reverse Sear

    1. Season steak generously
    2. Cook at 275°F (135°C) on a wire rack
    3. Monitor until 10-15°F below target temperature
    4. Rest 5-10 minutes
    5. Sear 1-2 minutes per side on high heat

    Critical Temperature Tips

    • Use digital meat thermometer for accuracy
    • Keep oven door closed to maintain 275°F
    • Let steak rest before and after searing

    Pro Chef Secrets

    • Place on elevated rack for even air circulation
    • Pat dry before final sear for optimal crust
    • Rest on wire rack to prevent moisture buildup
    • Final high-heat sear creates steakhouse-quality crust

    This reverse sear technique delivers consistent results with the signature steakhouse combination: crusty exterior, tender interior, edge-to-edge evenness.

    Ultimate Tomahawk Steak Seasoning

    Premium Steak Rubs

    • Classic Mix: Garlic + onion powder + black pepper
    • Herb Blend: Fresh rosemary + thyme + smoked paprika
    • Application: Coat generously, massage into meat

    Best Marinades

    TypeIngredientsFlavor Profile
    ClassicOlive oil + balsamic + WorcestershireRich & tangy
    AsianSoy + ginger + garlic + brown sugarSweet-umami
    CitrusLemon + Dijon + herbsBright & zesty
    Craft BeerDark ale + honey + garlicBold & malty

    Pro Tips:

    • Minimum marination: 30 minutes
    • Optimal flavor: 24 hours
    • Pat dry before cooking
    • Season again before grilling

    This combination of rubs and marinades enhances your tomahawk steak’s natural flavors without overpowering its premium taste.

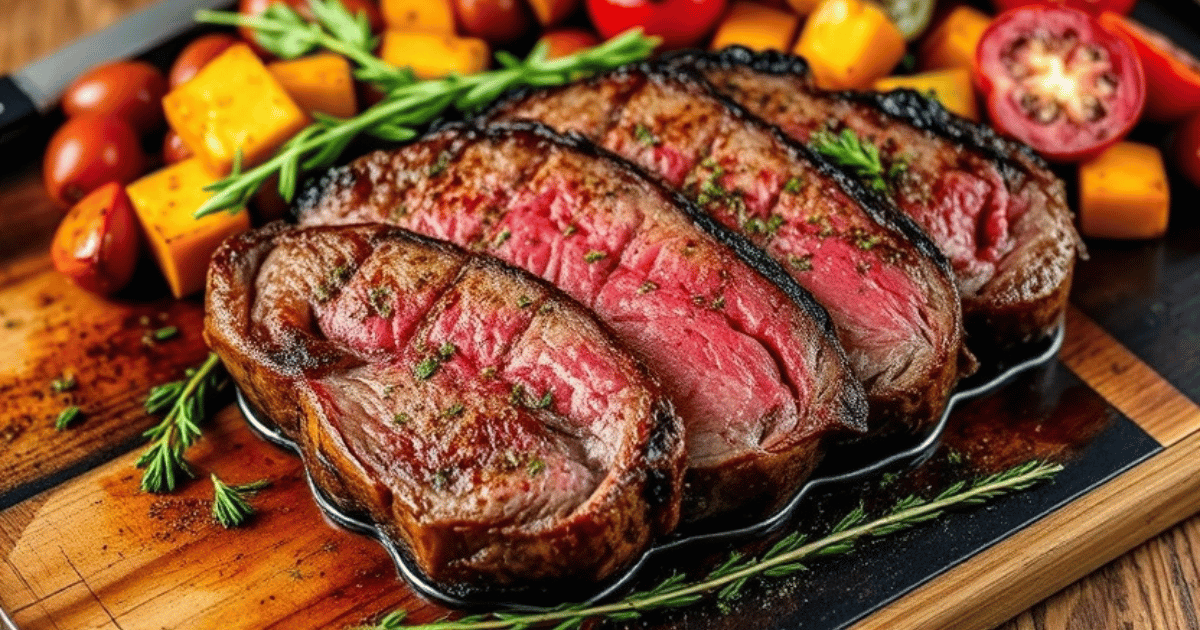
    Tomahawk Steak Side Dishes: Classic & Modern Pairings

    Traditional Sides

    • Garlic mashed potatoes
    • Herb-roasted fingerlings
    • Sautéed asparagus with brown butter
    • Brussels sprouts with bacon
    • Glazed baby carrots

    Contemporary Accompaniments

    • Cauliflower steaks + chimichurri
    • Wild mushroom polenta
    • Roasted beet quinoa salad
    • Spiced maple sweet potato wedges

    Perfect Pairing Guide

    Side TypeTextureFlavor Profile
    PotatoesCreamy/CrispyRich, buttery
    VegetablesTender-crispFresh, seasonal
    GrainsLight, fluffyEarthy, complex

    Pro tip: Combine one creamy, one crispy, and one vegetable side for optimal texture contrast with your tomahawk steak.

    Essential Mistakes to Avoid

    Temperature Control

    • Monitor internal temp with meat thermometer
    • Avoid overcooking – leads to dry, tough meat
    • Follow doneness temperature guidelines
    • Let steak come to room temperature before cooking

    Seasoning Guidelines

    • Season generously with salt and pepper
    • Apply seasoning 30-60 minutes before cooking
    • Pat dry before applying rubs
    • Don’t overpower natural beef flavor

    Critical Rest Period

    StageTimeWhy Important
    Pre-cooking30-60 minEven temperature
    Post-cooking10-15 minJuice redistribution

    Common Errors

    • Cooking cold steak
    • Skipping rest period
    • Under-seasoning
    • Not using thermometer
    • Cutting immediately after cooking

    Monitor temperature, season properly, and respect rest periods for steakhouse-quality results.

    Conclusion

    Embarking on your journey to master the tomahawk steak has surely been a rewarding experience. Now, you’re well-versed in the distinctive qualities of this premium cut and equipped with the knowledge to cook it to perfection.

    As you reflect on your learning, savor the satisfaction of creating a delectable dish at home. You’ve delved into butchering, temperature control, and seasoning, allowing you to showcase your culinary prowess to family and friends.

    Embrace the adventure of experimenting and enhancing your skills. Remember, the joy of mastering the tomahawk steak lies in the journey, not just the final dish. Embark on this culinary adventure and relish the delicious rewards it brings.

    FAQs

    What is a tomahawk steak?

    A tomahawk steak is a superior beef cut featuring a long, French-trimmed rib bone that adds to its striking presentation. Cut from the rib primal, it boasts excellent marbling, tenderness, and a rich, flavorful taste.

    Why is the tomahawk steak considered a special cut?

    The tomahawk steak’s uniqueness comes from its long, frenched rib bone, high-quality ribeye meat, and remarkable marbling, which combine to deliver exceptional flavor and tenderness.

    How did the tomahawk steak gain its popularity?

    Recently, the tomahawk steak has risen in popularity, becoming a staple in upscale steakhouses and gourmet restaurants. Its dramatic appearance and top-tier quality appeal to steak enthusiasts seeking a luxurious dining experience.

    What is the butchering process for a tomahawk steak?

    The tomahawk steak originates from the rib primal, with the long bone left intact and frenched to reveal the full rib. This method enhances the steak’s visual appeal while preserving its tenderness and flavor.

    How do I select a high-quality tomahawk steak?

    When choosing a tomahawk steak, look for a rich, deep red color and abundant marbling. Ensure the bone is clean and the fat cap remains intact. Consider the steak’s source and freshness as well.

    What tools do I need to cook a tomahawk steak?

    You’ll need a reliable grill or oven to cook a tomahawk steak, along with a meat thermometer to monitor internal temperature. Tools for flipping and handling the steak are essential, and proper storage containers help keep it fresh.

    How do I properly prepare a Tomahawk steak for cooking?

    Allow the tomahawk steak to reach room temperature before cooking. Pat it dry and season it lightly. Dry aging can further enhance the steak’s flavor and texture.

    What internal temperature should I cook a tomahawk steak to?

    The ideal internal temperature for a tomahawk steak depends on your preferred doneness:

    • Rare: 125°F
    • Medium-rare: 130-135°F
    • Medium: 140-145°F
    • Medium-well: 150-155°F

    Always allow the steak to rest for 5 to 10 minutes after cooking.

    What are the best grilling methods for a tomahawk steak?

    Grill tomahawk steaks using both direct and indirect heat. Direct heat sears the steak, while indirect heat cooks it to the desired doneness. The reverse sear method, combining these techniques, yields excellent results.

    What are some good seasoning and marinade options for a tomahawk steak?

    Season tomahawk steaks with salt, pepper, garlic, rosemary, and thyme. Marinades can add extra flavors, but be cautious not to overpower the steak.

    What side dishes go well with tomahawk steak?

    Ideal side dishes for a tomahawk steak include roasted potatoes, creamy mashed potatoes, grilled asparagus, and sautéed mushrooms. Modern options like roasted Brussels sprouts, sweet potato fries, or a fresh salad also pair wonderfully.

    What beverages go well with a tomahawk steak?

    Pair tomahawk steaks with bold red wines such as Cabernet Sauvignon, Malbec, or Shiraz. Craft beers with hoppy or malty profiles also complement the steak. Whiskey-based cocktails or Old Fashioneds are excellent choices too.

    What are the common mistakes to avoid when cooking tomahawk steak?

    Avoid overcooking, under-seasoning, and skipping the resting period. Proper temperature management, consistent seasoning, and allowing the steak to rest are crucial for the best outcome.

    How should I store and handle leftover tomahawk steak?

    Wrap leftover tomahawk steak tightly in plastic wrap or aluminum foil and refrigerate for up to 3-4 days. Reheat it gently in the oven or a skillet. Leftover steak is perfect for steak sandwiches or beef hash.

  • Juicy Tomahawk Steak Recipes You Must Try

    Juicy Tomahawk Steak Recipes You Must Try

    Juicy Tomahawk Steak Recipes You Must Try

    You’ve likely heard of the Tomahawk steak. This impressive cut of beef is known for its long bone, which resembles a tomahawk axe, and its rich, juicy flavor. The Tomahawk steak is essentially a bone-in ribeye, but its size and presentation make it a showstopper at any meal. Whether you’re hosting a dinner party or simply treating yourself, mastering the art of cooking a Tomahawk steak is a skill worth having. In this article, we’ll explore the top juicy Tomahawk steak recipes you must try, along with tips to ensure your steak is perfectly cooked every time.


    Why Tomahawk Steak is Special

    The Tomahawk steak is cut from the rib section of the cow, and its long bone is left intact, giving it a dramatic appearance. The bone not only adds to the presentation but also enhances the flavor by insulating the meat during cooking, resulting in a juicier and more tender steak. Its marbling (fat distribution) ensures a rich, buttery texture that melts in your mouth. Because of its size—usually around 2 inches thick and weighing 30-45 ounces—it’s perfect for sharing or indulging in a luxurious meal.


    Tips for Cooking the Perfect Tomahawk Steak

    Before diving into the recipes, here are some essential tips to ensure your Tomahawk steak turns out perfectly:

    1. Choose Quality Meat: Opt for USDA Prime or Wagyu beef for the best flavor and texture.
    2. Season Generously: Use coarse sea salt, freshly ground black pepper, and other seasonings to enhance the natural flavors.
    3. Bring to Room Temperature: Let the steak sit at room temperature for 30-60 minutes before cooking to ensure even cooking.
    4. Sear and Finish: Sear the steak on high heat to create a crust, then finish cooking at a lower temperature to your desired doneness.
    5. Rest the Steak: Allow the steak to rest for 10-15 minutes after cooking to let the juices redistribute.

    Top Juicy Tomahawk Steak Recipes

    1. Classic Grilled Tomahawk Steak

    This recipe is perfect for those who love the smoky flavor of grilled meat.

    Ingredients:

    • 1 Tomahawk steak (30-45 oz)
    • 2 tbsp coarse sea salt
    • 1 tbsp freshly ground black pepper
    • 2 tbsp olive oil
    • 3 cloves garlic, crushed
    • 2 sprigs rosemary

    Instructions:

    1. Preheat your grill to high heat (450°F-500°F).
    2. Season the steak generously with salt and pepper.
    3. Drizzle olive oil over the steak and rub in the crushed garlic and rosemary.
    4. Sear the steak on the grill for 3-4 minutes per side to create a crust.
    5. Reduce the heat to medium (350°F) and continue cooking for 10-15 minutes, flipping occasionally, until the internal temperature reaches 130°F for medium-rare.
    6. Let the steak rest for 10 minutes before you slice and serve it.

    2. Reverse-Seared Tomahawk Steak

    The reverse sear method ensures a perfectly even cook with a crispy exterior.

    Ingredients:

    • 1 Tomahawk steak (30-45 oz)
    • 2 tbsp kosher salt
    • 1 tbsp black pepper
    • 1 tbsp smoked paprika
    • 2 tbsp butter
    • 4 cloves garlic, minced
    • 2 sprigs thyme

    Instructions:

    1. Preheat your oven to 275°F.
    2. Season the steak with salt, pepper, and a sprinkle of smoked paprika.
    3. Place the steak on a wire rack in a baking sheet and cook in the oven for 30-40 minutes, or until the internal temperature reaches 110°F.
    4. Heat a cast-iron skillet over high heat and add butter, garlic, and thyme.
    5. Sear the steak about 2 to 3 minutes on each side until a nice crust develops.
    6. Rest the steak for 10 minutes before serving.

    3. Herb-Butter Basted Tomahawk Steak

    This recipe elevates the steak with a flavorful herb butter baste.

    Ingredients:

    • 1 Tomahawk steak (30-45 oz)
    • 2 tbsp sea salt
    • 1 tbsp black pepper
    • 4 tbsp unsalted butter
    • 3 cloves garlic, minced
    • 2 sprigs rosemary
    • 2 sprigs thyme

    Instructions:

    1. Preheat your oven to 400°F.
    2. Season the steak with salt and pepper.
    3. Heat a cast-iron skillet over high heat and sear the steak for 3-4 minutes per side.
    4. Now, put butter, minced garlic and fresh rosemary and thyme to the skillet.
    5. Baste the steak with the melted butter mixture and transfer the skillet to the oven.
    6. Cook for 10-15 minutes, basting occasionally, until the internal temperature reaches 130°F for medium-rare.
    7. Rest the steak for 10 minutes before serving.

    4. Smoked Tomahawk Steak

    For a unique twist, try smoking your Tomahawk steak for a deep, smoky flavor.

    Ingredients:

    • 1 Tomahawk steak (30-45 oz)
    • 2 tbsp kosher salt
    • 1 tbsp black pepper
    • 1 tbsp garlic powder
    • 1 tbsp onion powder
    • 1 cup wood chips (hickory or oak)

    Instructions:

    1. Preheat your smoker to 225°F.
    2. Sprinkle the steak with salt, pepper, garlic powder, and onion powder.
    3. Place the steak in the smoker and cook for 1.5-2 hours, or until the internal temperature reaches 120°F.
    4. Now sear the steak on a hot cast iron skillet or grill for 2-3 minutes in each side.
    5. Rest the steak for 10 minutes before serving.

    5. Coffee-Rubbed Tomahawk Steak

    This recipe adds a bold, earthy flavor with a coffee-based rub.

    Ingredients:

    • 1 Tomahawk steak (30-45 oz)
    • 2 tbsp finely ground coffee
    • 1 tbsp brown sugar
    • 1 tbsp smoked paprika
    • 1 tbsp kosher salt
    • 1 tbsp black pepper
    • 2 tbsp olive oil

    Instructions:

    1. Preheat your grill or oven to 400°F.
    2. Mix the coffee, brown sugar, smoked paprika, salt, and pepper in a bowl.
    3. Rub the steak with olive oil and coat it evenly with the coffee rub.
    4. Sear the steak on high heat for 3-4 minutes per side.
    5. Reduce the heat and cook for 10-15 minutes, or until the internal temperature reaches 130°F for medium-rare.
    6. Rest the steak for 10 minutes before serving.

    Serving Suggestions

    Pair the steak with classic sides like garlic mashed potatoes, roasted vegetables, or a fresh Caesar salad. For a finishing touch, drizzle with chimichurri sauce or a pat of herb butter.


    Additional Tips and Tricks

    Choosing the Right Cut

    When selecting a Tomahawk steak, look for one with even marbling throughout the meat. This marbling is key to achieving that melt-in-your-mouth texture. Additionally, ensure the steak is a consistent thickness to promote even cooking.

    Seasoning Variations

    While salt and pepper are classic seasonings, don’t be afraid to experiment with other spices and herbs. Consider using a blend of garlic powder, onion powder, smoked paprika, or even a touch of cayenne pepper for a bit of heat.

    Cooking Methods

    While grilling and reverse searing are popular methods, you can also try sous vide for precise temperature control. Sous vide involves vacuum-sealing the steak and cooking it in a water bath at a specific temperature before searing it for a perfect crust.

    Resting the Steak

    Letting the steak rest is essential for keeping its juices intact. When you cook a steak, the heat pushes the juices toward the center. Allowing the steak to rest lets these juices redistribute throughout the meat, ensuring every bite is flavorful and moist.

    Pairing with Wine

    A robust red wine like Cabernet Sauvignon or Malbec pairs beautifully with a Tomahawk steak. The tannins in these wines complement the richness of the beef, enhancing the overall dining experience.


    Exploring Global Flavors

    Argentinian-Style Tomahawk Steak

    In Argentina, steak is often seasoned simply with salt and cooked over an open flame. For an Argentinian twist, serve your Tomahawk steak with chimichurri sauce, made from parsley, garlic, vinegar, and olive oil.

    Asian-Inspired Tomahawk Steak

    Marinate your steak in a mixture of soy sauce, ginger, garlic, and sesame oil for an Asian-inspired flavor. Serve it with steamed rice and a side of stir-fried vegetables for a well-rounded meal.

    Mediterranean Tomahawk Steak

    Rub your steak with a blend of oregano, thyme, rosemary, and lemon zest for a Mediterranean flair. Serve with a side of roasted vegetables and a dollop of tzatziki sauce.


    Conclusion

    The Tomahawk steak is a luxurious cut of beef that’s perfect for special occasions or indulgent meals. With these top recipes, you can explore different cooking methods and flavor profiles to find your favorite way to enjoy this impressive steak. Remember to start with high-quality meat, season generously, and let the steak rest before serving. Whether you grill, reverse sear, or smoke your Tomahawk steak, the result will be a juicy, flavorful masterpiece that’s sure to impress. Happy cooking!

    Frequently Asked Questions

    What is the best method to cook a Tomahawk steak?

    The best method depends on your preference. Grilling provides a smoky flavor, while reverse searing ensures even cooking. Smoking adds a unique depth of flavor, and sous vide offers precision.

    How long should I cook a Tomahawk steak?

    Cooking time varies based on the method and desired doneness. Generally, a 2-inch thick steak takes about 15-20 minutes on the grill or in the oven, plus resting time.

    At what temperature should a Tomahawk steak be cooked?

    For medium-rare, target an internal temperature of 130°F. Use a meat thermometer to ensure accuracy.

    Can I pan fry a Tomahawk steak?

    Yes, a cast-iron skillet is ideal for searing and finishing a steak. Ensure the pan is hot enough to create a crust.


    Final Thoughts

    Tomahawk steak is not only food; it is an adventure of sorts. Its impressive size, rich flavor, and versatility make it a favorite among steak lovers. By trying these recipes and tips, you’ll be well on your way to mastering the art of cooking this luxurious cut. Whether you prefer classic grilling, innovative smoking, or precise sous vide, there’s a Tomahawk steak recipe for everyone. So fire up your grill, preheat your oven, or dust off your smoker, and get ready to enjoy one of the most delicious steaks you’ll ever taste. Bon appétit!

  • How to Cook a Reverse Sear Tomahawk Steak Like a Pro

    How to Cook a Reverse Sear Tomahawk Steak Like a Pro

    How to Cook a Reverse Sear Tomahawk Steak Like a Pro

    If there was ever a recipe that would have every home cook in awe of their abilities, the reverse sear tomahawk steak is the way to do it. This cut, characterised by a long rib bone that is exposed and well-marbled, should be given more than just a raw barbeque.

    The reverse sear method has single-handedly changed how people at home cook with thick cuts of meat. all made possible in a single device, that too with a high level of reliability.

    Unlike most searing where you bring oil to high heat, this searing method is a slow process that staggers the heat and results in a great crust any professional chefs would adore.

    Today we will explore tips and tricks for making a killer reverse sear tomahawk steak once more; crispy on the outside and tender on the inside. From a celebratory dinner to just wanting to step up your steak game, these pro tips certainly will take your tomahawk from decent to out of this world.

    Understanding the Reverse Sear Tomahawk Steak

    In order to make the proper Reverse Sear Tomahawk Steak, there is need to understand the execution process.
    Tomahawk steak is one of the most impressive types of steaks and can energize everyone in the kitchen and at the table. Here’s what makes it unique:

    What Makes a Tomahawk Special

    • The Bone: The most shocking thing is the long and beautiful bone implanted to the ribeye. This bone is usually 8-12 inches in size, looking like a tomahawk axe hence the name.
    • Exceptional Marbling: In the same way that a ribeye does, the Tomahawk is characterized by a beautiful fatty cap which adds loads of flavor and makes for a superbly tender bite.
    • Prime Real Estate: That is why the Tomahawk is essentially a ribeye steak where a large part of the rib bone is not trimmed. This provides aesthetic appeal and can always boost the cooking process as well.

    Grading and Selection

    • Look for High-Quality Grades: Opt for USDA Prime or Choice grades which have the best grade of muscle Buddy and palatable meat.
    • Check for Marbling: When it comes to within a grade, marbling can be different, It is customary to select steaks with uniform distribution on readily apparent patches of fat within the meat.
    • Consider Thickness: A good Tomahawk should be of at least 1.5 inches in thickness so that even the edges are well seared and tender from inside.

    Cost vs. Regular Ribeye

    • Premium Price: The regular Tomahawk will also cost a bit more than an ordinary ribeye partly because of the extra bone and the aesthetics.
    • Value Proposition: Compared to this the Tomahawk is slightly expensive but it worth it in terms of the experience and uniqueness of the steak pricing itself for the number of consumers it would attract during occasions.

    Essential Equipment and Tools

    Temperature Control Devices:

    • Oven Thermometer: A oven thermometer is a necessity to check whether the oven is operating in the correct temperatures or not. This is particularly true for the low-and-slow cooking after which it’s time to sear the meat during reverse sear.
    • Meat Thermometer: Nothing can substitute for a good instant-read meat thermometer. An advantage is that it can be used to regulate how cooked the steak inside is as it cooks, so you can avoid overcooking the steaks.

    Cooking Surfaces:

    • Oven Racks and Pans: A heavy duty oven rack should be used at the low and slow cooking phase of the preparation process. A rimmed baking sheet placed at the rack bottom will collect any dripping from the food.
    • Cast Iron Skillet or Grill: If one wants a great sear, they should season their cast iron skillet well or use a hot grill as well. This kind of surfaces produces very high heat to give foods a wonderful crispy, brown surface or caramelization.

    Additional Tools Needed:

    • Tongs: Crucial when flipping the steak to prevent burns when one is searing the steak.
    • Wire Brush: This is used before browning burger or steak or any macho barbeque item on the grill or non stick skillet.
    • Cutting Board: Functions for stability and safety after the steak has rested.
    • Sharp Knife: In order to do this, the steak has to be made thinner across the width of the muscle fibers.A bone-in steak has connective tissue called a butt cap on its surface and will be covered by fat.

    As you will see below, having these implements will help you cook a Reverse Sear Tomahawk Steak with a lot of confidence and ease.

    The Science Behind Reverse Searing

    Reverse searing is a concept based on the heat conduction and protein coagulation as the way of cooking perfectly good steaks. Let’s break down the science:  

    Traditional vs. Reverse Sear Method

    • Traditional Method: In the traditional technique searing is conducted initially at high intensity to form a brown layer. Then the steak is cooked at a lower temperature to achieve the desired doneness of steak is completed. This method can make food to be cooked on the outside while still being raw on the inside of the fish.
    • Reverse Sear Method: The reverse sear method does the exact opposite of this. The steak is then baked first in a low heat oven for some time to permit the heat to reach deep into the meat. This is because slow and gentle cooking process only cooks from the inside while to outside gets a nice brown color. The last intense cook leaves a superb layer of brown on an item while keeping it moist inside.  

    Temperature Control Benefits

    • Even Cooking: As it takes time, heat heats up the steak gradually from all sides meaning that all parts of the steak are cooked at the same time as would be desired.  
    • Moisture Retention: Many people would think that using high heat would mean the steak would become juicy, but the slow heaters prevent moisture loss, making for a tastier steak.  
    • Precise Control: The slow cooking enables tenderizing and gives control of the inner part of the steak thus cooks it properly to the required tenderness.  

    Why It Works Better for Thick Cuts

    Some foods are easier to desalinate than others and to serve thick cuts of meat such as the Tomahawk steak is a problem. Food exterior browns faster than the inside, and food is either under-cooked or burnt on the outside. The reverse sear method addresses this issue by:

    • Even Heat Distribution: In this instance, there is controlled heating in the oven, allowing the heat to get to the core of the dense mass of the steak cut without browning the outside to crisp and black.  
    • Reduced Shrinkage: The low, sustained heat then allows for minimal muscle contraction – which causes shrinkage and loss of moisture.
    • Enhanced Flavor: This further helps the enhanced and slow response of natural flavours and tenderness of the minute cuts of the meat through low-and-slow cooking strategy.  

    When you have the facts about reverse searing, you will be equipped to the work the technique flawlessly to give your steaks the best texture and tenderness.

    The Cooking Process of Reverse Sear Tomahawk Steak

    He could always make the best out of different dishes with the use of his reverse sear method, and what makes it magical is its process – precise and patience. This section splits each of the processes, which cannot go wrong if you need to obtain the real, authentic steakhhouse result, into several easy steps.

    Initial Low-Temperature Phase

    Based on the top conceptualisation of the reverse sear method of cooking, the initial slow cooking phase forms the bedrock of the method. This gentle approach guarantees the best control of the last doneness of your tomahawk steak in addition to ensuring even heating on the meat.

    Optimal Oven Settings

    To prepare the best reverse sear, preheat your oven to 250 degrees Fahrenheit controls the temperature. This may sound counter intuitive to most steak lovers, particularly using a temperature you’ll normally brush aside as being too low for cooking steak. If you have an oven that is hot or cold, then you need to be very accurate in this case. Put the seasoned tomahawk on a wire rack that you put in a rimmed baking sheet; this improves heat circulation around the food.

    Timing Guidelines

    This means that the actual amount of time it takes to cook the tomahawk will depend on how thick this piece of meat is and how pink you like it on the inside. As a general rule, expect:

    • Rare (125°F): 1.5 to 2 hours
    • Medium-rare (135°F): 2 to 2.5 hours
    • Medium (145°F): 2.5 to 3 hours

    Let me remind you that I’ve been generalizing here and this pertains to standard practice rather than a blanket law. You will notice that the tip steak or thickness of the uncongealed raw material will determine cooking times and that is the reason why temperature control is very important.

    Temperature Monitoring

    Before the steaks go into the oven, take a good meat thermometer, and place it into the center of the steak, but make sure not to place it in the fat or near the bone. For medium rare, pull the steak from heat when it is 10-15 degrees Fahrenheit below the desired temperature (which for us, is 120-125°F). It will rise slightly during the resting phase and final sear, internally The internal temperature The internal temperature

    The Resting Phase

    The resting phase of cooking is more than spending time waiting for the next culinary process – it helps the proteins in the meat to relax and the juices to re-organize. Let your tomahawk stay for 10-15 minutes at room temperature after you have taken it from the oven. At this time, this surface needs to be pat with dry paper towels – there’s no way one can get a perfect crust going to the next phase. You can also take time and prepare your searing station and other essential ingredients for basting.

    The Final Sear

    This is where the ART is done — to turn the nicely cooked inside into a wonderful looking bread.

    Getting the Perfect Crust

    Before, the skillet must be heated to a smoking point, which, in fact, is above 500°F (260°C). Put a very thin layer of high smoke point oil such as Avocado or Grapeseed oil. The most important thing to remember here is that before it goes in the pan, the surface of your steak must be bone dry – any residue of moisture will interfere with the process of browning. Put this tomahawk in the screaming hot pan, apply pressure on the meat so as to make sure the whole bottom of the steak gets in contact with the pan.

    Butter Basting Technique

    Add a large spoon of normal butter (about 3-4 tablespoons) when the steak has been seared for 45 seconds, along with crushed garlic and favourite herbs such as thyme and rosemary. When the butter is melted and starts foaming, turn the pan slightly to one side and constantly pour this flavorful butter over the steak. It also contributes amazing flavor which is of aspect to forming the desired crust.

    Timing the Flip

    Just as it is important that the burning should be carefully managed, timing is critical during the searing phase. A primary scald requires approximately 45 seconds to 1 minute exposure to direct heat. Try not to flip your food more than once especially if your goal is to have that crispy crust. After you have browned both sides, using the tongs pick up the tomahawk and place it on its side to brown the fat covering for 30-45 seconds or until crispy.

    The entire searing process should not last for more than 3-4 minutes in their totality. Keep this in mind; you never actually cook the steak here, you simply want to have color, texture, and extra flavor going for you. When you are done, your tomahawk should put a deep mahogany crust on the outside, in addition to the edge-to-edge doneness that comes with cooking the meat in the oven.

    Following searing, let the steak lie for 5-10 minutes before slicing it. The last rest brings the temperature down and lets the juices collect that way when you make the first incision the meat is well done on the outside and juicy inside.

    The biggest strength of this reverse sear method, in my opinion, is its tolerance towards timing – although the meat has to be cooked for some time, have that perfect temperature every step of the way you are bound to screw it up less. Follow the mentioned steps to the latter, and you will be able to prepare delicious Reverse Sear Tomahawk Steak, worth a restaurant’s price, on a weekly basis for your dinner parties.

    Common Mistakes and How to Avoid Them

    In general, it is important to achieve the perfect cooking of Reverse Sear Tomahawk Steak and even some mistakes are critical. If these mistakes are familiar to you, you will be able to replicate the Steakhouse experience every time.

    Temperature Control Errors

    Temperature control is undoubtedly one of the most important strategies provided by the reverse sear method. A mistake most home cooks make is setting their oven temperature according to the thermal display, which can actually be 25-50% different. It is also important always to use a new oven thermometer for the measurements. One more mistake people make is putting the meat over the heating rods – the correct place for a rack is in the middle of a Neff oven so that heat circulates evenly.

    Second one main temperature mistake is done during the searing stage. It also makes for getting your pan not hot enough to properly sear them leading to poor crust and possible overcooking. Cook your cast iron with high heat – if you cannot hold your hand 6 inches above the cooking surface for more than a second, it’s not hot enough.

    Seasoning Mistakes

    Even when it comes to seasoning, there are numerous mistakes you can make. The first mistake is cardinal – not seasoning hugely enough – a cut of meat this thick requires a good dose of salt and spice. Bake season from a height of 8-12 inches for even distribution, all across the pan.

    Second, mistakes that are made often are again related to timing and, more specifically, seasoning. The salt takes time to get absorbed in the meat. Season at least 40 minutes before cooking – and preferably the night before. It also helps the salt to make the right infiltration to get to the core of the piece of meat and increase its taste. Do not use fine table salt – instead try using kosher or sea salt when seasoning your food.

    Timing Issues

    Any attempt at a fast delivery of the various steps of the reverse sear process will just lead to disappointment. Common timing mistakes include:

    • Not bringing the steak to room temperature (it takes about 1-2 hours to do so)
    • Stressing the slow-cooking process or the low temperature phase
    • With regards to the second limitation, the authors failed to allow adequate rest time between the phases.
    • Cooking for longer time which ultimately means overcooking the perfectly cooked interior.

    Resting Period Problems

    One of the mistakes consist of reducing or omitting the resting periods. The time is a break after the low temperature cooking process which would ease the proteins tight structure nd maintain the necessary temperature. The last thing a food preparer does after searing is to rest, not cutting will lead to more juice loss and a dry steak.

    Serving and Presentation

    Slicing Techniques

    Slicing of the food portions is important in color displays as well as when consuming it. When preparing meat, should order it that the grains of the flesh be in an opposite direction, and use a sharp blade in order to give a smooth and clean incision. For a tomahawk, first cut the meat on the edge of the bone using the back of your knife. Next, cut the meat into 1/2-inch thick portions with all the pieces placed at an angle that would reveal ‘doneness’ perfectly.

    Plating Tips

    Everything looks more appetizing when served by dressed up wait staff. Consider these approaches:

    • He preferred to cook on a large plate in order to retain heat.
    • Place slice in a fanned out formation with each piece slightly overlapping the other.
    • Arrange the bone in a staged manner on the plate
    • Make room for accompaniments without over powering.
    • Can be decorated with other natural herbs or compound butter.
    • Spray some high-grade olive oil to make the hair shiny

    Accompaniment Suggestions

    A perfectly cooked tomahawk deserves thoughtful accompaniments:

    • Roasted bone marrow
    • Grilled asparagus or broccolini.
    • Truffle mashed potatoes
    • Sautéed wild mushrooms
    • Caramelized shallots
    • Roasted garlic heads
    • Micro greens or watercress for the bright contrast

    Tips from Professional Chefs

    Expert Insights

    Professional chefs emphasize several key points for perfect execution:

    • Quality matters – source your meat from reputable butchers
    • Invest in proper tools, especially thermometers and heavy-duty cast iron
    • Practice temperature control without relying on timers
    • Learn to judge doneness by touch and visual cues
    • Understand the importance of carryover cooking

    Restaurant Secrets

    Behind-the-scenes techniques from professional kitchens:

    • Pre-heat serving plates in a low-temperature oven
    • Keep compound butter ready for finishing
    • Use a torch for hard-to-reach areas during searing
    • Maintain different temperature zones on your cooking surface
    • Rest steaks on a wire rack to prevent steam from softening the crust

    Flavor Enhancement Techniques

    Professional chefs employ several methods to maximize flavor:

    • Dry-aging at home using specialized bags
    • Creating custom spice blends for different beef grades
    • Infusing butter with multiple aromatics during basting
    • Using smoked salt for seasoning
    • Adding bone marrow butter for extra richness
    • Finishing with flaky sea salt and freshly cracked pepper
    • Incorporating umami-rich ingredients like aged soy sauce or fish sauce in minimal quantities

    These advanced techniques can help transform a great steak into an unforgettable dining experience, rivaling the quality of high-end steakhouses while maintaining the satisfaction of cooking it yourself.

    Conclusion

    Probably this is the reason why reverse sear tomahawk steak cooking method has been embraced by many steak lovers once you prepare the tomahawk steak by cooking it through reverse sear you will know why. That is why sous vide steak is that in every detail it is one of the best ways to cook a steak evenly from the center to the edge and has a beautiful crust. Nonetheless, it might take a considerable amount of time to accomplish all those steps, yet it’s adequate to invest more time and efforts to achieve the highest level of thoroughness.

    Don’t forget that when it comes to grilling, practice makes perfect – each time you prepare a tomahawk this way, you will just get better at the motions and the timing. Then having these techniques in you cooking skill set, you will be in a position to prepare steakhouses’ like meals at home.

    Frequently Asked Questions

    Q: With Reverse Sear Tomahawk Steak, how early should I marinade it?

    A: You should also know that it is possible to season your tomahawk up to 24 hours before using it. By dry-brining, you make the chicken tastier, and more importantly, you achieve better results as for moisture. At the bare minimum, season 40 minutes before cooking to allow the salt to work into the meat sufficiently.

    Q: What is the best thickness for tomahawk when doing a reverse sear?

    A: The recommended thickness for the insulation material is between 1,1/2 and 2,1/2 inches. Reverse sear works effectively for steaks that have thin cuts than for those that have cuts that are thicker than average.

    Q: Is it safe for me to use this method in say an open grill in a compound?

    A: Actually, it is very convenient to use a grill for both phases. Create a dual-zone heat source, and cook with indirect heat at 225-250°F in the beginning, then, grill with direct high heat for searing.

    Q: What should I do if I don’t have cast iron skillet?

    A: When possible, a cast iron pan is perfect but any pan with a heavy bottom that can well handle high heat is recommended. Otherwise, very high temperature on the grill can also be used for achieving the aims of the searing phase.

    Q: How long can I re-heat the steak before searing it when is cooked at a low temperature for a long time?

    A: The perfected steak can be left at the room temperature for about an hour to an hour and a half only after the initial sear. This flexibility qualifies it to be used especially during parties. You just need to make sure that it is well dried before searing it.

    Q: If I didn’t broil the steak first, why did it not get the good sear that I wanted?

    A: A weak appearance of the crust is the consequence of either moisture on the surface of the meat or inadequate heat. Make sure the steak is as dry as you can before the process and make sure your pan is very hot.

    Q: Can I reverse sear tomahawk steak that I had frozen?

    A: Despite that, that can be done, it is not advisable. Use your refrigerator’s cold for thawing your steak this may take you up to 24-48 hours and after that bring it to room temperature.

    Q: How should I store my meals so that I can reheat them later?

    A: Storing the leftovers in an airtight container and placing the container in the fridge will help it last up to 3 days. To reheat, warm gently in a 250 F oven until you get it to the temperature of your choice. Do not microwave because it becomes overcooked when done so.

    Q: Can one consume steak at raw temperatures and is there any difference between grain fed and grass fed beef?

    A: When it comes to whole muscle cuts such as a tomahawk steak, consuming a raw meal is not a problem because bacteria, which are pathogenic, are always found on the surface; and, they die during the process of searing The tomahawk steak. But, adhere regional food hygiene measures and individual choices.

    Q: Is it possible to cook the steak with butter instead of oil in the first stages?

    A: It is best to use smoke point oil for the first sear of the steak and the butter to baste the steaks later on. While using butter alone, it will stick due to the high temperatures necessary in order to form a good sear.

    Q: How much should one be willing to part with for a quality to-am-hawk steak?

    A: It will cost between $25-45 per pound for Choice grade and $50-100+ per pound for Prime grade tomahawks depending on the region and quality. It may most often come in the range of 1.25 to 1.75 kilograms, or at most 3.5 lbs.

    Q: How else can I tell that the meat is done if not for a meat thermometer?

    A: It is best to use a meat thermometer, however, here are finger test measures; Rare is equivalent to the feel on cheek, medium-rare is the feel on the chin and the medium to that of the tip of the nose. However, this method is not accurate and requires experience in selection.

  • Thin Sliced Steak Recipes for Quick Dinners

    Thin Sliced Steak Recipes for Quick Dinners

    thin sliced steak recipes

    Thin sliced steak recipes is the solution when time is short but the body yearns for some tasty, gratifying grub. Not only is it fast at cooking but also many tasty meals can be prepared quickly utilizing the dish. Regardless you want to stir fry, make sandwiches, fajita, or salads, thin sliced steak recipes delivers versatility and effortless without compromise to the delicious taste. Here we will be sharing some of the most delicious thin-sliced steak recipes for you to try at home during the hectic weekdays to bring some restaurant like meals to your dining table. Steak is probably one of the last things you’d think of when you’re planning a quick dinner, but it doesn’t have to take long to become soft and flavorful.

    Understanding Different Types of Thin-Cut Steaks

    Thin-cut steaks are ideal for quick, flavorful meals. They are perfect for grilling, searing, or stir-frying, making them a go-to choice for busy nights. Among the best options are cuts like flank steak, skirt steak, hanger steak, and carne asada, each offering unique flavors and textures that suit a variety of dishes. By understanding the qualities of these cuts, you can choose the right steak for your meal, ensuring both taste and convenience.

    Best Cuts for Quick-Cooking Methods

    Thin steaks are perfect for high-heat, quick cooking methods that lock in flavor and tenderness. Here are some of the top choices:

    • Flank steak: Lean and versatile, it absorbs marinades well and cooks quickly over high heat.
    • Skirt steak: Similar to flank steak but with a slightly chewier texture, making it perfect for tacos and fajitas.
    • Hanger steak: Known for its rich, beefy flavor and tenderness when cooked at high temperatures.
    • Carne asada: A Mexican favorite, typically marinated and grilled or seared to perfection.

    How to Choose Quality Thin Steaks

    When selecting thin-cut steaks, look for cuts that are bright red, firm to the touch, and free from any off-putting smells. A fresh, quality steak will cook evenly and yield the best texture and flavor. Remember, thinner steaks cook faster, so ensure they are consistent in thickness for even cooking.

    Proper Storage and Preparation Tips

    For optimal flavor and tenderness, store your thin steaks in the coldest part of the fridge, wrapped tightly in plastic or butcher paper. Before cooking, allow them to reach room temperature to ensure they cook evenly and retain their juiciness. This step helps the steaks achieve that perfect, tender bite every time.

    Steak Cut Guide

    Steak CutFlavor ProfileBest Cooking Method
    Flank SteakRobust, beefyGrilling, searing, stir-frying
    Skirt SteakIntense, slightly chewyGrilling, searing, fajitas
    Hanger SteakDeeply flavored, tenderGrilling, searing, pan-frying
    Carne AsadaZesty, marinatedGrilling, searing, tacos

    With the right thin-cut steak and cooking methods, you can quickly create mouthwatering dishes that are full of flavor and perfect for any meal.

    Essential Kitchen Tools for Cooking Thin Steaks

    Cooking thin sliced steak recipes becomes a breeze with the right kitchen tools. These tools not only help with preparing and cooking the steak but also ensure consistent, delicious results every time. Whether you’re searing, grilling, or slicing, using the right equipment is key to achieving the perfect thin steak.

    Here are the essential kitchen tools you’ll need for preparing thin steaks:

    Sharp Chef’s Knife

    A sharp chef’s knife is essential for slicing thin, even pieces of steak. A blade that’s at least 8 inches long gives you better control for precise cuts. A high-quality, sharp knife ensures clean slices, helping to preserve the steak’s texture and tenderness.

    Meat Tenderizer

    Thin steaks can benefit from a meat tenderizer to break down tougher muscle fibers, making the steak more tender. Using a sturdy mallet or a textured tenderizing blade can help soften the meat, ensuring a more flavorful and easy-to-chew result.

    Grill Pan or Cast-Iron Skillet

    A grill pan or cast-iron skillet is ideal for cooking thin steaks. These types of pans heat evenly, providing perfect searing and helping you achieve that crispy, flavorful crust while keeping the inside juicy. Their superior heat retention ensures a consistent cooking temperature.

    Meat Thermometer

    A meat thermometer is essential for ensuring your steaks are cooked to the perfect level of doneness. With a digital display and a wide temperature range, this tool removes the guesswork, helping you achieve precise results every time.

    Tool Breakdown:

    ToolPurposeKey Features
    Sharp Chef’s KnifePrecise slicing of thin steaks8-inch or longer blade, high-quality steel
    Meat TenderizerEnhances tenderness of thin steaksMallet or textured blades
    Grill Pan or Cast-Iron SkilletEven heat distribution for searingHeavy-duty construction, superior heat retention
    Meat ThermometerEnsures proper donenessDigital display, wide temperature range

    By investing in these essential tools, you’ll be well on your way to mastering the art of cooking thin steaks. The right equipment makes a significant difference, ensuring your recipes are tender, juicy, and full of flavor.

    Perfect Marinade Techniques for Tender Results

    Marinating thin-cut steaks is one of the best ways to enhance their flavor and tenderness. Whether you’re working with flank steak, carne asada, or another thin-cut cut, marinating can elevate your meal, making even less expensive steaks taste gourmet. Here’s how to master the art of marinating for tender, flavorful results.

    Classic Marinades for Enhanced Flavor

    Classic marinades are essential for enhancing the natural flavor of your thin steaks. For example, flank steak marinade or carne asada seasoning typically includes a balance of acidic ingredients like vinegar or citrus, combined with herbs, garlic, and spices. The acidity helps break down the muscle fibers, tenderizing the meat, while the herbs and spices infuse the steak with rich, savory flavors. These classic combinations create a mouthwatering depth that makes your steak shine.

    Time and Temperature Guidelines

    To get the best results from your marinade, timing and temperature are key. Here are some helpful tips for marinating your steaks:

    • Marinating Time: For optimal flavor and tenderness, marinate your steaks for at least 30 minutes, but no more than 24 hours. Longer marinating times can sometimes make the steak too soft or mushy.
    • Ideal Temperature: Keep the steak in the marinade at a temperature between 40°F and 140°F, with 70°F being the ideal for room temperature marination. Avoid marinating at room temperature for extended periods to prevent bacterial growth.

    Asian-Inspired Marinade Options

    For a unique twist, try an Asian-inspired marinade. This style often includes ingredients like soy sauce, rice vinegar, ginger, and garlic to create a deep, umami-rich flavor profile. These marinades are especially great for thin-cut steaks, giving them a tender texture and vibrant taste. The balance of sweet, salty, and savory flavors in these marinades adds a refreshing, bold contrast to the richness of the beef.

    By mastering marinade techniques and understanding the best times and temperatures for marinating, you can transform your thin-cut steaks into tender, flavorful dishes that will impress every time. Whether you go classic or try something adventurous with Asian-inspired flavors, your steak will be tender and packed with rich taste.

    Quick and Easy Thin Sliced Steak Recipes

    Thin-sliced steak recipes are a lifesaver for busy weeknights. These steaks cook quickly, are full of flavor, and are incredibly versatile. Whether you prefer classic or global flavors, there’s a recipe for everyone. Thin-cut steaks are perfect for stir-fries, skillet dishes, or grilling, making them ideal for quick and satisfying meals.

    In just a few minutes, you can have a delicious, hearty meal on the table. With these quick and easy thin-sliced steak recipes, you’ll be able to enjoy a tasty dinner with minimal effort.

    Flavorful Thin Steak Recipes

    Here are some mouthwatering ideas to try with thin-sliced steak:

    • Teriyaki Beef Stir-Fry – Thin steak strips cooked with a medley of veggies in a tangy teriyaki sauce, served over fluffy rice. This recipe provides a delightful mix of sweet and savory flavors.
    • Garlic Butter Skillet Steak – Thin steaks seared to perfection and topped with a rich, aromatic garlic butter sauce. It’s simple yet packed with deliciousness.
    • Grilled Steak Fajitas – Thin steak marinated in a blend of spices, grilled to perfection, and served with tortillas and your favorite toppings for a festive, flavorful meal.

    These quick and easy thin-sliced steak recipes will take your weeknight dinners to the next level. Whether you’re craving stir-fry, skillet steak, or fajitas, these dishes are flavorful and easy to prepare, making them perfect for any busy evening.

    Asian-Inspired Beef Tataki with Ponzu Sauce

    Elevate your dinner with a delicious Asian-inspired beef tataki. This dish features thinly sliced steak that’s quickly seared to achieve a perfectly rare inside and a caramelized outside. It’s a refined, flavorful dish that brings Japanese culinary traditions to your table.

    Traditional Japanese Preparation Methods

    The key to a perfect beef tataki lies in the searing technique. Start by seasoning the beef with a bit of salt and pepper. Heat a cast-iron skillet over high heat until it’s smoking hot, then sear the meat quickly on all sides. This high heat creates a flavorful crust while keeping the center rare and tender.

    Sauce Variations and Pairings

    Ponzu sauce is the classic accompaniment for beef tataki. With its tangy citrus notes and umami depth from soy sauce and mirin, it perfectly complements the richness of the beef. For an extra layer of flavor, you can add chili oil or toasted sesame seeds to the ponzu sauce, giving it a spicy kick.

    To balance the richness of the steak, pair it with fresh, tender greens like arugula or watercress. Add crunchy textures with radish slices or shredded carrots for an additional burst of flavor and freshness.

    This Asian-inspired beef tataki with ponzu sauce is an elegant and flavorful dish, perfect for impressing guests or enjoying as a special treat. Whether served as an appetizer or a main course, it offers a beautiful glimpse into Japanese cuisine that will excite your taste buds.

    Classic Carne Asada with Traditional Seasoning

    Carne asada is a beloved dish in many households, known for its rich flavors and satisfying texture. Made with thinly sliced steak seasoned with warm, aromatic spices and grilled to perfection, it’s a simple yet delicious meal that brings the taste of Mexico right into your kitchen.

    Seasoning and Preparation

    The secret to an amazing carne asada lies in the seasoning. Start by mixing together garlic powder, onion powder, cumin, oregano, chili powder, salt, and black pepper. Generously coat your flank or skirt steak with this flavorful blend, ensuring every inch of the meat is well-seasoned.

    Allow the seasoned steak to rest at room temperature for 15-20 minutes before cooking. This step helps the flavors meld together and relaxes the meat, making it easier to cook to perfection.

    Grilling the Carne Asada

    Grill the carne asada on high heat to quickly sear the steak, locking in the juices and creating a beautiful char. Adjust the heat as needed to reach your desired doneness, typically medium-rare to medium for the best texture and flavor.

    Serving Suggestions

    Serve your grilled carne asada with warm tortillas, fresh diced onions, chopped cilantro, and a squeeze of lime. This combination of flavors will transport you straight to the vibrant streets of Mexico with every bite.

    Ingredients:

    • 1-1.5 lbs of flank steak or skirt steak, thinly sliced
    • 1 tsp garlic powder
    • 1 tsp onion powder
    • 1 tsp cumin
    • 1 tsp oregano
    • 1 tsp chili powder
    • Salt and black pepper to taste

    Enjoy the rich, bold flavors of classic carne asada, perfect for tacos, burritos, or simply enjoyed on its own!

    Mediterranean Steak Salad with Fresh Herbs

    Elevate your salad game with a Mediterranean-inspired steak salad, where tender steak, fresh vegetables, and fragrant herbs come together for a delightful meal. This dish is a perfect balance of flavors and textures, ideal for a light yet satisfying meal.

    Dressing and Topping Options

    The key to a great Mediterranean steak salad lies in the dressing and toppings. Start with a tangy vinaigrette made from olive oil, lemon juice, and red wine vinegar. This bright, zesty dressing perfectly complements the steak and vegetables.

    For added luxury and flavor, top your salad with crumbled feta cheese, Kalamata olives, roasted red peppers, and toasted pine nuts. These toppings not only add richness but also bring depth and a variety of textures to each bite.

    Seasonal Vegetable Combinations

    Choose fresh, seasonal vegetables to make your salad burst with flavor. Romaine lettuce or baby spinach make excellent bases for the salad. Add diced cucumber, cherry tomatoes, and sliced red onion for a satisfying crunch.

    For a summer salad, toss in grilled zucchini, roasted eggplant, and fresh basil. If you’re craving something cozy for fall, try roasted butternut squash, crumbled feta, and chopped parsley.

    The versatility of this Mediterranean steak salad allows you to mix and match the best seasonal ingredients for a dish that’s always fresh and exciting.

    Dressing Ingredients:

    • Olive oil
    • Lemon juice
    • Red wine vinegar
    • Garlic
    • Dried oregano

    Topping Options:

    • Crumbled feta cheese
    • Kalamata olives
    • Roasted red peppers
    • Toasted pine nuts
    • Fresh herbs (basil, parsley, mint)

    This Mediterranean steak salad is not only delicious but also a colorful and vibrant dish, making it perfect for any occasion!

    Flank Steak Stir-Fry with Seasonal Vegetables

    Elevate your dinner with a quick and delicious flank steak stir-fry, featuring tender steak and a colorful medley of fresh vegetables. This easy-to-make recipe is packed with flavor, and it’s perfect for busy nights when you want something healthy and satisfying.

    Ingredients Preparation

    To start, gather your ingredients. You’ll need flank steak, sliced into thin strips, and a variety of fresh seasonal vegetables such as bell peppers, snow peas, and mushrooms. Preparing everything in advance is crucial for a smooth and efficient stir-fry process.

    Cooking Process

    1. Heat a large wok or skillet over high heat and add vegetable oil.
    2. Cook the flank steak strips for 2-3 minutes, stirring frequently, until they are lightly browned and cooked through.
    3. Add the chopped vegetables to the pan and stir-fry for another 3-5 minutes, ensuring the veggies stay tender yet crisp.

    Flavoring and Serving

    For a flavorful finish, season the stir-fry with a simple sauce made of soy sauce, rice vinegar, and a touch of honey or brown sugar for sweetness. Serve the stir-fry over steamed rice or noodles, and top with fresh herbs or toasted sesame seeds for added texture and flavor.

    Cooking Tips

    The secret to a perfect flank steak stir-fry is high heat and quick cooking. This method ensures that the steak remains juicy and tender, while the vegetables retain their crunch, offering a delightful contrast in textures.

    With this quick and flavorful recipe, you can enjoy a delicious, restaurant-quality meal at home in no time. Enjoy the bold flavors and healthy ingredients of this easy stir-fry!

    Elegant Beef Carpaccio Appetizer

    Add a touch of sophistication to your next dinner party or cocktail gathering with a beautifully prepared beef carpaccio appetizer. This classic Italian dish, featuring thinly sliced raw beef, is both elegant and flavorful. With the right techniques, you can create a stunning and tasty appetizer that will leave your guests in awe.

    Safety Tips for Raw Preparation

    When preparing raw beef, ensuring food safety is paramount. Start by sourcing the freshest, highest-quality beef available. Proper handling is essential to avoid contamination and preserve the meat’s delicate flavor and texture.

    1. Chill the Beef: Place the beef in the freezer for 30-60 minutes before slicing. This helps to firm up the meat, making it simpler to slice into thin, even pieces.
    2. Use Clean Tools: Use a clean, sharp knife and cutting board to slice the beef. This helps to achieve paper-thin slices and ensures a clean cut.
    3. Minimize Handling: Avoid touching the raw beef with your hands. Instead, use clean utensils for handling to maintain freshness and hygiene.

    Garnishing Techniques

    The key to beef carpaccio is its simplicity and elegance. Garnishing enhances both the visual appeal and the flavor of the dish. Here are a few tips for creating a beautifully presented plate:

    1. Plating the Beef: Arrange the thin slices of beef in a circular or overlapping pattern on a chilled serving platter. This creates a stunning visual effect.
    2. Dress Lightly: Drizzle the beef with a light, acidic dressing such as lemon juice, olive oil, or a balsamic reduction to elevate the flavor.
    3. Add Toppings: Top with freshly grated Parmesan cheese, capers, or finely chopped herbs like parsley or arugula. These additions offer both flavor and texture contrast.
    4. Final Touches: Garnish with a few slices of fresh lemon, a sprinkle of crushed black pepper, or a delicate drizzle of olive oil for a final burst of flavor.

    Serving Suggestions

    Beef carpaccio is perfect for any special occasion. Its delicate flavors and stunning presentation will impress your guests, showcasing your culinary skills. Whether served as an appetizer or as a light main course, this dish will be a memorable part of your gathering.

    Korean BBQ-Style Marinated Strips

    Spice up your dinner with Korean BBQ-style marinated steak strips. This recipe combines bold Korean seasonings and cooking techniques to create tender, flavorful strips perfect for quick meals or sharing with friends and family.

    Marinating for Authentic Flavor

    To achieve the authentic taste of Korean BBQ, the key is the marinade. The combination of soy sauce, brown sugar, garlic, ginger, and toasted sesame oil infuses the steak with a savory-sweet flavor profile that’s iconic in Korean cuisine. For the best results, marinate the steak for at least 30 minutes, but up to 8 hours will enhance the flavor even more.

    Ingredients

    • Thin-sliced Korean BBQ steak: 1 lb
    • Soy sauce: 1/4 cup
    • Brown sugar: 2 tablespoons
    • Garlic, minced: 3 cloves
    • Ginger, grated: 1 tablespoon
    • Toasted sesame oil: 2 tablespoons
    • Green onions, sliced: 1/4 cup
    • Sesame seeds: 2 tablespoons

    Cooking and Serving Tips

    Once your steak is marinated, it’s time to cook. Heat a pan or grill to high heat and sear the steak strips for a few minutes, ensuring you get a nice char on the outside while keeping the inside tender and juicy.

    For a complete Korean meal, serve the marinated steak strips with steamed rice, kimchi, and your favorite banchan (side dishes). These additions complement the savory flavors of the steak, offering a truly authentic experience.

    Enjoy Korean BBQ at Home

    This Korean BBQ-style marinated steak recipe is perfect for a delicious and flavorful weeknight dinner. The balance of savory, sweet, and umami flavors is sure to impress your family and friends. Try it today for a taste of Korea from the comfort of your home!

    Conclusion

    Now, thin-sliced steaks are something that opens a completely new universe of meal ideas, from everyday rushed dinners to special Sunday dinners. Utensil, wok, or charring, these cuts form both light stir fry, Carpaccio class, as well as the deeply flavorsome Korean BBQ. Thin steaks are nevertheless a promising kind of product that gets closer to restaurant-level quality by the methods applied to prepare the marinades, and the quality of the cut used. By now you have enough information about new tastes, juicy steaks, and can cook meals that will be loved by everyone.

    FAQs about Thin Sliced Steak Recipes

    What are the best cuts for thin-sliced steaks?

    • The best cuts for thin-sliced steaks include flank steak, skirt steak, hanger steak, and carne asada. These cuts are tender, flavorful, and perfect for quick cooking methods like grilling, stir-frying, or pan-searing.

    How do I prepare thin-sliced steaks for cooking?

    • For optimal results, make sure to season the steak well before cooking. If you’re using tougher cuts, marinating for at least 30 minutes can enhance tenderness and flavor. Let the steak come to room temperature before cooking for even cooking and better texture.

    What’s the best way to cook thin-sliced steaks?

    • Thin-sliced steaks cook quickly and should be done on high heat to avoid overcooking. Methods like stir-frying, grilling, or pan-searing are ideal. Be mindful of cooking time, as thin slices cook in just a few minutes.

    How do I avoid overcooking thin steaks?

    • Thin steaks cook fast, so watch the time closely. Use a meat thermometer to check the internal temperature, especially for more delicate recipes like beef carpaccio. Let the steak rest for a few minutes after cooking so the juices can redistribute.

    Can I use frozen thin-sliced steak?

    • Yes, you can use frozen thin-sliced steak, but it’s best to thaw it in the refrigerator before cooking for more even results. Avoid thawing on the counter to prevent bacterial growth.

    How do I marinate thin-sliced steaks?

    • To marinate thin-sliced steaks, mix your desired marinade and coat the steak evenly. Let it sit in the refrigerator for 30 minutes to 4 hours, depending on the marinade’s strength. For maximum flavor, avoid marinating for too long, as it could make the meat too soft.

    Can I use thin-sliced steak in salads?

    • Absolutely! Thin-sliced steak makes a great addition to salads. You can try Mediterranean steak salads or other variations by grilling or pan-searing the steak and adding it to fresh greens and veggies for a tasty, protein-packed meal.

    What are some great sauces to pair with thin-sliced steak?

    • Thin-sliced steak pairs well with a variety of sauces, such as teriyaki, chimichurri, or a balsamic reduction. You can also add a tangy ponzu sauce for Asian-inspired flavors or a simple garlic butter sauce for a classic finish.

    How do I store leftover thin-sliced steak?

    • Store any leftover thin-sliced steak in an airtight container in the refrigerator for up to 3 days. For longer storage, freeze it. To reheat, use a low heat setting to avoid overcooking the meat. Thin slices can also be used in sandwiches or salads the next day.

    What are some quick and easy thin-sliced steak recipes?

    • Quick and easy recipes include stir-fries, steak fajitas, grilled steak salads, or garlic butter skillet steak. These recipes use minimal ingredients and are perfect for busy weeknights.
  • How to Cook Beef Strip Loin Steaks

    How to Cook Beef Strip Loin Steaks

    Beef Strip Loin Steaks

    Want to know how to make your beef strip loin steaks even tastier? Check out our tips on how to cook it. If you’re elite chef, or a novice cook, we have all the basics covered for you to understand everything about this cut of meat. Everything you need to know about USDA grading or selecting and preparing your steak will be discussed, so you can cook succulent and tasty strip loin steaks every time.
    Here, you will learn some tasty recipes, as well as useful sending you will receive that will help you become a great steak cook. We will also learn more about the techniques of marinating, maturation, salting, and ways of preparing the food on grill, sear, or broiler. Prepare yourself for creating restaurant style juicy beef strip loin steaks your guests will be begging to know how you made them!

    Essential Kitchen Tools for Cooking the Perfect Steak

    Achieving the perfect steak involves more than just selecting high-quality meat. The right kitchen tools are crucial for enhancing the flavor and texture of your steak. Here’s a guide to the essential equipment you’ll need to cook delicious beef strip loin steaks.

    The Importance of a Meat Thermometer

    A reliable meat thermometer is an essential tool for cooking steak to perfection. It allows you to monitor the internal temperature of the meat, ensuring your steak reaches the ideal level of doneness, whether it’s rare or well-done.

    • Digital instant-read thermometers provide fast, accurate readings.
    • Probe-style thermometers allow you to continuously monitor the temperature while the steak cooks.
    • Investing in a high-quality thermometer ensures precise temperature control and consistent results.

    Why a Cast Iron Skillet is a Must-Have

    A cast iron skillet is one of the best tools for cooking steak. Its ability to retain and evenly distribute heat makes it perfect for searing, pan-frying, and finishing your steak to perfection.

    • Preheat the skillet until it’s smoking hot to achieve a perfect sear on the steak’s exterior.
    • The skillet’s even heat conduction ensures a uniform cook throughout the steak.
    • For thicker cuts of steak, finish cooking in the oven to reach your desired level of doneness.

    In addition to these key tools, a sharp knife set, durable tongs, and a solid cutting board are also essential for smooth and efficient steak preparation. By investing in quality equipment, you’ll elevate your home cooking and enjoy your beef strip loin steaks at their best.

    The Science of Marbling and Flavor in Strip Loin

    Discover how beef marbling, aging, and cooking temperature come together to create a flavorful and unforgettable steak experience.

    The Role of Fat Distribution in Flavor

    The key to a tender and delicious strip loin steak lies in its marbling—the fat evenly distributed throughout the meat. This marbling not only enhances the steak’s juiciness but also imparts a unique, rich flavor that makes each bite more enjoyable.

    How Aging Affects Meat Quality

    Aging plays a critical role in enhancing the quality of strip loin. During the aging process, tough connective tissues in the meat break down, leading to a more tender and flavorful steak. The method and duration of aging have a significant impact on the texture and depth of flavor, resulting in a steak that melts in your mouth.

    The Connection Between Temperature and Texture

    The temperature at which you cook your steak is crucial for achieving the desired texture and level of doneness. Whether you’re searing, grilling, or using sous vide, controlling the temperature ensures that the strip loin remains juicy, tender, and perfectly cooked, making it a true culinary delight.

    CharacteristicImpact on Strip Loin
    Beef MarblingIncreases juiciness, mouthfeel, and flavor
    Meat AgingEnhances tenderness and deepens flavor
    Steak TemperatureDetermines texture and level of doneness

    A Guide to Beef Strip Loin: Cuts, Grading, and Selection Tips

    The strip loin is known for its tenderness and rich flavor, coming from the short loin section of the cow. To ensure you pick the highest-quality strip loin, it’s essential to understand the USDA beef grading system and the best practices for choosing the right cut at the butcher.

    USDA Grading System: What You Should Know

    The USDA grading system is the standard method for evaluating beef quality, based on factors like marbling, tenderness, and flavor. The top grade is Prime, followed by Choice, and then Select.

    Prime beef contains the most marbling, which results in exceptional tenderness and a more robust flavor. Choice grade offers a good balance of quality and price, with great flavor and texture, making it ideal for home cooks. Select grade is leaner and often more affordable, but it may lack some of the tenderness and flavor of higher grades due to less marbling.

    Selecting the Best Strip Loin at the Butcher

    When selecting a strip loin, look for one with a generous amount of marbling—tiny streaks of fat throughout the meat. This fat enhances both tenderness and flavor. Avoid cuts with excessive fat or any discoloration, which could be signs of lower quality or spoilage.

    Also, feel the meat to assess its firmness—it should be solid to the touch and cool, not soft or warm. A well-chosen strip loin will have a rich color and an even texture throughout.

    Storage and Preparation Tips

    After purchasing your strip loin, proper storage is key to maintaining its quality. Wrap the meat tightly in plastic wrap or butcher paper and store it in the coldest part of your refrigerator, ideally between 34°F and 40°F.

    Before cooking, let the steak rest at room temperature for around 30 minutes. This ensures even cooking when seared. Season the steak as desired before cooking to bring out its natural flavor and achieve a perfect sear.

    By understanding how to evaluate USDA grades, selecting the right strip loin, and using the proper storage and cooking techniques, you’ll be able to create delicious, restaurant-quality beef dishes that will wow your guests.

    Classic Pan-Seared Strip Loin with Garlic Butter

    Elevate your steak game with this classic pan-seared strip loin recipe, finished with a rich and flavorful garlic butter sauce. Follow these steps to consistently cook the perfect steak on the stovetop every time.

    The key to a delicious pan-seared strip loin lies in both the searing process and the garlic butter sauce. Here’s how to achieve a top-tier stovetop steak.

    1. Start by patting the strip loin steak dry with paper towels to remove excess moisture. Season generously with salt and pepper on both sides.
    2. Heat a cast-iron skillet or heavy-duty pan over high heat until it becomes smoking hot.
    3. Add a tablespoon of oil with a high smoke point, such as avocado or grapeseed oil, to the pan.
    4. Gently place the steak in the hot pan and sear it for 2-3 minutes on each side, or until a rich golden-brown crust develops.
    5. After both sides are seared, lower the heat to medium-low. Incorporate a few tablespoons of unsalted butter, along with garlic and fresh herbs like thyme or rosemary, into the pan.
    6. Tilt the pan slightly and use a spoon to baste the steak with the aromatic garlic butter for 1-2 minutes, allowing the flavors to infuse the meat.
    7. Remove the steak from the pan and let it rest for 5-10 minutes before slicing and serving to ensure maximum tenderness.
    8. Serve the steak with the savory garlic butter sauce drizzled over the top, and enjoy a restaurant-quality meal in the comfort of your home.

    Mastering the Perfect Grill Marks: A BBQ Strip Steak Guide

    Grilling beef strip loin steaks is a skill that requires attention to detail. The key to achieving those perfect grill marks lies in mastering your technique. This guide will help you refine your grilling skills and show you how to cook a flavorful BBQ steak with beautiful grill marks.

    Direct vs. Indirect Heat Methods

    Understanding the difference between direct and indirect heat is essential for getting the perfect grill marks on your steak. Here’s how each method works:

    • Direct heat involves placing the steak directly over the hottest part of the grill. This method is perfect for searing the steak and creating those iconic grill marks. It’s ideal for thinner cuts or for steaks that cook quickly.
    • Indirect heat involves cooking the steak next to the heat source, rather than directly over it. This method is especially useful for thicker cuts, like strip loin, as it allows the steak to cook evenly without burning the exterior.

    Timing and Temperature Control

    Mastering the right timing and temperature is crucial for grilling the perfect strip steak. Follow these tips for a beautifully cooked BBQ steak:

    • Preheat your grill to a high temperature of around 450°F to 500°F for direct heat searing.
    • For indirect heat, maintain the grill temperature between 300°F and 350°F.
    • Sear the steak for 2-3 minutes per side to achieve the perfect grill marks.
    • Adjust the heat and cooking time based on the thickness of the steak to ensure it reaches your preferred level of doneness.

    By learning how to use direct and indirect heat effectively, and mastering timing and temperature control, you’ll be able to grill the perfect BBQ steak every time. Impress your guests and satisfy your cravings with these expert grilling techniques.

    Herb-Crusted Beef Strip Loin with Red Wine Reduction

    Elevate your next meal with this herb-crusted beef strip loin recipe, paired with a rich red wine reduction sauce. The combination of a flavorful herb crust and a deep, savory wine sauce creates a dish that’s sure to impress your guests.

    Creating the Herb Crust

    Begin by preparing the herb crust. In a food processor, blend together fresh herbs like rosemary, thyme, and parsley with garlic, breadcrumbs, and Parmesan cheese. Once the mixture is well combined, press it firmly onto the surface of the beef strip loin, ensuring it sticks evenly.

    Searing and Roasting the Steak

    Next, heat a cast-iron skillet over high heat and sear the herb-coated steak until it develops a golden-brown crust. This step is key for locking in flavor. Once seared, transfer the skillet to the oven and roast the steak until it reaches an internal temperature of about 130°F for medium-rare.

    Making the Red Wine Reduction

    While the steak rests, start on the red wine reduction sauce. In the same skillet, cook chopped shallots and garlic until fragrant. Then, pour in a rich, full-bodied red wine, such as Cabernet Sauvignon or Merlot. Let the sauce simmer and reduce until it thickens and deepens in flavor.

    Serving the Dish

    Once the steak has rested, slice it and serve with the luscious red wine sauce spooned over the top. This dish pairs beautifully with roasted vegetables, creamy mashed potatoes, or a crisp salad. It’s a delight for both the eyes and the taste buds.

    Enjoy the contrast between the herb-crusted exterior and the tender beef inside, all complemented by the velvety smooth red wine sauce. This recipe is perfect for any special occasion or dinner party and will leave a lasting impression on your guests.

    Sous Vide Strip Loin: Temperature and Time Guidelines

    Take your steak to new heights with sous vide cooking. This precise method guarantees that your beef strip loin will be tender and full of flavor every time. In this guide, we’ll walk you through the equipment setup, temperature control, and finishing techniques to create a truly exceptional dish.

    Equipment Setup and Preparation

    To start sous vide cooking, you’ll need some essential tools. Start with a reliable sous vide water bath to ensure precise and consistent temperature control throughout the cooking process. You’ll also need high-quality vacuum-sealed bags to properly seal your steaks. A tight seal is crucial for even cooking and preventing water from entering the bag.

    Finishing Techniques

    Once your steak has been perfectly cooked in the sous vide bath, it’s time to finish it off with a beautiful sear. The high heat creates a rich, caramelized crust that enhances flavor. For this final step, you can use a cast-iron skillet, a hot grill, or even a blowtorch to achieve the desired finish.

    Sous Vide TemperatureCooking TimeDesired Doneness
    125°F (52°C)1-4 hoursRare
    130°F (54°C)1-4 hoursMedium-rare
    135°F (57°C)1-4 hoursMedium

    Experimenting with different times and temperatures allows you to fine-tune your ideal sous vide strip loin. The key to success lies in mastering temperature control and the precise water bath environment. With practice, you’ll be able to create restaurant-quality strip loin right in your own kitchen.

    Asian-Inspired Marinated Strip Steak Recipe

    Elevate your steak experience with this delicious Asian-inspired marinade. A perfect blend of soy sauce, ginger, and spices creates a dish that’s both tender and bursting with flavor. Ideal for those who love bold, savory Asian flavors and a juicy steak.

    The secret to this marinade lies in its balance of sweet, salty, and umami flavors. The combination of soy sauce, brown sugar, and ginger imparts a rich, savory taste that complements the beef perfectly. Marinating the steak for at least 30 minutes allows the flavors to deeply penetrate the meat.

    Ingredients

    • Soy Sauce: 1/2 cup
    • Brown Sugar: 2 tablespoons
    • Fresh Ginger (grated): 2 tablespoons
    • Garlic (minced): 2 cloves
    • Red Pepper Flakes: 1 teaspoon
    • Beef Strip Loin Steaks: 2 pounds

    Instructions

    1. In a dish or resealable bag, combine soy sauce, brown sugar, grated ginger, minced garlic, and red pepper flakes. Stir to combine.
    2. Add the beef strip loin steaks to the marinade, ensuring they’re well-coated. Seal the bag or cover the dish and refrigerate for at least 30 minutes, or up to 4 hours, for maximum flavor infusion.
    3. Before cooking, remove the steaks from the marinade and pat them dry with paper towels to remove excess moisture.
    4. Grill or pan-fry the steaks until they reach your preferred doneness, ensuring a nice sear on each side.
    5. Let the steaks rest for a few minutes after cooking before slicing.

    Serve your Asian-inspired soy-ginger strip steaks with your favorite sides like steamed rice, grilled vegetables, or a refreshing Asian-style salad. This flavorful marinade will make your steak dinner unforgettable.

    Reverse Searing Method for Thick-Cut Strip Loin

    The reverse sear method is a game-changing technique for cooking thick-cut strip loin steaks. It ensures that the steak is evenly cooked from edge to edge, with a delicious, caramelized crust and a juicy interior. Here’s how to perfect it.

    Step-by-Step Temperature Control

    Achieving the perfect reverse sear requires careful temperature control. Start by seasoning your steak with your favorite herbs and spices. Place it on a wire rack set over a baking sheet to allow air circulation around the steak. Put the steak in a preheated oven at a low temperature of around 250°F (120°C).

    Slow-cook the steak until it reaches your desired doneness. For a medium-rare steak, aim for an internal temperature of around 110°F (43°C). Once the steak has reached this temperature, remove it from the oven and let it rest for 5-10 minutes. This resting period helps the juices to spread evenly throughout the meat.

    Resting and Serving Tips

    While the steak is resting, heat up a cast-iron skillet or grill until it’s nice and hot. Once the resting time is up, sear the steak for 1-2 minutes per side to develop a rich, golden-brown crust.

    After searing, let the steak rest again for an additional 5 minutes to let the juices settle before slicing. When cutting the steak, be sure to slice against the grain to ensure tender, juicy bites.

    Serve your perfectly cooked reverse-seared strip loin steak with side dishes like roasted vegetables or a fresh salad. Mastering this technique will ensure steakhouse-quality results every time, delivering a thick-cut strip loin that’s cooked to perfection.

    Mediterranean-Style Strip Loin with Fresh Herbs

    Embark on a flavorful Mediterranean journey with this herb-infused strip loin recipe. Combining fresh herbs, aromatic spices, and olive oil, this dish will transport your taste buds to the sun-drenched shores of the Mediterranean.

    Marinating the Steak

    Start by marinating the strip loin in a mixture of olive oil, lemon juice, minced garlic, and fresh herbs such as rosemary, thyme, and oregano. Allow the steak to soak in these Mediterranean flavors by marinating it for at least 30 minutes, or up to 24 hours for a more intense flavor infusion.

    Cooking the Steak

    Next, preheat a skillet or grill over high heat. Sear the marinated strip loin, turning occasionally, until it reaches your desired level of doneness. The combination of fresh herbs and the charred exterior will give the steak an irresistible flavor and aroma.

    Garnishing and Serving

    Once cooked, garnish the steak with fresh herbs, a generous drizzle of olive oil, and a sprinkle of flaky sea salt. Serve with roasted vegetables, a crisp salad, or any of your favorite Mediterranean sides to complete the meal.

    Ingredients

    • Strip loin steak: 2 lbs (900g)
    • Olive oil: 1/4 cup (60ml)
    • Lemon juice: 2 tablespoons (30ml)
    • Garlic (minced): 3 cloves
    • Fresh rosemary (chopped): 2 tablespoons (30ml)
    • Fresh thyme (chopped): 1 tablespoon (15ml)
    • Fresh oregano (chopped): 1 tablespoon (15ml)
    • Flaky sea salt: To taste

    This Mediterranean-style strip loin brings the perfect balance of fresh herbs, citrus, and savory spices for a delicious and vibrant meal that will leave you craving more.

    Steakhouse-Quality Strip Loin: Professional Techniques

    Creating steakhouse-quality strip loin steaks at home is an art form. With the right techniques, you can elevate this premium cut and bring out the best flavors and textures. Here’s a look at the secrets chefs use to make restaurant-worthy strip loin steaks.

    Seasoning and Preparation Methods

    The foundation of a great strip loin steak begins with seasoning. Professional chefs often use just salt and pepper to enhance the natural beef flavor, but you can also add garlic powder, onion powder, or herbs for an extra layer of flavor. The key is to season generously and evenly.

    A technique used by many steakhouses is dry aging. This process involves allowing the beef to rest in a controlled environment for an extended period. Dry aging enhances the steak’s flavor, making it richer and more tender while also intensifying the natural beefy taste.

    Restaurant Secrets Revealed

    To achieve a perfect steak, broiling is a method that chefs swear by. This technique involves using high heat to quickly sear the steak, creating a crispy, caramelized exterior while keeping the interior juicy and tender. Broiling or using a hot skillet replicates the searing power of a commercial steakhouse grill.

    Temperature control is paramount when cooking steakhouse-quality strip loin. Chefs monitor the internal temperature closely to ensure the steak is cooked to perfection. Using a meat thermometer helps avoid overcooking and guarantees the ideal doneness, whether it’s rare, medium, or well-done.

    Resting the steak after cooking is essential for maintaining juiciness. Let the meat rest for several minutes, allowing the juices to redistribute. When slicing, it’s important to cut against the grain to ensure tenderness in every bite.

    By using these steakhouse techniques in your kitchen, you can create strip loin steaks that rival those served in top-tier restaurants. With attention to detail, seasoning, and proper cooking methods, you’ll enjoy restaurant-quality steaks at home.

    Common Cooking Mistakes to Avoid with Strip Loin

    Cooking beef strip loin steaks requires precision and attention to detail. Avoid these common mistakes to ensure your strip loin is perfectly cooked and delicious every time.

    Overseasoning or Underseasoning the Meat

    Finding the right balance of seasoning is essential for enhancing the natural flavor of the beef. Overseasoning can mask the beef’s rich, natural taste, while underseasoning may leave the steak bland. Use salt, pepper, or your favorite seasoning blend to taste, but apply them just before cooking to ensure even distribution and the right flavor profile.

    Overcooking the Steak

    One of the biggest mistakes is overcooking the strip loin. This cut is best enjoyed at medium-rare to medium doneness, which keeps it tender and juicy. To avoid overcooking, use a meat thermometer to monitor the internal temperature and remove the steak when it reaches the desired level of doneness.

    Skimping on Resting Time

    Resting the steak after cooking is a step many overlook, but it’s crucial for achieving a tender, juicy result. After cooking, let your strip loin rest for 5-10 minutes before slicing. This lets the juices spread evenly through the meat, resulting in a flavorful and juicy steak.

    Common MistakeExplanationSolution
    OverseasoningCan overwhelm the natural flavor of the beefSeason liberally with salt, pepper, or your preferred spice blend just before cooking
    OvercookingResults in a dry, tough textureUse a meat thermometer to monitor internal temperature and remove the steak once it reaches your desired doneness
    Skimping on Resting TimeDoesn’t allow the juices to redistribute throughout the meatLet the steak rest for 5-10 minutes before slicing

    By avoiding these common mistakes, you’ll consistently cook strip loin steaks that are juicy, flavorful, and cooked to perfection.

    Conclusion

    Mastering the art of cooking strip loin steaks involves understanding the essential techniques, from seasoning and temperature control to resting the meat and avoiding common mistakes. Whether you’re searing, grilling, or using methods like sous vide or reverse searing, the key is to maintain the right balance of flavors, textures, and doneness.

    These tips should help one enjoy strip loin steak and understand everything that one ought to know about cooking steaks successfully. No matter whether one chooses to sear, grill, sous vide or reverse sear, one has to have the right flavors, textures and degrees of doneness. Here are some professional tips for seasoning, cooking and resting that will help one always prepare tender juicy and flavorful steaks. But with these techniques and a little practice, you can be sure to prepare restaurant quality strip loin steaks, every time, every bite.

    FAQs About Cooking Strip Loin Steaks

    What is the best way to season a strip loin steak?

    The best way to season a strip loin steak is with salt and pepper as a base. You can also add spices like garlic powder, onion powder, or fresh herbs like rosemary and thyme for extra flavor. Season the steak just before cooking for the best results.

    What’s the ideal doneness for strip loin steak?

    Strip loin steaks are best cooked to medium-rare (130°F/54°C) or medium (140°F/60°C) for optimal tenderness and juiciness. Use a meat thermometer to make sure the steak hits the right internal temperature.

    How do I prevent overcooking my strip loin steak?

    To avoid overcooking, use a meat thermometer to monitor the steak’s internal temperature closely. Remove the steak from the heat when it reaches your desired doneness, and always allow for resting time to keep it juicy.

    Why is it necessary to leave the steak to rest after cooking?

    Resting the steak allows the juices to redistribute throughout the meat, making it more tender and flavorful. Without resting, the juices will escape when you cut into it, leaving the steak dry.

    What are the best methods for cooking strip loin steaks?

    Popular cooking methods include pan-searing, grilling, reverse searing, and sous vide. Each method has its own advantages—pan-searing and grilling give a great crust, while sous vide ensures perfect doneness throughout the steak.

    Can I cook strip loin steak in the oven?

    Yes, you can cook strip loin steaks in the oven, especially for thicker cuts. For the best results, use the reverse sear method—cook the steak in a low-temperature oven to your desired doneness, then sear it in a hot skillet or on a grill for a flavorful crust.

    How long should I marinate strip loin steaks?

    Marinate strip loin steaks for at least 30 minutes, but up to 24 hours for maximum flavor infusion. Choose marinades that complement the natural beefy flavor, such as those with garlic, herbs, or soy-based sauces.

    What should I serve with strip loin steaks?

    Strip loin steaks pair well with a variety of sides, including roasted vegetables, mashed potatoes, salads, or grilled corn. A rich sauce, like garlic butter or red wine reduction, can also elevate the dish.

    How do I know when my strip loin steak is done?

    The best way to ensure your meat is cooked properly is by using a meat thermometer. Here are the general temperature guidelines:

    • Rare: 120-125°F (49-52°C)
    • Medium-rare: 130-135°F (54-57°C)
    • Medium: 140-145°F (60-63°C)
    • Well-done: 160°F (71°C) or higher

    Can I cook frozen strip loin steaks?

    It’s best to thaw your strip loin steaks before cooking for even cooking. However, if you’re in a pinch, you can cook them from frozen, but it will take longer and may affect the texture.

    1. Quick & Easy:Perfect Frozen Salmon in Air Fryer

      Quick & Easy:Perfect Frozen Salmon in Air Fryer

      Frozen Salmon in Air Fryer

      Cooking salmon has never been easier or more delicious, thanks to the air fryer! This innovative kitchen gadget is a game-changer, transforming frozen salmon into a flavorful and perfectly cooked meal in no time. Whether you’re short on time or looking for a hassle-free way to enjoy frozen salmon, Frozen Salmon in the Air Fryer is the perfect solution.

      In this guide, we’ll dive into the many reasons why air frying is a must-try method for preparing frozen salmon. You’ll discover how simple it is to achieve restaurant-quality results with minimal effort, learn exactly what tools and ingredients you’ll need, and gain step-by-step instructions for making it happen. Plus, we’ll share some exciting recipe ideas to inspire your next meal. Get ready to elevate your salmon game and wow your family and friends with your newfound cooking skills!

      Benefits of Cooking Frozen Salmon in Air Fryer

      Using an air fryer to prepare frozen salmon is a game-changer, offering convenience, improved nutrition, and unbeatable flavor. This method not only saves time and energy but also ensures that your meals are as delicious as they are healthy. Let’s explore why air frying frozen salmon is a must-try for any home cook.

      1. Save Time and Energy

      Air fryers are champions of efficiency. They preheat quickly and cook faster than traditional methods, allowing you to enjoy perfectly cooked salmon in a fraction of the time. This speed doesn’t compromise quality—your salmon will still have that tender, flaky texture you love. Plus, air fryers use less electricity than conventional ovens, making them a cost-effective and eco-friendly choice for busy kitchens.

      2. Healthier Cooking, Better Nutrition

      Salmon is a powerhouse of nutrients, rich in omega-3 fatty acids, high-quality protein, and essential vitamins. Air frying enhances its health benefits by cooking it with little to no added oil. You can achieve a crispy, golden exterior without the excess fat or calories, allowing you to savor salmon’s natural goodness guilt-free.

      3. Superior Texture and Flavor

      One of the standout benefits of air frying frozen salmon is the incredible texture it delivers. The hot, circulating air creates a crisp outer layer while locking in moisture, ensuring every bite is juicy and flavorful. Unlike traditional methods that can sometimes result in unevenly cooked or dry fish, the air fryer guarantees consistent results that enhance salmon’s natural taste and texture.


      Air Fryer Advantages vs. Traditional Cooking Methods

      Air Fryer BenefitsTraditional Cooking
      Faster cooking timeLonger cooking time
      Uses less energyConsumes more energy
      Healthier, low-oil cookingOften requires more oil or fat
      Crispy exterior, moist interiorMay result in drier or uneven cooking

      Choosing to cook frozen salmon in the air fryer means enjoying a quick, nutritious, and flavorful meal without the hassle. Why settle for less when you can have perfectly cooked salmon in minutes?

      Essential Equipment and Tools for Air Fryer Frozen Salmon

      Making air-fried frozen salmon is incredibly simple, especially when you have the right tools at your disposal. While the air fryer is the star of the show, a few additional items can elevate your cooking process and ensure perfect results every time. Let’s dive into the essentials you’ll need to prepare restaurant-quality salmon at home.

      1. A High-Quality Air Fryer

      The foundation of this cooking method is, of course, the air fryer itself. Look for a model that heats evenly and can accommodate the size of your salmon fillets without crowding. Features like digital controls, preset cooking modes, and adjustable temperature settings make it easier to achieve consistent and precise cooking results.

      2. Tongs Designed for Air Frying

      A sturdy pair of air fryer-friendly tongs is a must-have. These allow you to handle the salmon fillets safely and flip them mid-cook if needed, all without damaging the delicate flesh. Silicone or heat-resistant tongs work best to avoid scratching your air fryer basket.

      3. Basting Brush for Seasoning

      A basting brush is an underrated but incredibly helpful tool. Use it to evenly coat your frozen salmon with oil, marinades, or seasonings before air frying. This ensures that every bite is packed with flavor and that the exterior develops a beautifully golden crust.

      4. Digital Meat Thermometer

      Precision is key when cooking salmon, and a digital meat thermometer takes the guesswork out of the process. Use it to check the internal temperature of your salmon fillets to ensure they’ve reached a safe and perfectly cooked 145°F (63°C). This tool is especially helpful if you’re new to cooking fish or experimenting with different air fryer settings.


      With these essential tools in your kitchen, air frying frozen salmon becomes a stress-free and enjoyable experience. From prepping your fillets to serving a dish that looks and tastes amazing, having the right equipment ensures success every time. Your family and friends will be amazed by how delicious and effortlessly you can prepare this healthy meal!

      How to Cook Frozen Salmon in an Air Fryer

      Cooking frozen salmon in an air fryer is not only quick but also an easy way to create a flavorful, nutritious meal. With the right temperature and timing, you can achieve perfectly cooked salmon that’s tender, moist, and delicious. Let’s break down the steps to air fry frozen salmon like a pro.

      1. Setting the Right Temperature

      Temperature plays a vital role in ensuring your salmon cooks evenly and stays juicy. Preheat your air fryer to a temperature between 380°F and 400°F. This range is ideal for cooking frozen salmon, as it provides enough heat to cook through the fillet without over-drying the outside.

      2. Cooking Time Recommendations

      The size and thickness of your salmon fillets will determine how long they need to cook. Follow these general guidelines:

      • Thin fillets (4–6 ounces): Cook for 12–15 minutes.
      • Thicker fillets (6–8 ounces): Cook for 15–18 minutes.
        For the best results, flip the salmon halfway through the cooking time to ensure even browning on both sides.

      3. How to Know When Salmon is Ready

      Wondering how to tell if your air-fried salmon is perfectly cooked? Look out for these signs:

      • Flakes Easily: Use a fork to check if the salmon flakes apart effortlessly.
      • Internal Temperature: Use a digital meat thermometer to ensure the thickest part of the fillet has reached 145°F (63°C).
      • Color Change: The salmon should transition from a translucent appearance to an opaque pink hue.

      By following these simple tips, you can turn frozen salmon into a mouthwatering meal in just minutes. The air fryer makes the process nearly foolproof, delivering salmon that’s moist, tender, and bursting with flavor. Say goodbye to thawing and hello to effortless cooking!

      Preparing Your Frozen Salmon for Air Frying

      Getting your frozen salmon ready for the air fryer is an important step to ensure flavorful and perfectly cooked results. Whether you’re an experienced home cook or trying this for the first time, a little preparation goes a long way. Follow these tips to make your air-fried salmon dishes truly stand out.

      1. To Thaw or Not to Thaw?

      One common question when cooking frozen salmon is whether to thaw it first. The great news is that you have the option to choose either path!

      • Cooking Directly from Frozen: This method is perfect for saving time. With the air fryer, you can cook frozen salmon evenly without needing to thaw it beforehand.
      • Thawing Before Cooking: If you have a bit more time, thawing your salmon can help it cook more evenly and enhance its flavor. To do this, place the salmon in the refrigerator for a few hours or use the cold-water method for quicker results.

      2. Remove Excess Moisture

      Whether you’re cooking your salmon frozen or thawed, removing surface moisture is essential. Use a clean paper towel or cloth to gently pat the salmon dry. This step ensures that the fish develops a crispy, golden-brown crust while air frying instead of steaming in its own moisture.

      3. Slice for Even Cooking

      For consistent cooking, slice your salmon fillets into smaller, evenly sized pieces if they’re particularly large or thick. This helps the heat circulate evenly, preventing overcooked edges or undercooked centers. Remember to arrange the pieces in a single layer in the air fryer basket, leaving some space between them to allow proper airflow.


      By taking these simple preparation steps, you’ll set yourself up for success when air frying frozen salmon. The result? Crispy, tender, and flavorful fillets that will impress your family and friends. Whether you’re whipping up a quick weeknight dinner or preparing a healthy meal for guests, these tips will help you create air-fried salmon perfection!

      Best Seasonings and Marinades for Air Fryer Salmon

      One of the best things about cooking salmon in an air fryer is the opportunity to experiment with different flavors. Seasonings and marinades can take your salmon to the next level, complementing its natural richness while adding a delicious twist. Whether you prefer bold spices, zesty herbs, or savory marinades, there’s a flavor combination for everyone. Here are some ideas to get you started.

      1. Dry Rub Options

      Dry rubs are quick and easy, offering bold flavors with minimal effort. Sprinkle these blends over your salmon before air frying for a flavorful crust.

      • Cajun-Style: Combine paprika, garlic powder, onion powder, cayenne pepper, black pepper, and oregano for a spicy kick with a hint of smokiness.
      • Lemon-Pepper: Mix lemon zest, black pepper, and a pinch of salt for a zesty, refreshing flavor.
      • Mediterranean Blend: Use dried oregano, basil, rosemary, garlic powder, and a pinch of red pepper flakes for a herby, savory taste.

      2. Wet Marinade Recipes

      Marinating your salmon before air frying allows the flavors to penetrate the fillet, resulting in a more robust taste. Here are a few crowd-pleasing marinades:

      • Teriyaki Marinade: Blend soy sauce, brown sugar, garlic, ginger, and sesame oil for a sweet and savory glaze.
      • Honey-Mustard: Whisk together honey, Dijon mustard, lemon juice, and olive oil for a tangy, slightly sweet marinade.
      • Garlic-Herb: Combine minced garlic, fresh parsley, dill, lemon juice, and olive oil for a bright and aromatic flavor.

      3. Simple Herb and Spice Combinations

      If you prefer to keep it simple, use fresh or dried herbs with a touch of seasoning to enhance your salmon. These combinations pair wonderfully with salmon’s natural taste:

      • Dill, Lemon, and Black Pepper: A classic mix that’s light and flavorful.
      • Chili Powder, Cumin, and Lime: Perfect for a southwestern twist with a hint of citrus.
      • Garlic, Rosemary, and Thyme: Earthy and aromatic, ideal for a comforting, homey flavor.

      Pro Tip: Experiment and Have Fun!

      The beauty of cooking salmon in an air fryer is the freedom to experiment. Mix and match your favorite seasonings, try new marinades, or even combine dry rubs and wet marinades for a unique flavor profile. With so many options, you’re bound to find a combination that becomes a family favorite.

      Enjoy the process, and let your creativity shine in the kitchen!

      Common Mistakes to Avoid When Air Frying Salmon

      Cooking salmon in an air fryer is a convenient and delicious way to enjoy a healthy meal, but there are a few common mistakes that can affect the outcome. Avoiding these errors will ensure your salmon is always perfectly cooked—moist, flavorful, and tender. Let’s take a look at what to avoid when air frying salmon.

      1. Overcrowding the Air Fryer Basket

      One of the biggest mistakes when air frying salmon is cramming too many fillets into the basket at once. Overcrowding leads to uneven cooking, with some pieces undercooked and others overcooked or dry. The air fryer works best when air can circulate around the food, so be sure to leave space between each fillet. If needed, cook your salmon in batches for the best results.

      2. Incorrect Temperature or Cooking Time

      Setting the wrong temperature or cooking time can easily ruin your salmon. Cooking salmon too long can make it dry and tough, while undercooking it can leave the inside raw. Always double-check the recommended settings based on the thickness of your fillets and your air fryer model. Typically, a temperature of 380°F to 400°F for 12-18 minutes works well for most frozen salmon fillets.

      3. Not Seasoning the Salmon Properly

      Salmon is naturally flavorful, but without seasoning, it can taste bland. Failing to properly season your fish or skipping marinades means missing out on an opportunity to enhance its taste. Experiment with different herbs, spices, and marinades to bring out the best flavors in your salmon. Don’t be afraid to try bold combinations like Cajun seasoning, lemon-pepper, or a garlic-herb mix.

      Honey Garlic Frozen Salmon Air Fryer Recipe

      Elevate your seafood game with this easy and delicious honey garlic frozen salmon recipe. Perfectly suited for the air fryer, this dish blends the rich, tender texture of salmon with the sweet and savory flavors of honey and garlic. It’s a quick, simple, and satisfying meal that’s sure to impress everyone at the table.

      Ingredients List

      • 4 frozen salmon fillets
      • 2 tablespoons honey
      • 3 cloves garlic, minced
      • 1 tablespoon soy sauce
      • 1 teaspoon dried thyme
      • 1/4 teaspoon black pepper
      • Pinch of salt

      Step-by-Step Instructions

      1. Preheat the Air Fryer
        Preheat your air fryer to 400°F (200°C). This high heat will help give the salmon a beautifully crispy exterior while keeping the inside juicy and tender.
      2. Prepare the Marinade
        In a small bowl, combine honey, minced garlic, soy sauce, dried thyme, black pepper, and a pinch of salt. Stir well to create a flavorful marinade that will coat the salmon fillets evenly and infuse them with a perfect balance of sweet and savory flavors.
      3. Arrange the Salmon in the Air Fryer
        Place the frozen salmon fillets in the air fryer basket, making sure there’s space between each fillet for proper airflow. This will ensure the salmon cooks evenly and crisps up nicely.
      4. Brush the Marinade
        Use a brush to evenly coat the frozen salmon fillets with the honey garlic marinade. Be generous, but make sure the marinade covers each piece evenly for maximum flavor.
      5. Air Fry the Salmon
        Air fry the salmon for 12-15 minutes, depending on the thickness of the fillets. Check for doneness by using a fork—when the salmon flakes easily and reaches an internal temperature of 145°F (63°C), it’s ready to serve.
      6. Serve and Enjoy
        Once the salmon is perfectly cooked, remove it from the air fryer and serve it hot. You can garnish it with fresh herbs or a squeeze of lemon juice for added flavor. This honey garlic frozen salmon makes a delicious main dish, or you can pair it with a side salad, steamed vegetables, or rice for a well-rounded meal.

      The air fryer gives this salmon a crispy, caramelized exterior while keeping the inside tender and juicy. The honey garlic glaze adds a sweet and savory kick, making this recipe a sure winner for any occasion. Plus, using frozen salmon and the air fryer means dinner is ready in no time—ideal for a busy weeknight or a special dinner for guests. Enjoy the incredible flavors and convenience of this dish!

      Lemon Herb Frozen Salmon Recipe

      Brighten up your air fryer meals with this zesty Lemon Herb Frozen Salmon recipe. The tangy citrus combined with fresh herbs makes this dish bursting with flavor, while the air fryer ensures the salmon remains tender and perfectly cooked. It’s a simple yet flavorful recipe that will impress anyone who tries it.

      Ingredients

      • 4 frozen salmon fillets
      • 2 tablespoons olive oil
      • 2 tablespoons chopped fresh parsley
      • 1 tablespoon chopped fresh dill
      • 1 tablespoon grated lemon zest
      • 2 tablespoons lemon juice
      • 1 teaspoon garlic powder
      • Salt and pepper to taste

      Instructions

      1. Preheat the Air Fryer
        Begin by preheating your air fryer to 400°F (200°C). This high heat helps to create a crispy, flavorful crust on the salmon while keeping the inside moist and tender.
      2. Make the Lemon Herb Mixture
        In a small bowl, combine olive oil, chopped parsley, chopped dill, lemon zest, lemon juice, and garlic powder. Mix thoroughly and add salt and pepper according to your preference. This flavorful mixture will coat the salmon and infuse it with a fresh, citrusy flavor.
      3. Prepare the Salmon
        Place the frozen salmon fillets into the air fryer basket, ensuring there is some space between each piece for even cooking. Use a brush or spoon to evenly coat the top of each fillet with the lemon herb mixture, making sure the salmon is well-seasoned.
      4. Air Fry the Salmon
        Air fry the salmon for 12-15 minutes, depending on the thickness of the fillets. Check for doneness by using a fork to see if the salmon flakes easily and ensure it has reached an internal temperature of 145°F (63°C).
      5. Serve and Enjoy
        Once the salmon is perfectly cooked, remove it from the air fryer and serve it immediately. For an extra touch, garnish with more fresh herbs if desired. Pair the salmon with your favorite sides, such as steamed vegetables, rice, or a fresh salad, for a complete meal.

      This Lemon Herb Frozen Salmon Recipe is the perfect way to enjoy the bright and fresh flavors of the sea. The combination of citrus and aromatic herbs creates a light yet flavorful dish that’s great for any night of the week. With the air fryer, you can enjoy a tender, perfectly cooked salmon in just minutes, making it an ideal option for busy evenings or a special dinner. Try it out today and elevate your air fryer game with this delicious citrus-infused dish!

      Cajun-Style Air Fryer Salmon

      Add some bold flavor to your dinner with this Cajun-inspired air fryer salmon recipe. The rich, spicy seasoning pairs perfectly with the tender salmon, creating a dish that’s both flavorful and satisfying. It’s a quick and easy recipe that will quickly become a favorite in your meal rotation.

      Spice Blend Components

      The key to getting that perfect Cajun kick is in the seasoning. Here’s what you’ll need to make the ideal spice blend for your air fryer salmon:

      • Paprika
      • Garlic powder
      • Onion powder
      • Cayenne pepper
      • Dried thyme
      • Salt and black pepper

      Cooking Method

      1. Preheat the Air Fryer
        Start by preheating your air fryer to 400°F (200°C). This high heat helps to crisp up the salmon’s exterior while keeping the inside tender and juicy.
      2. Prepare the Salmon
        Pat the frozen salmon fillets dry using a paper towel. This will help the spice blend adhere better. Place the fillets in a single layer in the air fryer basket, ensuring there’s space around each piece for even cooking.
      3. Season the Salmon
        In a small bowl, combine the paprika, garlic powder, onion powder, cayenne pepper, dried thyme, salt, and black pepper. Mix everything together, then rub the spice blend evenly over each fillet. Make sure the salmon is fully coated with the bold seasoning.
      4. Air Fry the Salmon
        Air fry the salmon for 12-15 minutes, or until it flakes easily with a fork and reaches an internal temperature of 145°F (63°C). The crispy exterior and tender interior are the perfect balance.
      5. Serve and Enjoy
        Once cooked, remove the salmon from the air fryer and serve it hot. Garnish with fresh parsley or a squeeze of lemon wedges for added freshness and flavor. This Cajun-style air fryer salmon is packed with spices, perfect for anyone who loves a little heat in their seafood.

      This Cajun-Style Air Fryer Salmon recipe brings the best of Southern flavors to your kitchen in no time. The vibrant spices create a smoky, spicy coating that pairs perfectly with the tender fish. Whether it’s a family dinner or a special meal, this dish is sure to be a crowd-pleaser!

      Asian-Inspired Teriyaki Salmon

      Bring the flavors of the East to your kitchen with this simple yet delicious air fryer teriyaki salmon recipe. Combining the sweetness and savory depth of homemade teriyaki sauce with the convenience of the air fryer, this dish is an easy way to enjoy Asian-inspired fish recipes at home. With a perfect balance of salty, sweet, and umami, this teriyaki salmon is a true crowd-pleaser.

      Ingredients for Teriyaki Marinade

      • Soy sauce
      • Brown sugar
      • Rice vinegar
      • Garlic, minced
      • Ginger, minced
      • A pinch of red pepper flakes (optional, for a bit of heat).

      Cooking Method

      1. Prepare the Teriyaki Marinade
        In a small bowl, whisk together soy sauce, brown sugar, rice vinegar, minced garlic, minced ginger, and a pinch of red pepper flakes. This combination creates a sweet soy glaze with a hint of spice, perfect for coating your salmon.
      2. Marinate the Salmon
        Add the frozen salmon fillets to the marinade, making sure they are well-coated. Let the salmon soak in the teriyaki sauce for at least 30 minutes, or up to 2 hours for more intense flavor. If you’re short on time, marinating for 30 minutes will still yield delicious results.
      3. Preheat the Air Fryer
        While the salmon marinates, preheat your air fryer to 380°F (193°C). This slightly lower temperature ensures the salmon cooks through without drying out while allowing the teriyaki glaze to caramelize beautifully.
      4. Air Fry the Salmon
        Once marinated, carefully place the salmon fillets in the air fryer basket, making sure the pieces don’t overlap or touch to ensure even cooking. Air fry the salmon for 12-15 minutes, flipping the fillets halfway through. The salmon should be cooked through, with the glaze nicely caramelized on the outside.
      5. Serve and Enjoy
        When the salmon is ready, remove it from the air fryer and serve immediately. Garnish with sliced green onions, sesame seeds, or any of your favorite Asian-inspired toppings to elevate the dish even further.

      This Asian-Inspired Teriyaki Salmon is a deliciously easy way to enjoy the perfect balance of sweet, savory, and umami flavors. The homemade teriyaki sauce creates a rich glaze that pairs beautifully with the tender salmon, and the air fryer makes it crispy on the outside while keeping it juicy inside. This dish brings the vibrant flavors of the Far East to your home in just a few simple steps, making it perfect for a weeknight dinner or a special occasion. Enjoy the taste of Asia with this flavorful and effortless recipe!

      Side Dishes That Go Perfectly with Air Fryer Salmon.

      Once you’ve mastered cooking air fryer salmon, it’s time to complete the meal with the perfect side dishes. Whether you prefer vibrant vegetables, hearty grains, or light salads, there are plenty of delicious options that pair wonderfully with salmon. Let’s explore some tasty sides that will elevate your meal.

      Vegetable Options

      Vegetables roasted in the air fryer are the perfect complement to salmon. Here are a few great choices:

      • Brussels Sprouts: Tossed with olive oil, salt, and pepper, these crispy little bites are packed with flavor and texture.
      • Asparagus: A light, nutritious option that pairs beautifully with the richness of salmon.
      • Sweet Potatoes: Air-fried sweet potatoes offer a sweet, caramelized contrast to the savory fish.
      • Beets: Roasted beets add an earthy flavor and vibrant color to your plate.
      • Bell Peppers & Onions: A colorful mix of bell peppers and onions, air fried to perfection, adds sweetness and crunch to balance the salmon.

      Grain and Starch Pairings

      For a more filling meal, these grains and starches pair perfectly with air fryer salmon:

      • Quinoa: A nutritious, protein-packed grain that adds a light yet satisfying base for your salmon.
      • Basmati Rice: Its fluffy texture and mild flavor allow the salmon to shine while complementing its taste.
      • Mashed Potatoes: Creamy mashed potatoes are the ultimate comfort food, soaking up the juices from the salmon and creating a rich, balanced meal.

      Lighter Options

      If you’re looking for something lighter, try these sides for a fresh, crisp contrast:

      • Green Salad: A crisp salad with a tangy vinaigrette is perfect for cutting through the richness of the salmon. Add some mixed greens, cucumbers, and tomatoes for extra freshness.

      When selecting sides for your air fryer salmon, choose options that enhance the fish’s delicate flavor and tender texture. Whether you go for roasted veggies, hearty grains, or a refreshing salad, these sides will turn your salmon dinner into a well-rounded, satisfying meal. Get creative and try out various combinations to discover your ideal pairing!

      Conclusion

      Cooking frozen salmon in an air fryer is a game-changer for quick, delicious, and healthy meals. With minimal prep and fast cooking times, you can enjoy perfectly crispy, tender salmon with ease. Whether you prefer a honey garlic glaze, lemon herb seasoning, or a spicy Cajun rub, the air fryer brings out the best in salmon, enhancing its natural flavor and texture. Plus, it’s a versatile tool that allows for endless variations, from Asian-inspired teriyaki to simple, savory seasoning blends.

      By pairing your air-fried salmon with vibrant vegetables, hearty grains, or refreshing salads, you can create a well-balanced, satisfying meal that suits every taste and dietary preference. The possibilities for sides are endless, allowing you to complement the rich, flaky fish with everything from roasted sweet potatoes to fluffy quinoa or even a crisp green salad.

      With the right tools, preparation, and a little creativity, you can master air fryer salmon and elevate your cooking to a whole new level. Get ready to impress your family and friends with flavorful, restaurant-quality meals, all from the comfort of your own kitchen. So, go ahead—grab that frozen salmon, fire up your air fryer, and enjoy a meal that’s as delicious as it is easy to make!

      FAQs about Cooking Frozen Salmon in Air Fryer

      Can I cook frozen salmon in the air fryer without thawing it?

      You can definitely cook frozen salmon directly in the air fryer.
      It’s a quick and easy method that saves you time. However, if you prefer a more even cook, you can thaw the salmon first. Either way, your salmon will come out delicious!

      What’s the best temperature to cook frozen salmon in an air fryer?

      The ideal temperature for cooking frozen salmon in the air fryer is between 380°F and 400°F. This temperature ensures that the salmon cooks evenly and stays juicy inside while developing a crispy exterior.

      How long do I need to cook frozen salmon in the air fryer?

      The cooking time can change based on how thick the salmon fillets are. For thin fillets (4-6 ounces), cook for 12-15 minutes, and for thicker fillets (6-8 ounces), cook for 15-18 minutes. Always flip the salmon halfway through for even browning.

      How can I tell if the salmon is cooked just right?

      Perfectly cooked salmon should easily flake with a fork and have an internal temperature of 145°F (63°C). The color should shift from translucent to a pink, opaque hue. Using a digital thermometer is the most reliable way to ensure it’s cooked perfectly.

      Do I need to season my salmon before cooking it?

      Yes, seasoning your salmon is key to enhancing its flavor. You can use dry rubs like Cajun seasoning or lemon-pepper, or marinate the salmon in a honey garlic or teriyaki sauce before cooking. Try out various marinades and spices to match your preferences!

      What sides pair well with air fryer salmon?

      Air fryer salmon goes with a variety of sides:

      • Vegetables: Roasted Brussels sprouts, sweet potatoes, asparagus, or a mix of bell peppers and onions.
      • Grains: Quinoa, basmati rice, or mashed potatoes.
      • Salads: A light green salad with tangy dressing adds a refreshing contrast to the richness of the salmon.

      Can I cook multiple salmon fillets at once?

      You can cook multiple salmon fillets in the air fryer, but be careful not to overcrowd the basket. Make sure to leave some space between each fillet for even cooking. If you’re preparing several fillets, it might be best to cook them in batches to get the best results.

      What’s the advantage of using an air fryer for salmon?

      The air fryer is perfect for cooking salmon because it’s quick, energy-efficient, and delivers a crispy exterior while keeping the inside tender and juicy. It also requires little to no oil, making it a healthier option compared to traditional frying methods.

      Can I use frozen salmon with skin on?

      Yes, you can cook frozen salmon with the skin on in the air fryer. The skin will get crispy and add extra flavor to your dish. If you don’t prefer the skin, you can easily remove it after cooking.

      How do I avoid overcooking my salmon in the air fryer?

      To prevent overcooking, monitor the cooking time carefully and always check the internal temperature. Overcooking salmon can make it dry, so aim for the fish to reach 145°F and remove it from the air fryer as soon as it’s done.

      By following these tips and tricks, you’ll be able to cook perfect frozen salmon in your air fryer every time, with flavor-packed seasonings and side dishes to complete the meal. Enjoy cooking!

    2. Healthy and Delicious Turkey Chops for Every Occasion

      Healthy and Delicious Turkey Chops for Every Occasion

      Turkey Chops

      Transform your everyday dining experience with the mouthwatering magic of Turkey Chops! Whether you’re a seasoned home chef or just starting your culinary journey, these versatile cuts of meat are about to become your new favorite protein. We’ve curated an impressive collection of 15 game-changing recipes that showcase just how incredible turkey chops can be – from quick weeknight dinners to sophisticated weekend entertainers.

      Imagine sinking your fork into a perfectly cooked turkey chop, its golden-brown exterior giving way to tender, juicy meat within. That’s the experience awaiting you with each of these carefully selected recipes. We’re moving beyond basic cooking methods to explore everything from herb-crusted masterpieces to smoky grilled variations that’ll have your family requesting seconds (and thirds!).

      What makes turkey chops truly special is their remarkable ability to absorb flavors while staying lean and healthy. We’ll guide you through foolproof techniques for achieving that perfect balance of moisture and texture, ensuring your chops never turn out dry or bland. You’ll discover how simple marinades can transform these humble cuts into restaurant-worthy meals, and learn professional tips for getting that coveted golden crust while keeping the inside succulent.

      Ready to revolutionize your dinner rotation with these wholesome, protein-packed alternatives to traditional meat options? Join us as we explore creative ways to prepare turkey chops that will delight both picky eaters and adventurous food lovers alike. From Mediterranean-inspired dishes to Asian fusion creations, these recipes are about to change the way you think about turkey forever!

      Why Turkey Chops Are Your Next Kitchen Game-Changer

      In a world where healthy eating meets culinary creativity, turkey chops have emerged as a standout star in the protein lineup. These versatile cuts aren’t just another trend – they’re revolutionizing how we think about nutritious, satisfying meals. Let’s explore why these lean, flavorful cuts deserve a prime spot in your meal planning and how to ensure you’re selecting the absolute best options for your table.

      The Impressive Health Profile That’s Hard to Beat

      When it comes to powerful nutrition packed into every bite, turkey chops truly shine. Picture this: a single 4-ounce serving delivers an impressive 26 grams of high-quality protein while keeping fat content to a remarkably low 3 grams. But that’s just the beginning of their nutritional story. These lean cuts are veritable powerhouses of essential nutrients that your body craves:

      • Your daily B-vitamin boost comes naturally with turkey chops, offering substantial amounts of niacin, B6, and B12. These vital nutrients are your allies in maintaining steady energy levels, supporting brain function, and helping your body produce those crucial red blood cells.
      • The selenium content in turkey chops deserves special attention – this mineral plays a decisive role in strengthening your immune system and maintaining optimal thyroid function, making each bite contribute to your overall wellness journey.
      • For those watching their caloric intake, turkey chops offer that satisfying, filling quality you want in a meal while keeping the calories surprisingly low, especially compared to their red meat counterparts.

      Mastering the Art of Selecting Premium Turkey Chops

      The journey to a memorable turkey chop dinner begins at the selection process. Here’s your guide to choosing cuts that will elevate your cooking:

      First, trust your senses. Quality turkey chops should have a fresh, clean appearance with meat that’s firm to the touch and springs back when gently pressed. The color should be a consistent, healthy pink – any gray or greenish tints are your cue to pass. Pay attention to the texture too; the surface should be smooth without any sticky or slimy feeling.

      When possible, opt for organic or free-range turkey chops. These premium options typically come from birds raised without antibiotics or artificial growth hormones, resulting in meat that’s not only potentially healthier but often more flavorful. Yes, they might cost a bit more, but the difference in quality and peace of mind is worth the investment.

      Keep an eye on the packaging date and storage conditions. Even the highest quality turkey chops can be compromised by poor storage. Look for packages that feel cold and show no signs of freezer burn if frozen. If buying fresh, plan to cook them within 1-2 days of purchase for optimal results.

      Remember, selecting quality turkey chops is more than just picking protein – it’s about choosing a foundation for a meal that will nourish your body while delighting your taste buds. With these guidelines in mind, you’re well-equipped to make choices that will lead to delicious, healthy meals your whole family will love.

      Your Essential Kitchen Arsenal for Turkey Chop Perfection

      Creating mouthwatering turkey chops isn’t just about the ingredients – it’s about having the right tools and techniques at your fingertips. Think of your kitchen equipment as your culinary support team, each playing a crucial role in transforming those raw turkey chops into a feast-worthy dish. Let’s explore the must-have tools and seasoning secrets that will elevate your turkey chop game to restaurant-quality levels.

      The Ultimate Tool Kit for Turkey Chop Success

      Every great chef knows that the right equipment makes all the difference. Here’s your comprehensive guide to the essential tools that will help you master turkey chop preparation:

      The Cast Iron Champion: Invest in a high-quality cast iron skillet or grill pan. These heavyweight heroes distribute heat evenly, creating that perfect golden crust while keeping the inside juicy. The natural seasoning that builds up over time adds an extra layer of flavor that no other cookware can match.

      The Precision Blade: A sharp, reliable chef’s knife isn’t just a tool – it’s your trusted partner in the kitchen. Look for an 8-inch blade that feels comfortable in your hand. This will help you trim excess fat, portion your chops evenly, and ensure each cut is clean and precise.

      The Temperature Truth-Teller: A reliable meat thermometer is non-negotiable for turkey chop perfection. Digital instant-read thermometers are worth the investment, giving you accurate readings in seconds. Aim for an internal temperature of 165°F (74°C) for safe, juicy results every time.

      The Texture Transformer: A quality meat mallet or tenderizer helps you achieve consistent thickness across your chops, ensuring even cooking. Look for one with both smooth and textured sides – the smooth side for gentle thinning, the textured side for tougher cuts that need more attention.

      The Control Master: Invest in a pair of spring-loaded tongs or a wide, sturdy spatula. These tools give you the control you need to flip and maneuver your chops without piercing the meat and losing those precious juices.

      Mastering the Art of Seasoning and Marinating

      The magic of turkey chops lies in how you season them. Here’s your guide to creating flavors that will make your taste buds dance:

      Dry Rub Revelations:

      • Create your signature blend with kosher salt, fresh-ground pepper, and aromatic herbs like sage, thyme, and rosemary
      • Add depth with smoked paprika, garlic powder, and a pinch of brown sugar
      • Experiment with citrus zests and dried herbs for bright, fresh flavors

      Marinade Magic: Mediterranean Miracle: Combine Greek yogurt, minced garlic, lemon juice, and fresh herbs. The yogurt’s natural enzymes tenderize while adding tanginess.

      Asian Fusion: Whisk together soy sauce, grated ginger, sesame oil, and a touch of honey. This marinade creates a beautiful caramelized exterior when cooked.

      Classic Comfort: Mix Dijon mustard, honey, apple cider vinegar, and fresh herbs for a marinade that delivers sweet, tangy perfection.

      Pro Tips for Seasoning Success:

      • Always pat your chops dry before applying seasonings
      • Let seasoned chops rest at room temperature for 15-30 minutes before cooking
      • For maximum flavor penetration, score the surface lightly before applying marinades
      • Remember that marinades should be your 4-hour minimum to overnight flavor enhancer
      • Keep a dedicated container for your favorite spice blend – it’ll save time on busy weeknights

      Remember, these tools and techniques are your foundation for turkey chop mastery. With practice and patience, you’ll develop an intuitive understanding of how each element contributes to the perfect dish. Soon, you’ll be creating turkey chop variations that could make a professional chef envious!

      Irresistible Turkey Chop Recipes That’ll Make You Look Like a Pro

      Get ready to transform your kitchen into a culinary playground with these crowd-pleasing turkey chop recipes. Whether you’re cooking for a quick weeknight dinner or planning a special occasion, these dishes prove that turkey chops are anything but boring. Each recipe brings its own unique twist while keeping preparation straightforward and results consistently delicious.

      1. Golden-Crusted Herb-Infused Pan-Seared Turkey Chops

      Transform humble turkey chops into a restaurant-worthy dish with this foolproof pan-searing technique. The secret lies in creating that perfect golden crust while maintaining a juicy interior.

      Key Ingredients:

      • 4 turkey chops, patted dry
      • Fresh herbs (rosemary, thyme, sage)
      • High-quality olive oil
      • Sea salt and freshly ground black pepper
      • 2 cloves of garlic, crushed
      • 1 tablespoon butter for basting

      Method: Season your chops generously with salt and pepper, then press fresh herbs into both sides. Heat your skillet until it’s nearly smoking, add oil, and lay those chops in – that satisfying sizzle is music to a chef’s ears! Cook for 4-5 minutes per side, adding garlic and butter in the final minutes for extra flavor. Let them rest for 5 minutes before serving to lock in those precious juices.

      2. Sweet & Smoky Grilled Honey Mustard Turkey Chops

      This recipe combines the magic of outdoor grilling with a mouthwatering honey mustard glaze that caramelizes beautifully over the heat.

      The Game-Changing Marinade:

      • ¼ cup Dijon mustard
      • 3 tablespoons local honey
      • 2 tablespoons apple cider vinegar
      • Fresh thyme leaves
      • Minced garlic
      • Cracked black pepper

      Marinate your chops for at least 4 hours (overnight is even better!). Fire up that grill to medium-high heat, and get ready for some serious flavor. The key is to watch for those beautiful grill marks and that perfect caramelization – about 6-7 minutes per side. Don’t forget to brush with extra marinade as they cook!

      3. Sun-Kissed Mediterranean Turkey Chops with Olive Tapenade

      Transport your taste buds to the Mediterranean coast with this sophisticated yet simple preparation.

      The Star Tapenade:

      • Mixed olives (Kalamata, green, black)
      • Capers
      • Fresh herbs (basil, oregano)
      • Lemon zest
      • Extra virgin olive oil
      • Anchovy paste (optional but recommended!)

      Season your chops with Mediterranean herbs, pan-sear until perfectly done, then top with your freshly made tapenade. The combination of the lean turkey with the rich, briny olive mixture creates a perfect balance that’ll have everyone asking for seconds.

      4. Ultimate Crispy Parmesan-Crusted Turkey Chops

      This isn’t your average breaded chop – we’re talking about a perfectly seasoned, golden-brown crust that audibly crunches when you cut into it.

      The Perfect Coating:

      • Seasoned panko breadcrumbs
      • Freshly grated Parmesan cheese
      • Italian herbs
      • Garlic powder
      • Paprika for color
      • A touch of lemon zest

      The Secret Technique: Double-dip your chops for maximum crunch: first in seasoned flour, then in beaten egg with a splash of mustard, and finally in your parmesan-panko mixture. Press the coating firmly onto each chop, then let them rest for 10 minutes before frying – this helps the coating stick better.

      Pro Tips for All Recipes:

      • Always bring your chops to room temperature before cooking
      • Pat them dry thoroughly before seasoning
      • Let them rest after cooking to redistribute juices
      • Don’t overcrowd your pan or grill
      • Use a meat thermometer for perfect doneness every time

      Each of these recipes shows that turkey chops can take center stage in any meal. They’re not just healthy alternatives – they’re crave-worthy dishes that’ll have everyone at your table reaching for seconds. Remember, the key to perfect turkey chops is treating them with care and not being afraid to experiment with flavors. Happy cooking!

      Master Class: Creating Unforgettably Juicy Turkey Chops

      Let’s unlock the secrets to transforming potentially dry turkey chops into succulent, flavor-packed masterpieces. Whether you’re a kitchen novice or a seasoned cook, these game-changing techniques will elevate your turkey chop game to new heights. The key lies not just in the cooking process, but in the crucial steps before and after the heat hits the meat.

      The Magic of Moisture: Marinating & Brining Secrets

      Marination isn’t just about flavor – it’s about creating turkey chops that stay juicy even if you accidentally cook them a minute too long. Here’s your roadmap to moisture mastery:

      Perfect Marinade Blueprint:

      • Base: Extra virgin olive oil or neutral oil
      • Acid: Fresh lemon juice, apple cider vinegar, or white wine
      • Aromatics: Crushed garlic, shallots, fresh herbs
      • Seasonings: Sea salt, black pepper, your choice of spices
      • Optional Enhancers: Dijon mustard, honey, or soy sauce

      Marinating Time Guide:

      • Minimum: 30 minutes for basic flavor absorption
      • Sweet Spot: 4-6 hours for optimal flavor penetration
      • Maximum: 24 hours (beyond this, texture can become mushy)

      The Brining Revolution: Create a basic brine solution using:

      • 4 cups cold water
      • ¼ cup kosher salt
      • 2 tablespoons brown sugar
      • Optional aromatics: peppercorns, bay leaves, garlic cloves, citrus peels

      Pro-Brining Tips:

      • Always brine in the refrigerator
      • Optimal brining time: 2-4 hours (don’t exceed 6 hours)
      • Rinse thoroughly and pat completely dry before cooking
      • Remember to reduce additional seasoning after brining

      The Art of the Rest: Maximizing Flavor and Juiciness

      The period between taking your chops off the heat and serving them is crucial for achieving that professional-level juiciness. Here’s why and how:

      The Science of Resting: During cooking, heat drives the meat’s juices toward the center. Resting allows these juices to redistribute throughout the meat, ensuring every bite is as juicy as possible.

      Perfect Resting Protocol:

      • Minimum Rest Time: 5 minutes
      • Optimal Rest Time: 7-10 minutes
      • Maximum Rest Time: 15 minutes
      • Temperature Drop During Rest: About 5-10°F

      Resting Best Practices:

      • Place chops on a warm plate or cutting board
      • Tent loosely with foil (don’t wrap tightly)
      • Resist the urge to cut into them early!
      • Use this time to prepare your sauce or finish side dishes

      Final Flourishes for Serving

      Transform good turkey chops into memorable ones with these finishing touches:

      Sauce Suggestions:

      • Pan Sauce: Deglaze your cooking pan with white wine or broth, add herbs and a pat of butter
      • Herb-Infused Oil: Drizzle with fresh herbs blended with olive oil
      • Light Gravy: Create a quick reduction with stock and aromatics

      Presentation Tips:

      • Slice against the grain for maximum tenderness
      • Arrange on warmed plates (cold plates steal heat too quickly)
      • Garnish with fresh herbs or microgreens for color and flavor
      • Consider serving with a compound butter medallion for extra luxury

      Remember: These techniques aren’t just cooking steps – they’re your secret weapons for creating turkey chops that will have everyone asking for your recipe. The key is patience and attention to detail. Master these fundamentals, and you’ll never serve a dry turkey chop again! Copy

      Creating the Ultimate Turkey Chop Feast: Perfect Pairings & Accompaniments

      Turn your turkey chops into a complete culinary experience by mastering the art of side dish pairings. The right accompaniments can elevate a simple turkey chop into a memorable meal that delights all the senses. Let’s explore how to create that perfect balance of flavors, textures, and colors that will make your dinner truly special.

      Vegetable Companions: Adding Color and Nutrition

      Roasted Root Vegetables:

      • Brussels Sprouts with Honey-Balsamic Glaze: Halved sprouts roasted until crispy, then drizzled with a sweet-tangy reduction
      • Rainbow Carrots with Fresh Herbs: Multi-colored carrots roasted with thyme and rosemary, finished with a touch of maple syrup
      • Cauliflower Steaks: Thick-cut cauliflower slices roasted until golden, seasoned with garlic and smoked paprika

      Leafy Green Sensations:

      • Garlicky Sautéed Spinach: Fresh spinach quickly wilted with olive oil, sliced garlic, and a pinch of red pepper flakes
      • Tuscan Kale with Pine Nuts: Tender kale leaves massaged with olive oil, topped with toasted pine nuts and shaved Parmesan
      • Swiss Chard with Golden Raisins: Rainbow chard sautéed with sweet raisins and a splash of balsamic vinegar

      Grain and Starch Solutions: The Foundation Builders

      Creamy Classics:

      • Parmesan Mashed Potatoes: Yukon golds whipped with butter, cream, and freshly grated Parmesan
      • Cauliflower-Potato Mash: A lighter version combining potatoes and cauliflower for fewer calories without sacrificing creaminess
      • Sweet Potato Purée: Smooth and silky with a touch of maple syrup and warming spices

      Wholesome Grains:

      • Mediterranean Quinoa: Fluffy quinoa tossed with roasted cherry tomatoes, olives, and fresh herbs
      • Wild Rice Pilaf: A nutty blend of wild and brown rice with mushrooms and fresh thyme
      • Farro Risotto: Creamy Italian grain cooked slowly with white wine and finished with Parmesan

      Sauce Sensations: The Final Touch

      Fresh and Vibrant:

      • Classic Chimichurri: Fresh parsley, cilantro, garlic, and olive oil with a hint of vinegar
      • Lemon-Herb Sauce: Bright and fresh with mixed herbs, lemon zest, and extra virgin olive oil
      • Green Goddess Dressing: Creamy, herbal, and perfect for drizzling

      Rich and Savory:

      • Wild Mushroom Gravy: A medley of mushrooms in a rich, wine-enhanced sauce
      • Caramelized Onion Jus: Slowly cooked onions transformed into a sweet and savory sauce
      • Roasted Garlic Aioli: Creamy, garlicky, and perfect for dipping

      Beverage Pairings: Completing the Experience

      Wine Selections:

      • White Wines:
        • Sauvignon Blanc: Crisp and herbal, perfect with lighter preparations
        • Pinot Grigio: Clean and refreshing, ideal for herb-seasoned chops
        • Chardonnay: Fuller-bodied option for richer preparations
      • Red Wines:
        • Pinot Noir: Light and versatile, works well with most preparations
        • Merlot: Smooth and medium-bodied, great with mushroom sauces
        • Light Zinfandel: Fruit-forward option that won’t overwhelm the meat

      Alternative Beverages:

      • Craft Beers: Try wheat beers or light ales that complement without overpowering
      • Mocktails: Herb-infused sparkling water or pomegranate spritzers
      • Artisanal Sodas: Ginger beer or craft root beer for a unique pairing

      Remember, the key to successful pairing is balance. Consider the seasoning and preparation of your turkey chops when selecting sides. A heavily seasoned chop might pair better with simpler sides, while a simply prepared chop can handle more complex accompaniments. Don’t be afraid to mix and match these suggestions to create your perfect plate!

      Elevate Your Dining Experience with Turkey Chops: A Final Note

      As we’ve explored throughout this comprehensive guide, turkey chops are far more than just a healthy alternative to traditional meats – they’re a versatile, delicious protein that deserves a starring role in your culinary repertoire. From their impressive nutritional profile to their ability to absorb flavors and adapt to various cooking methods, turkey chops offer endless possibilities for creating memorable meals.

      The journey to mastering turkey chop preparation is an exciting one. Armed with the right tools, techniques, and knowledge we’ve shared – from selecting the perfect cuts to achieving that ideal golden crust – you’re now equipped to transform these lean cuts into dishes that will impress both family and guests alike. Remember that the key to perfect turkey chops lies in the details: proper marinating, careful temperature control, and that all-important resting period.

      We’ve discovered how simple ingredients and techniques can elevate turkey chops from ordinary to extraordinary. Whether you’re craving the Mediterranean-inspired version with olive tapenade, the comfort of crispy breaded cutlets, or the sophisticated appeal of herb-infused pan-seared chops, there’s a recipe here to suit every palate and occasion.

      The versatility of turkey chops extends beyond the main dish itself. By thoughtfully pairing them with complementary sides, sauces, and beverages, you can create complete meals that satisfy both nutritional needs and culinary desires. From vibrant roasted vegetables to wholesome grains, each accompaniment adds another layer to your dining experience.

      As you begin experimenting with these recipes and techniques, remember that cooking is a journey of discovery. Don’t be afraid to adjust seasonings, try new flavor combinations, or create your own signature turkey chop dish. With practice, you’ll develop an intuitive understanding of how to consistently prepare juicy, flavorful turkey chops that your friends and family will request time and time again.

      So go ahead – give turkey chops the attention they deserve in your kitchen. Your taste buds, and your health, will thank you for making this lean, versatile protein a regular part of your meal planning. Here’s to creating delicious, nutritious meals that prove healthy eating never has to sacrifice flavor!

      Frequently Asked Questions About Turkey Chops

      Q: How do I know when turkey chops are fully cooked?

      A: Turkey chops are safely cooked when they reach an internal temperature of 165°F (74°C) at the thickest part. Use a meat thermometer for accuracy. The meat should be white throughout with no pink areas. Cooking time typically ranges from 4-6 minutes per side, depending on thickness.

      Q: Can I freeze turkey chops, and how long do they last?

      A: Yes, you can freeze turkey chops! When properly wrapped in freezer paper or sealed in freezer bags with air removed, they can last up to 6 months in the freezer. In the refrigerator, fresh turkey chops will keep for 1-2 days. Always label packages with the date of freezing.

      Q: Why do my turkey chops sometimes turn out dry?

      A: Turkey chops can become dry due to overcooking or not using proper moisture-retention techniques. To prevent this:

      • Brine or marinate before cooking
      • Don’t cook beyond 165°F internal temperature
      • Let them rest for 5-10 minutes after cooking
      • Use a meat thermometer to avoid overcooking

      Q: Are turkey chops healthier than chicken breasts?

      A: Turkey chops are comparable to chicken breasts in terms of nutrition. They’re both excellent sources of lean protein with similar calorie counts. Turkey chops contain about 26 grams of protein per 4-ounce serving, with slightly less fat than chicken. They’re also rich in B vitamins and minerals like selenium and zinc.

      Q: Can I substitute turkey chops for chicken in recipes?

      A: Yes! Turkey chops work well as a substitute for chicken in most recipes. Just keep in mind that turkey might cook slightly faster due to its lean nature. Adjust cooking times accordingly and use a meat thermometer to ensure proper doneness.

      Q: What’s the best way to thaw frozen turkey chops?

      A: The safest method is to thaw turkey chops in the refrigerator. Place them on a plate or in a container to catch any drips and allow 24 hours for thawing. For faster thawing, place sealed packages in cold water, changing the water every 30 minutes. Never thaw at room temperature.

      Q: How thick should turkey chops be for optimal cooking?

      A: The ideal thickness for turkey chops is about ¾ to 1 inch. This allows them to cook evenly while staying juicy. If your chops are thicker, you can pound them to an even thickness using a meat mallet. This also helps them cook more uniformly.

      Q: What’s the best way to season turkey chops?

      A: Turkey chops take well to many seasonings. A basic blend includes:

      • Salt and black pepper
      • Garlic powder or fresh garlic
      • Dried herbs like thyme, rosemary, or sage
      • Paprika for color Season generously since turkey can be mild in flavor.

      Q: Can I grill turkey chops in winter?

      A: Absolutely! If outdoor grilling isn’t possible, use a grill pan on your stovetop. You’ll get similar grill marks and flavor. Alternatively, you can broil them in the oven, placing them 4-6 inches from the heat source.

      Q: How do I prevent turkey chops from sticking to the pan?

      A: To prevent sticking:

      • Make sure your pan is heated properly before you add the meat
      • Pat the chops dry before cooking
      • Use enough oil or cooking spray
      • Don’t flip the meat until it releases easily from the pan
      • Consider using a non-stick or well-seasoned cast-iron pan

      Q: What’s the best way to store leftover cooked turkey chops?

      A: Store cooled, cooked turkey chops in an airtight container in the refrigerator for up to 3-4 days. To reheat, use gentle heat to prevent drying out. You can add a splash of broth or water when reheating to maintain moisture.

      Q: Can I make turkey chops in an air fryer?

      A: Yes! Air fryers work great for turkey chops. Preheat to 375°F, cook for about 5-7 minutes per side, or until they reach 165°F internally. Spray or brush with oil before cooking for better browning.

    3. How to Make the Perfect Cali Burrito at Home

      How to Make the Perfect Cali Burrito at Home

      How to Make the Perfect Cali Burrito at Home

      Are you ready to embark on a flavor journey that embodies the spirit of California? Look no further than the legendary Cali burrito. This culinary delight has captured the hearts and taste buds of countless food lovers. In this guide, we’ll delve into the rich history and key ingredients of the California-style burrito wrap. We’ll also provide you with a step-by-step process to create one in your own kitchen. Whether you’re a California native or simply a food enthusiast, prepare yourself for an exciting culinary adventure.

      What Makes a Cali Burrito Unique

      The Cali Burrito, also affectionately known as the California-style burrito, is a true culinary masterpiece that sets itself apart from your average Mexican burrito. Born from the vibrant food scene of San Diego, this burrito has become a local legend.

      The San Diego Origins Story

      Back in the 1990s, the culinary minds of San Diego’s chefs and taco shop owners began experimenting with new flavor combinations. One groundbreaking innovation was the introduction of french fries as a key ingredient, a move that truly elevated the burrito to iconic status.

      Essential Ingredients for the Perfect Cali Burrito

      • Flour Tortilla: A soft and pliable tortilla is essential for holding all the deliciousness inside.
      • Carne Asada: Tender, marinated steak grilled to perfection provides the savory heart of the burrito.
      • Guacamole: Creamy and flavorful guacamole adds a touch of richness and a vibrant green hue.
      • Pico de Gallo: A fresh salsa bursting with diced tomatoes, onions, and cilantro brings a zesty kick.
      • Sour Cream: A dollop of sour cream offers a cool, tangy contrast to the bolder flavors.
      • French Fries: The star of the show! Crispy and salty, the french fries add a unique texture and flavor dimension that makes the Cali burrito truly special.

      This incredible combination of steak, vibrant vegetables, and crispy french fries results in a truly satisfying and unforgettable dining experience.

      Essential Ingredients for Your Perfect Cali Burrito

      Crafting a truly exceptional Cali burrito demands the finest ingredients. You want fresh, high-quality produce to ensure the best flavor and texture in every bite. Let’s dive into the key components that make a loaded burrito, or as some call it, a burrito supreme, truly special.

      The protein is the heart and soul of any great Cali burrito. Carne asada (grilled steak) and pollo asado (grilled chicken) are classic choices that never disappoint. For a taste of Mexico, consider al pastor (marinated pork) or carnitas (braised pork).

      Next, we need to add a vibrant crunch. Fresh veggies are a must! Romaine lettuce, juicy tomatoes, and crisp onions provide the perfect textural contrast. And let’s not forget the creamy, dreamy guacamole – it’s an absolute essential.

      To finish it off, we need a touch of melty goodness. Shredded cheese, such as cheddar or Monterey Jack, adds a satisfying richness. A dollop of cool sour cream rounds out the flavor profile perfectly.

      Remember, the quality of your ingredients directly impacts the final taste. Choose fresh, high-quality produce and meats to elevate your Cali burrito to new heights of deliciousness.

      The Art of Burrito Assembly

      Crafting the perfect burrito – be it a deluxe, stuffed, or supreme – is more than just throwing ingredients into a tortilla. It’s a culinary art form that requires a delicate balance of technique and intuition. From warming the tortilla to the strategic layering of ingredients, mastering the art of burrito assembly will elevate your culinary game.

      Tortilla Triumph: Mastering the Warm-Up

      The tortilla serves as the foundation of our culinary masterpiece. A properly warmed tortilla is crucial for achieving optimal burrito bliss. It should be supple yet sturdy, capable of embracing the generous filling without tearing.

      • Heat Source Selection: Begin by heating a skillet or griddle over medium heat.
      • Gentle Toasting: Gently place the tortilla on the hot surface and allow it to warm for approximately 30 seconds to 1 minute, flipping it occasionally to ensure even heating.
      • The Perfect Texture: The ideal tortilla will be pliable and slightly toasted, ready to receive its flavorful payload.

      Layering for Flavor Symphony: A Strategic Approach

      The true magic of a great burrito lies in the harmonious interplay of flavors and textures.

      • Protein Power: Begin by placing a generous portion of your chosen protein – be it carne asada, pollo asado, or your favorite vegetarian option – at the heart of the tortilla.
      • A Circle of Flavor: Arrange the remaining ingredients in concentric circles around the protein, ensuring a balanced distribution of flavors and textures.
      • The Goldilocks Principle: Aim for a balanced filling. Too much, and your burrito will be unwieldy; too little, and you’ll be left wanting more.

      The Art of the Wrap: A Masterclass in Burrito Construction

      Wrapping a burrito may seem simple, but it’s a skill that requires finesse.

      • Fold and Conquer: Begin by folding the bottom of the tortilla over the filling to create a secure base.
      • Tuck and Roll: Carefully tuck in the sides to create a tight, even package.
      • The Final Roll: Roll the burrito tightly and evenly, ensuring all the ingredients remain securely contained within.
      • A Touch of Elegance: For added security and to prevent any mishaps, wrap the finished burrito in foil or parchment paper.

      By mastering these techniques, you’ll be well on your way to crafting burrito masterpieces that are not only visually stunning but also an absolute delight to savor.

      Exploring the Regional Variations of the California Burrito

      The California burrito, born in the vibrant culinary landscape of San Diego, has since undergone a fascinating evolution, spawning a diverse array of regional interpretations across the Golden State. One notable variation is the Mission burrito, a culinary sensation that has captivated the hearts (and stomachs) of San Franciscans.

      Named after the city’s historic Mission District, this behemoth of a burrito boasts a significantly larger tortilla and a more substantial filling than its San Diego counterpart. Carne asada remains a cornerstone, but the Mission burrito also incorporates a generous helping of beans, cheese, rice, salsa, and often, a dollop of creamy guacamole.

      The culinary creativity doesn’t stop there. In Los Angeles, the California burrito embraces a more diverse range of protein options, with carnitas and al pastor making frequent appearances. Meanwhile, in the Central Valley, the burrito takes on a heartier character, incorporating roasted chiles and potatoes for a truly satisfying and soul-warming experience.

      A Regional Breakdown:

      • San Diego: Carne asada, french fries, cheese, pico de gallo
      • San Francisco (Mission Burrito): Larger tortilla, packed-in filling (carne asada, beans, cheese, rice, salsa, guacamole)
      • Los Angeles: Diverse protein options (carnitas, al pastor)
      • Central Valley: Roasted chiles, potatoes

      These regional variations not only demonstrate the remarkable adaptability of the California burrito but also serve as a testament to the rich and diverse culinary tapestry that has woven its way across the Golden State.

      Conclusion

      The California burrito, a culinary icon born in the vibrant food scene of San Diego, has captured the hearts and taste buds of food enthusiasts across the nation. This iconic dish, with its unique blend of flavors and textures, has undeniably earned its place among America’s culinary treasures.

      Now, you have the power to recreate this culinary masterpiece in your own kitchen. Feel free to embrace the classic California burrito recipe, or unleash your inner culinary artist and experiment with your own unique twists and flavor combinations.

      Remember, the key to burrito bliss lies in the quality of your ingredients. Choose fresh, high-quality produce and meats to ensure an explosion of flavor in every bite. So, gather your ingredients, master the art of tortilla warming, and let your creativity flow. With a little practice and a touch of culinary flair, you’ll be crafting California-style burritos that will transport you straight to the Golden State.

      Frequently Asked Questions:

      What exactly is a California Burrito?

      The California Burrito, a culinary icon born in Southern California, particularly in the vibrant food scene of San Diego, represents a delightful fusion of traditional Mexican flavors with distinctly Californian sensibilities. This unique combination results in a truly satisfying and flavorful meal.

      What are the essential ingredients that make a Cali Burrito?

      At the heart of every authentic California Burrito lies a harmonious blend of key ingredients:

      • Carne Asada: Tender, grilled steak provides the savory foundation.  
      • French Fries: A quintessential Californian addition, the crispy fries add a unique textural dimension.  
      • Guacamole: Creamy and flavorful guacamole adds a touch of richness and a vibrant green hue.
      • Cheese: Melty cheese adds a touch of decadence and binds the flavors together.
      • Sour Cream: A dollop of sour cream offers a cool, tangy contrast to the bolder flavors.

      While not always included, rice and beans can often be found adding further depth and complexity to the flavor profile. These ingredients, expertly wrapped in a large flour tortilla, distinguish the California Burrito from its more traditional Mexican counterparts.

      How did this culinary masterpiece come to be?

      The California Burrito emerged from the creative culinary minds of San Diego, a region renowned for its vibrant food scene. The ingenious addition of french fries, a beloved Californian staple, proved to be a game-changer, elevating the burrito to iconic status. This innovative fusion of Mexican and Californian flavors defines the essence of the California Burrito.  

      What sets the California Burrito apart from other burritos?

      The California Burrito boasts several distinctive characteristics that set it apart:

      • The Influence of California: The inclusion of ingredients like french fries and guacamole reflects the unique culinary landscape of California.
      • The Grandeur of the Tortilla: A larger flour tortilla is employed to accommodate the generous filling.
      • The Reign of Carne Asada: Grilled steak often takes center stage, providing a robust and flavorful foundation.  

      These unique features collectively contribute to the distinctive identity of the California Burrito.

      How can I assemble the perfect California Burrito at home?

      Crafting the perfect California Burrito at home is a rewarding culinary endeavor.

      1. Start with a Strong Foundation: Begin with a large, warm flour tortilla.
      2. Layer with Precision: Layering is key! Strategically arrange your ingredients, starting with carne asada, followed by french fries, guacamole, cheese, and sour cream.
      3. The Art of the Wrap: Carefully wrap the burrito, ensuring all the ingredients are securely contained within.

      Are there regional variations to explore?

      Indeed! As the California Burrito has gained popularity, regional variations have emerged throughout the Golden State. While the core ingredients often remain consistent, local chefs and food enthusiasts have introduced their own unique twists. These variations may include the addition of different meats, an abundance of fresh vegetables, or the incorporation of local flavors and ingredients.

    4. Marry Me Chicken Pasta: A Love Story in Every Bite

      Marry Me Chicken Pasta: A Love Story in Every Bite

      Marry Me Chicken Pasta

      Looking for a show-stopping pasta dish that combines restaurant-quality elegance with home-cooked comfort? Enter the legendary Marry Me Chicken Pasta – a dish so irresistible, it’s said to inspire proposals at first bite.

      This modern Italian-American favorite transforms humble ingredients into culinary magic. Picture this: succulent pieces of chicken nestled in a silky sauce that coats each strand of pasta perfectly. Sun-dried tomatoes add bursts of intense flavor, while fresh herbs and garlic create an aromatic base that fills your kitchen with an inviting warmth.

      What sets this dish apart is its perfect balance of indulgence and simplicity. The cream sauce achieves restaurant-level richness while remaining surprisingly easy to master at home. Whether you’re planning a romantic date night, hosting a special family dinner, or simply craving something extraordinary, this recipe delivers a memorable dining experience.

      The name “Marry Me Chicken” originated from its reputation for being so delicious that it could prompt a marriage proposal. While we can’t guarantee a ring, we can promise that this elevated pasta dish will earn a permanent spot in your recipe collection.

      The Perfect Ingredients: Building Your Marry Me Chicken Pasta

      Every exceptional dish begins with carefully selected ingredients, and Marry Me Chicken Pasta is no exception. Let’s explore the essential components that create this crowd-pleasing recipe’s signature flavor profile.

      The Star Players

      At the heart of this dish lies perfectly seasoned chicken breast, chosen for its lean texture and ability to stay tender while soaking up the rich sauce. While boneless, skinless breasts are traditional, you can also use chicken thighs for an even juicier result.

      The sauce builds its distinctive character from a harmonious blend of ingredients. Sun-dried tomatoes bring an intense, sweet-tart flavor that cuts through the richness, while fresh garlic provides an aromatic foundation that infuses the entire dish.

      Creating the Signature Sauce

      The luxurious sauce that makes this dish famous relies on two key ingredients: heavy cream and authentic Parmesan cheese. The heavy cream creates the sauce’s silky base, while freshly grated Parmesan (preferably Parmigiano-Reggiano) adds a complex, umami-rich flavor that store-bought pre-grated cheese simply can’t match.

      Choosing Your Pasta

      While this versatile sauce works with many pasta shapes, medium-sized varieties like penne, rigatoni, or fusilli are ideal. These shapes feature ridges and curves that capture the creamy sauce in every bite. For a more traditional presentation, long pasta like fettuccine or linguine creates an elegant dining experience.

      Pro tip: For best results, always opt for high-quality, Italian-made pasta. Its superior texture and ability to cook to perfect al dente makes a noticeable difference in the final dish.

      Remember, the quality of your ingredients directly impacts the final result. While this dish is remarkably forgiving, using fresh, high-quality components will elevate it from delicious to truly memorable.

      Kitchen Equipment: Setting Up for Success

      Before diving into this crowd-pleasing recipe, let’s ensure your kitchen is properly equipped. The right tools can transform your cooking experience from good to exceptional, making the process smoother and more enjoyable.

      Essential Equipment

      Your Primary Cooking Vessels

      The cornerstone of this recipe is a high-quality, large skillet or sauté pan. Look for one that’s at least 12 inches in diameter with deep sides. A heavy-bottomed pan, particularly stainless steel or cast iron, provides even heat distribution and prevents the cream sauce from scorching.

      For pasta preparation, invest in a generously sized pot with a capacity of at least 6 quarts. This ensures your pasta has plenty of room to move freely while cooking, preventing clumping and ensuring even cooking.

      Critical Utensils

      A well-crafted wooden spoon isn’t just tradition – it’s practical science. Wood won’t scratch your cookware, and it’s perfect for deglazing and incorporating those flavorful browned bits from the pan bottom. Keep a sharp chef’s knife in your arsenal for precise, safe cutting that preserves the chicken’s texture.

      Helpful Additions

      While not essential, certain tools can elevate your cooking experience:

      For Enhanced Flavor Development

      A garlic press streamlines prep work and releases more oils from the garlic, intensifying the flavor profile. Consider a microplane grater for fresh Parmesan – freshly grated cheese melts more smoothly into the sauce.

      For Precision and Consistency

      Digital kitchen scales and quality measuring tools ensure recipe accuracy. Remember, in cooking like this, small variations in measurements can significantly impact the sauce’s final texture.

      For Sauce Perfection

      A silicone-coated whisk helps achieve that silky-smooth sauce texture without scratching your cookware. If you’re aiming for ultra-smooth results, an immersion blender can transform your sauce into restaurant-quality perfection.

      Pro Tip: Before starting, arrange your tools and equipment in an organized workspace. This “mise en place” approach makes the cooking process more efficient and enjoyable, allowing you to focus on perfecting each step of this memorable dish.

      Marry Me Chicken Pasta: Recipe Overview and Timeline

      Transform your kitchen into a gourmet restaurant with this swoon-worthy Marry Me Chicken Pasta. This show-stopping dish combines Italian-inspired flavors with modern comfort food appeal, creating an experience that’s both elegant and deeply satisfying.

      Quick Facts

      Prep Time: 15 minutes Cook Time: 30 minutes Total Time: 45 minutes Servings: 4-6 people Difficulty Level: Intermediate Perfect For: Date nights, family dinners, special occasions

      Recipe Roadmap

      The magic of this dish unfolds in three key stages:

      First, we’ll focus on achieving perfectly seared chicken with a golden-brown crust that seals in moisture while developing deep flavor. This critical step creates the foundation for the entire dish.

      Next comes the signature sauce – a velvety blend that transforms simple ingredients into something extraordinary. The careful layering of garlic, Parmesan, and carefully selected spices creates a sauce that’s rich without being heavy.

      Finally, we’ll bring everything together, combining al dente pasta with our chicken and sauce. This final stage is where the dish develops its characteristic silky texture and integrated flavors.

      Pro Tip: While this recipe is straightforward enough for home cooks of any skill level, the key to restaurant-quality results lies in timing. Having all ingredients prepped before starting (mise en place) will help you nail each step perfectly.

      Detailed Instructions: Crafting the Perfect Marry Me Chicken Pasta

      Phase 1: Preparing the Chicken

      Start by transforming ordinary chicken breasts into something extraordinary:

      1. Pat the chicken breasts dry with paper towels to achieve better browning.
      2. Season generously with:
        • Kosher salt
        • Freshly ground black pepper
        • Italian herbs (basil, oregano, thyme)
        • Optional: garlic powder

      Heat your skillet over medium-high heat until it’s properly hot. Add olive oil and sear the chicken for 5-6 minutes per side until golden brown and cooked through (165°F internal temperature). Transfer to a cutting board, let rest for 5 minutes, then slice into diagonal strips.

      Phase 2: Creating the Signature Sauce

      The sauce is where this dish truly shines. In your still-hot skillet:

      1. Lower heat to medium and add butter
      2. Sauté minced garlic and shallots until fragrant (about 1 minute)
      3. Deglaze with white wine or chicken stock, scraping up those flavorful browned bits
      4. Pour in heavy cream
      5. Add freshly grated Parmesan
      6. Season with:
        • Red pepper flakes
        • Sun-dried tomatoes
        • Fresh basil
        • Salt and pepper to taste

      Simmer until the sauce coats the back of a spoon (about 5-7 minutes).

      Phase 3: Bringing It All Together

      Perfect pasta integration requires attention to detail:

      1. Cook pasta in well-salted water until just al dente (1 minute less than package directions)
      2. Reserve 1 cup of pasta water before draining
      3. Add pasta directly to the sauce
      4. Toss gently, adding pasta water as needed for desired consistency
      5. Fold in sliced chicken
      6. Let everything mingle for 1-2 minutes

      Pro Tip: For the perfect finish, add a handful of fresh basil and an extra sprinkle of Parmesan just before serving. The residual heat will release the basil’s aromatic oils and melt the cheese just right.

      Remember: The key to this dish’s success lies in timing. Try to have your pasta ready just as the sauce reaches the perfect consistency. This ensures everything comes together at its peak.

      Mastering the Signature Sauce: Pro Tips for Creamy Perfection

      The heart of Marry Me Chicken Pasta lies in its luxurious sauce. Here’s your guide to achieving that perfect, restaurant-quality consistency every time.

      The Art of Simmering

      Patience transforms good sauce into great sauce. Maintain a gentle simmer – you should see occasional small bubbles, not a rolling boil. This slow cooking process allows flavors to develop fully while preventing the cream from breaking.

      Cream Integration Technique

      Temperature control is crucial when working with dairy. Start by tempering your heavy cream:

      • Let it come to room temperature before using
      • Add it gradually while whisking constantly
      • Keep heat at medium-low during incorporation
      • Look for steam, not bubbles, as your heat indicator

      Cheese Selection and Treatment

      Your choice and handling of Parmesan makes a significant difference:

      • Use freshly grated Parmigiano-Reggiano
      • Grate it finely just before adding
      • Incorporate it gradually off the heat
      • Reserve some for finishing the dish

      Fine-Tuning Your Sauce

      The perfect sauce needs balance. Here’s how to achieve it:

      • Start with less seasoning than you think – you can always add more
      • Use the pasta cooking water’s starch to adjust consistency
      • Taste and adjust seasoning only after the cheese has been incorporated
      • Keep in mind that the sauce will thicken a bit as it cools down.

      Pro Tip: Keep a close eye on sauce consistency – it should coat the back of a spoon and leave a clean line when you run your finger through it. This “nappe” consistency ensures the sauce will cling perfectly to both pasta and chicken.

      These techniques may take practice, but mastering them will elevate this dish from memorable to unforgettable.

      Creative Variations to Make It Your Own

      Dietary Adaptations

      Transform this beloved dish to fit any dietary preference without sacrificing flavor:

      For Gluten-Free Options:

      • Substitute traditional pasta with quinoa pasta, chickpea pasta, or zucchini noodles
      • Ensure all seasonings and ingredients are certified gluten-free
      • Consider rice-based pasta for the closest texture to traditional pasta

      For Plant-Based Options:

      • Replace chicken with portobello mushrooms or crispy tofu
      • Create meaty texture with cauliflower steaks or seitan
      • Enhance umami with nutritional yeast and mushroom powder

      For Dairy-Free Needs:

      • Use cashew cream sauce (blend soaked cashews with vegetable broth)
      • Incorporate coconut cream for richness
      • Add nutritional yeast for cheesy flavor

      Storage and Reheating Tips

      To maintain the dish’s creamy texture:

      1. Storage:
        • Keep in airtight container
        • Refrigerate up to 3 days
        • Store sauce separately from pasta if possible
      2. Reheating:
        • Add splash of cream or broth
        • Heat gently over medium-low
        • Stir frequently to prevent separation

      Perfect Pairings

      Wine Selections

      • Chardonnay: Complements the creamy sauce
      • Pinot Grigio: Offers bright contrast
      • Verdicchio: Balances richness with acidity

      Side Dishes

      • Garlic-roasted broccolini
      • Light arugula salad with lemon vinaigrette
      • Crusty artisan bread for sauce-soaking

      This viral sensation began as a simple chicken dish that gained fame for its “proposal-worthy” taste. The pasta version emerged as home cooks evolved the recipe, adding their own twists while maintaining the core elements that made the original so special. This dish is incredibly forgiving and adaptable. Don’t be afraid to experiment with different herbs, spices, or protein alternatives to make it your own signature version.

      FAQs about Creamy Marry Me Chicken Pasta

      What’s the story behind “Marry Me Chicken Pasta”?

      The “Marry Me Chicken Pasta” recipe has a romantic origin! It evolved from the popular “Marry Me Chicken” dish, which gained fame on social media and food blogs for its irresistible flavor. The name perfectly captures its ability to impress, making it ideal for romantic dinners. This creamy pasta version takes the classic dish to new heights.

      What are the essential ingredients for this delicious pasta?

      To create the perfect Marry Me Chicken Pasta, you’ll need these key ingredients:

      • Chicken breasts: The base of the dish is boneless, skinless chicken breast:
      • Sun-dried tomatoes: Add a burst of savory flavor and vibrant color.
      • Garlic: Adds a strong, fragrant foundation for the sauce.
      • Heavy cream: Creates the signature rich, creamy texture.
      • Parmesan cheese: Adds a nutty, sharp flavor and helps thicken the sauce.
      • Pasta of your choice: Choose your favorite type of pasta for the perfect bite.

      What kitchen equipment do I need?

      You’ll primarily need:

      • A large skillet or sauté pan: essential for cooking the chicken and simmering the sauce.
      • A pasta pot: To cook the pasta to al dente perfection.
      • A wooden spoon: For stirring and combining ingredients.

      Optional tools like a garlic press and an immersion blender can help streamline the process.

      How long does it take to make?

      This recipe is a lifesaver on busy weeknights! It typically takes around 30-40 minutes to prepare, making it a quick and easy option for a delicious meal.

      What are the key steps to follow?

      Follow these simple steps for guaranteed success:

      1. Season and cook the chicken breasts: Start by seasoning the chicken and cooking it to perfection.
      2. Create the creamy sauce: Combine sun-dried tomatoes, garlic, heavy cream, and Parmesan cheese to create the luscious sauce.
      3. Toss and enjoy: Combine the cooked pasta with the flavorful chicken and creamy sauce.

      How can I achieve the perfect creamy sauce?

      For a truly indulgent sauce:

      • Use high-quality ingredients: Opt for heavy cream or half-and-half for the richest texture.
      • Adjust the consistency: Add more cream or a little pasta water to achieve your desired thickness.
      • Grate your cheese: Finely grate Parmesan cheese for smoother melting and a more even distribution.
      • Season to perfection: Season the sauce generously with salt, pepper, and your favorite herbs or spices to balance the flavors.

      What wine and side dishes pair best?

      A crisp, medium-bodied white wine like Chardonnay or Pinot Grigio complements the richness of the sauce beautifully.

      For side dishes, consider:

      • Garlic bread: A timeless favorite that perfectly absorbs the tasty sauce.
      • A fresh, light salad: Provides a refreshing contrast to the creamy pasta.

      How should I store and reheat leftovers?

      Store leftover pasta in an airtight container in the refrigerator for 3-4 days. To reheat, add a splash of milk or cream to prevent drying out and gently warm over low heat.

      Can I make any variations or substitutions?

      Absolutely! This recipe is easily adaptable:

      • Gluten-free: Use gluten-free pasta for a delicious and allergy-friendly option.
      • Vegetarian: Substitute chicken with tofu, mushrooms, or your favorite plant-based protein.
      • Dairy-free: Replace heavy cream with unsweetened almond milk or coconut milk for a creamy and dairy-free alternative.
    5. Unique Baked Chicken Cutlets Recipes You’ll Love

      Unique Baked Chicken Cutlets Recipes You’ll Love

      Baked Chicken Cutlets Recipes

      Finding quick and tasty dinner ideas can be a challenge, but I’m here to help! These are great Baked Chicken Cutlets Recipes that will definitely spice up your weeknight cooking. There are regular mozzarella coated dishes which one can find delicious as well as Parmesan encrusted, gluten-less almond dishes.

      Chicken cutlets that are baked make for quite a good choice since they are healthy this comes with other delicious varieties such as crispy panko or the Mediterranean herbs. The juiciness of the chicken coupled with the crunchy crust is described in each recipe. Prepare for some new addictions to dinner menus!

      Discover this selection of mouthwatering baked chicken cutlets recipes. You’ll uncover exciting flavors that will delight your taste buds. Have fun preparing a homemade dish that’s both nutritious and delicious.

      Unlocking the Secrets to Perfect Baked Chicken Cutlets

      Creating succulent and crispy baked chicken cutlets requires a combination of the right tools, high-quality ingredients, and a touch of culinary expertise. This guide will equip you with the essential knowledge to achieve restaurant-quality results in your own kitchen.

      Essential Kitchen Arsenal:

      To embark on your baked chicken cutlet journey, gather these key tools:

      • Baking Sheet or Rimmed Baking Pan: Ensures even heat distribution for consistent cooking.
      • Wire Rack or Parchment Paper: Promotes air circulation, preventing soggy bottoms and enhancing crispiness.
      • Meat Tenderizer or Rolling Pin: Creates uniformly thin cutlets for even cooking and faster preparation.
      • Tongs or Spatula: Facilitates gentle handling of the delicate chicken cutlets.

      Selecting the Finest Ingredients:

      Opt for chicken breasts that are approximately 1/2 to 3/4 inch thick for optimal cooking results. Prioritize organic, free-range chicken for superior flavor and texture.

      Mastering the Cooking Technique:

      To achieve a delectable crispy coating on your baked chicken cutlets, adhere to these guidelines:

      • Preheat your oven to 400°F (200°C). This ensures a rapid and even cooking process.
      • Bake the chicken cutlets for 18-22 minutes, flipping halfway through. This guarantees thorough cooking and even browning.
      • For extra crispiness, broil the chicken for the final 2-3 minutes. Monitor closely to prevent burning.

      By employing the appropriate tools, selecting premium ingredients, and mastering these cooking techniques, you’ll be well on your way to crafting exceptional oven-baked chicken cutlets with a tantalizing crispy coating.

      Indulge in Classic Italian-Style Parmesan Crusted Chicken Cutlets

      Craving a simple yet elegant chicken dinner? These Italian-inspired Parmesan crusted chicken cutlets deliver a burst of flavor with a crispy, golden-brown coating. This recipe is perfect for a quick weeknight meal or a more special occasion.

      The secret to this dish lies in the irresistible combination of Parmesan cheese, breadcrumbs, and aromatic seasonings. This simple yet flavorful coating transforms ordinary chicken into an extraordinary culinary experience.

      Ingredients:

      • Simple and readily available. You’ll find most of the ingredients right in your pantry.
      • Minimal effort, maximum reward. Minimal preparation time yields incredibly flavorful results.

      Cooking Instructions:

      1. Preheat your oven to 400°F (200°C). This ensures optimal cooking and a perfectly golden crust.
      2. Create the Flavorful Coating: In a shallow bowl, combine grated Parmesan cheese, breadcrumbs, garlic powder, Italian seasoning, and a pinch of salt and pepper.
      3. Coat the Chicken: Dip each chicken cutlet into the Parmesan mixture, gently pressing to ensure the coating adheres evenly.
      4. Bake to Perfection: Arrange the coated cutlets on a baking sheet lined with parchment paper or a silicone baking mat. Bake for 18-22 minutes, or until the chicken is cooked through and the coating is golden and crispy.
      5. Serve and Enjoy: Serve hot and relish the delightful combination of tender, juicy chicken and a crispy, Parmesan-crusted exterior.

      Pairings and Presentation:

      Complement these delectable chicken cutlets with your favorite side dishes, such as roasted vegetables, a vibrant salad, or a side of pasta.

      Gluten-Free Delight: Almond-Crusted Chicken Cutlets

      For a flavorful and gluten-free twist on classic chicken cutlets, try this almond-crusted recipe. This recipe replaces traditional breadcrumbs with almond flour, resulting in a crispy, nutritious, and naturally gluten-free coating.

      Almond Flour Coating Tips:

      • Select Fine-Ground Almond Flour: Opt for finely ground almond flour for a smooth and consistent coating.
      • Infuse Flavor: Season the almond flour with your favorite spices, such as garlic powder, paprika, or a blend of herbs.
      • Even Coating: Ensure the chicken cutlets are evenly coated in the almond flour mixture for optimal flavor and crispiness.
      • Enhance Crispiness: For extra crispiness, lightly spray the coated cutlets with cooking oil before baking.

      Seasoning Variations:

      Try out various seasonings to develop distinct flavor profiles.

      • Italian-Inspired: Combine Parmesan cheese, dried oregano, and garlic powder for a classic Italian touch.
      • Southwestern Spice: Infuse the almond flour with chili powder, cumin, and a hint of cayenne pepper for a touch of heat.
      • Lemon-Herb: Add zesty lemon zest, dried thyme, and rosemary for a bright and refreshing flavor.

      Serving Suggestions:

      These gluten-free chicken cutlets pair perfectly with a variety of side dishes:

      • Crisp Green Salad: Enhance the dish with a light and refreshing green salad tossed with a vinaigrette.
      • Roasted Vegetables: Serve alongside roasted sweet potato wedges, zucchini noodles, or other seasonal vegetables.
      • Steamed Veggies: Complement the chicken with a side of steamed broccoli, asparagus, or green beans.

      Enjoy the delightful combination of crispy texture and nutty flavor that these gluten-free chicken cutlets offer. They provide a healthy and satisfying meal option for everyone to enjoy.

      Elevate Weeknights with Crispy Panko-Crusted Baked Chicken Cutlets

      Craving the satisfying crunch of fried chicken without the guilt? These crispy panko-crusted baked chicken cutlets offer a healthier and equally delicious alternative. This recipe is a surefire hit with the whole family.

      The Panko Advantage:

      Panko breadcrumbs are the key to achieving an irresistibly crispy coating. Their light and airy texture creates a delightfully crunchy exterior while keeping the chicken moist and juicy on the inside.

      Preparation Steps:

      • Start with Quality Chicken: Use boneless, skinless chicken cutlets or thinly sliced chicken breasts for optimal results.
      • Create the Breading Station: Set up a breading station with panko breadcrumbs, Parmesan cheese, and your favorite seasonings.
      • Double-Dip for Maximum Crunch: Dip the chicken cutlets in beaten egg, then coat them thoroughly in the panko mixture.
      • Maximize Crispiness: Place the coated cutlets on a wire rack set over a baking sheet. This allows for maximum air circulation, resulting in a perfectly crispy exterior.
      • Bake to Perfection: Bake at a high temperature for 15-20 minutes, flipping halfway through, to ensure the chicken is cooked through and the coating is golden brown.

      Serving Suggestions:

      Serve these oven-baked chicken cutlets with your favorite side dishes:

      • Roasted Vegetables: Pair them with roasted vegetables for a wholesome and flavorful meal.
      • Fresh Salads: Complement the richness of the chicken with a refreshing green salad.
      • Fluffy Mashed Potatoes: Create a comforting and satisfying meal by serving the chicken with fluffy mashed potatoes.

      Enjoy Guilt-Free Goodness:

      This panko-crusted baked chicken cutlet recipe is a true weeknight lifesaver. It delivers the irresistible crunch of fried chicken with the convenience and health benefits of baking. Enjoy the delicious flavors and the satisfaction of knowing you’re making a healthy choice for your family.

      Mediterranean Herb-Coated Chicken Cutlets: A Flavorful Journey

      Transport your taste buds to the sun-drenched shores of the Mediterranean with these vibrant herb-coated chicken cutlets. This recipe showcases a delightful blend of aromatic herbs and spices, creating a truly unforgettable flavor experience. Whether you’re seeking a healthy weeknight dinner or a flavorful meal prep option, these Mediterranean-inspired cutlets are sure to impress.

      Fresh vs. Dried Herbs: A Culinary Guide

      Choosing between fresh and dried herbs can significantly impact the flavor profile of your Mediterranean chicken cutlets.

      • Fresh Herbs: Offer a vibrant and delicate flavor. Add fresh herbs like parsley, oregano, and basil towards the end of cooking to preserve their delicate aromas.
      • Dried Herbs: They offer a more intense flavor. You can add dried herbs earlier in the cooking process to let their flavors thoroughly infuse into the chicken.

      Mediterranean Spice Blend Recipe:

      Create a flavorful Mediterranean spice blend to elevate your chicken cutlets:

      • Ingredients:
        • 2 teaspoons dried oregano
        • 1 teaspoon dried basil
        • 1 teaspoon garlic powder
        • 1 teaspoon onion powder
        • 1/2 teaspoon ground cumin
        • 1/2 teaspoon paprika
        • 1/4 teaspoon ground coriander
        • 1/4 teaspoon cayenne pepper (optional for a touch of heat)
      • Instructions: Combine all the ingredients in a small bowl and mix them thoroughly.

      Use this aromatic blend to season your chicken cutlets before baking for a truly authentic Mediterranean flavor experience.

      Baked Chicken Cutlets: A Meal Prep Powerhouse

      Incorporating meal prep chicken dishes into your weekly routine can significantly simplify busy weeknights. Baked chicken cutlets are an ideal candidate for meal prep, offering a versatile and convenient protein source for easy and healthy dinners throughout the week. This section will guide you on storing, reheating, and batch cooking these delicious cutlets.

      Storage and Reheating Tips:

      Proper storage is crucial for maintaining the flavor and quality of your cooked chicken cutlets:

      • Cooling Down: Allow the cooked cutlets to cool completely before transferring them to airtight containers.
      • Refrigerator Storage: Store cooked chicken cutlets in the refrigerator for up to 3-4 days.
      • Freezer Storage: For longer-term storage, freeze cooked chicken cutlets in airtight containers for up to 2-3 months.
      • Reheating: Reheat gently in the oven at 350°F for 10-15 minutes, or use short bursts in the microwave, checking frequently to prevent overcooking.

      Batch Cooking Guidelines:

      Batch cooking chicken cutlets is an efficient way to maximize your time and ensure a ready supply of protein for quick and easy meals:

      1. Preheat and Prepare: Preheat your oven to 400°F and line a large baking sheet with parchment paper.
      2. Arrange the Chicken: Arrange the chicken cutlets in a single layer on the baking sheet, ensuring they don’t overlap.
      3. Bake to Perfection: Bake for 15-20 minutes, or until the internal temperature reaches 165°F.
      4. Cool and Store: Allow the cooked chicken cutlets to cool completely before transferring them to airtight containers for storage.

      Storage Time:

      • Refrigerator (40°F or below): 3-4 days
      • Freezer (0°F or below): 2-3 months

      By implementing these storage, reheating, and batch cooking tips, you can effortlessly incorporate delicious and healthy baked chicken cutlets into your meal prep plan, simplifying your weeknight dinners and promoting a healthier lifestyle.

      Fire Up Your Taste Buds with Spicy Buffalo-Style Baked Chicken Cutlets

      Craving the fiery flavor of buffalo wings without the guilt of deep frying? These spicy buffalo-style baked chicken cutlets deliver a satisfying crunch and bold flavor with a healthier twist.

      Achieving the Perfect Buffalo Flavor:

      The key to these delicious cutlets lies in finding the perfect balance of heat and tanginess in the buffalo sauce coating. Bake the chicken to achieve a crispy exterior while maintaining juicy and tender meat on the inside.

      Serving Suggestions:

      Serve these spicy buffalo-style baked chicken cutlets alongside your favorite sides:

      • Fresh Salad: A refreshing green salad provides a cool counterpoint to the spicy chicken.
      • Roasted Vegetables: Roasted vegetables add a touch of sweetness and earthiness to the dish.
      • Creamy Ranch Dressing: Dip the chicken cutlets in creamy ranch dressing for an extra layer of flavor.

      Ingredients:

      • 4 boneless, skinless chicken cutlets
      • 1/2 cup buffalo sauce
      • 1/4 cup breadcrumbs or panko
      • 1 tablespoon olive oil
      • 1 teaspoon garlic powder
      • 1/2 teaspoon paprika
      • Salt and pepper to taste

      Instructions:

      1. Preheat the Oven: Preheat your oven to 400°F (200°C).
      2. Create the Flavorful Coating: In a shallow dish, combine buffalo sauce, breadcrumbs or panko, olive oil, garlic powder, paprika, salt, and pepper.
      3. Coat the Chicken: Dip the chicken cutlets in the buffalo sauce mixture, ensuring they are evenly coated on both sides.
      4. Bake to Perfection: Place the coated cutlets on a baking sheet lined with parchment paper or a silicone mat. Bake for 20 to 25 minutes, or until the chicken is fully cooked and the coating is golden brown and crispy.
      5. Serve and Enjoy: Serve the spicy buffalo-style baked chicken cutlets hot with your preferred sides or dipping sauces.

      Experience Guilt-Free Buffalo Flavor:

      Enjoy the bold flavors of these spicy buffalo-style baked chicken cutlets without the guilt of deep frying. With simple ingredients and quick baking, you can savor the taste of your favorite buffalo wings in a healthier and more convenient way.

      Kid-Friendly Ranch-Seasoned Chicken Cutlets: A Winning Meal

      Baked chicken cutlets offer a delicious and nutritious meal option for the whole family, especially younger children. Adding a touch of ranch seasoning transforms these cutlets into a kid-friendly favorite. This recipe combines the savory flavor of ranch with the tender, crunchy texture of baked chicken, creating a winning dish for even the pickiest eaters.

      Fun Serving Ideas for Children:

      Make these ranch-flavored chicken cutlets even more appealing to kids with these creative serving ideas:

      • Fun Shapes: Use cookie cutters to cut the cooked chicken into fun shapes like stars, dinosaurs, or hearts.
      • Dipping Fun: Offer ranch dressing on the side for dipping, encouraging hands-on participation and making mealtime more enjoyable.
      • Easy-to-Handle: Cut the chicken cutlets into bite-sized strips or nuggets for easier handling by small hands.

      Healthier Ranch Alternatives:

      For a healthier twist on traditional ranch seasoning, consider making your own:

      • Homemade Ranch Seasoning: Combine dried herbs like parsley, chives, and dill with garlic powder, onion powder, and a touch of Greek yogurt or buttermilk. This homemade blend provides a flavorful and healthier alternative to store-bought ranch seasoning.

      By incorporating these kid-friendly serving ideas and healthier ranch options, you can ensure that these baked chicken cutlets are a hit with your little ones. Enjoy the satisfaction of providing your children with a delicious and nutritious meal they’ll love.

      Quick and Easy Weeknight Chicken Cutlets: A Time-Saving Solution

      Tired of spending hours in the kitchen on busy weeknights? Discover how to prepare delicious baked chicken cutlets in a fraction of the time. These simple steps will help you enjoy a flavorful and satisfying easy chicken dinner without compromising on taste or quality.

      Tips for a Speedy Weeknight Meal:

      • Smart Prep: Cut chicken breasts into thin cutlets to reduce cooking time.
      • Quick Coating: Coat the cutlets with seasoned breadcrumbs or flour for a crispy exterior that complements the juicy interior.

      Cooking Instructions:

      1. Preheat and Prepare: Start by preheating your oven to 400°F (200°C) and lining a baking sheet with parchment paper.
      2. Coat the Chicken: Dredge the chicken cutlets in a mixture of breadcrumbs, Parmesan cheese, and your favorite dried herbs and spices (e.g., rosemary, thyme, oregano).
      3. Bake: Place the coated cutlets on the baking sheet and lightly spray with olive oil. Bake for 15-20 minutes, flipping halfway through, until the chicken is cooked through and the breading is golden brown and crispy.

      Completing Your Quick Meal:

      Serve your baked chicken cutlets with a variety of quick and easy side dishes to create a complete and satisfying meal:

      • Fresh Salads: A refreshing green salad adds a healthy and vibrant touch.
      • Roasted Vegetables: Roasted vegetables provide a simple and flavorful accompaniment.
      • Whole-Grain Sides: Serve with whole-grain rice or pasta for a more substantial meal.

      This easy and efficient recipe allows you to enjoy a delicious and healthy easy chicken dinner even on the busiest of weeknights.

      Ingredients:

      • Chicken Cutlets: 4-6 pieces
      • Breadcrumbs: 1 cup
      • Parmesan Cheese: 1/2 cup, grated
      • Dried Herbs: 1 tablespoon (e.g., rosemary, thyme, oregano)
      • Olive Oil Spray: As needed

      Asian-Inspired Sesame-Crusted Chicken Cutlets: A Flavorful Journey

      Elevate your baked chicken cutlets with an exciting Asian twist. These sesame-crusted chicken cutlets offer a delightful fusion of flavors and textures, taking your taste buds on a culinary adventure to the East.

      Asian Sauce Pairings:

      Enhance the flavors of your sesame-crusted chicken with a variety of delicious Asian-inspired sauces:

      • Teriyaki Sauce: This classic Japanese sauce offers a sweet and savory balance that perfectly complements the crispy chicken.
      • Spicy Sriracha Sauce: Add a touch of heat with a drizzle of fiery Sriracha sauce.
      • Sesame Ginger Sauce: This tangy sauce combines the nutty flavor of toasted sesame with the aromatic zing of ginger.
      • Hoisin Sauce: This thick and slightly sweet Chinese sauce adds a touch of richness to the crispy cutlets.

      Garnishing Tips:

      Elevate the presentation and enhance the flavors of your sesame chicken with these colorful and flavorful garnishes:

      • Thinly Sliced Scallions or Green Onions: Add a vibrant green color and a subtle onion flavor.
      • Toasted Sesame Seeds: Boost the nutty flavor of the crust and add a delightful crunch.
      • Shredded Carrots or Daikon Radish: Provide a refreshing and crunchy contrast to the crispy chicken.
      • Chopped Cilantro or Fresh Parsley: Add a bright, herbaceous touch and a touch of freshness.

      These Asian-inspired chicken cutlets offer a unique and flavorful twist on a classic dish. Experiment with different Asian sauces and garnishes to create your own personalized culinary masterpiece.

      Elevate Your Chicken Cutlets with a Healthy Greek Yogurt Marinade

      Transform your baked chicken cutlets into a flavorful and juicy masterpiece with this healthy Greek yogurt marinade. This method infuses the chicken with incredible flavor while keeping the fat content low. Discover how to create tender, succulent chicken that will impress your family and friends.

      The Power of Greek Yogurt:

      The key to incredibly flavorful and moist chicken lies in the marinade. Greek yogurt creates a creamy and tangy coating that penetrates the chicken, resulting in exceptionally tender and juicy meat. The active cultures in Greek yogurt also naturally tenderize the chicken, making it remarkably soft and flavorful.

      Marinating Tips:

      • Yogurt Choice: Opt for full-fat or 2% Greek yogurt for maximum moisture and richness.
      • Marinating Time: Marinate the chicken for at least 30 minutes for optimal flavor infusion. For even deeper flavor, marinate for up to 24 hours in the refrigerator.
      • Flavor Boost: Enhance the marinade with fresh herbs like oregano, thyme, or rosemary, minced garlic, lemon juice, or your favorite spices.
      • Pat Dry for Crispiness: Before baking, pat the chicken dry with paper towels to ensure a perfectly crispy exterior.

      Baking Instructions:

      1. Preheat the Oven: Preheat your oven to 400°F (200°C).
      2. Arrange the Chicken: Place the marinated chicken cutlets on a lightly greased baking sheet.
      3. Bake to Perfection: Bake about 18 to 22 minutes, flipping them halfway through, until the internal temperature hits 165°F (75°C).
      4. Rest and Serve: Allow the chicken to rest for 5 minutes before serving.

      Serving Suggestions:

      Serve your Greek yogurt-marinated chicken cutlets with a variety of delicious and healthy sides:

      • Fresh Salads: Pair with a vibrant green salad for a light and refreshing meal.
      • Roasted Vegetables: Complement the chicken with a medley of roasted vegetables.
      • Whole-Grain Sides: Serve with a side of whole-grain rice or quinoa for a complete and satisfying meal.

      This versatile and healthy recipe offers a delicious and nutritious way to enjoy baked chicken cutlets.

      Quinoa-Crusted Chicken Cutlets: A Flavorful and Nutritious Twist

      Discover the delightful combination of quinoa and chicken cutlets in this healthy and flavorful recipe. Quinoa, a protein-rich and gluten-free grain, provides a nutritious and uniquely crunchy coating for these classic cutlets. Let’s explore how to prepare these quinoa-crusted chicken cutlets and uncover their impressive health benefits.

      Quinoa Preparation Methods:

      There are two primary methods for preparing quinoa for your chicken cutlet coating:

      • Grind into Flour: Grind the quinoa into a fine flour-like consistency using a food processor or blender.
      • Toast and Pulse: Toast whole quinoa grains until fragrant and golden brown. Then, pulse them in a food processor to create a coarse, breadcrumb-like texture.

      Remember: Rinse the quinoa thoroughly before processing to remove any bitterness.

      Nutritional Benefits of Quinoa:

      • Protein Powerhouse: Quinoa is a complete protein, containing all nine essential amino acids, making it an excellent source of protein for your chicken cutlet coating.
      • Naturally Gluten-Free: Unlike traditional breadcrumbs, quinoa is naturally gluten-free, making these cutlets a perfect option for those following a gluten-free diet.
      • Nutrient-Rich: Quinoa is packed with essential vitamins, minerals, and antioxidants, providing a significant nutritional boost to your healthy chicken recipes.

      By incorporating quinoa into your baked chicken cutlets, you can enjoy a delicious and nutritious meal that satisfies your taste buds while supporting your overall health and well-being.

      Conclusion: A Culinary Exploration of Baked Chicken Cutlets

      This article has explored a diverse range of baked chicken cutlets recipes, catering to various tastes and dietary preferences. From classic Italian-inspired Parmesan crusted cutlets to flavorful Mediterranean herb-coated options and even healthy keto-friendly versions, you’ve discovered numerous ways to transform simple chicken into a delicious and easy dinner.

      Beyond their culinary appeal, these baked chicken cutlets recipes offer a healthier alternative to fried options. Baking allows you to achieve a satisfyingly crispy texture and rich flavors while minimizing fat and calorie intake.

      These versatile chicken cutlets are perfect for meal prep, providing a convenient and healthy protein source for busy weeknights. Experiment with different coatings, seasonings, and marinades to discover your favorite flavor combinations. The possibilities for creating delicious and healthy baked chicken cutlets are truly endless.

      Frequently Asked Questions (FAQs)

      • What are the essential kitchen tools and equipment needed to make baked chicken cutlets?
        • Essential tools include a baking sheet, a shallow dish for breading, and optionally, a wire rack and a meat mallet or rolling pin to flatten the chicken.
      • How do I choose the right chicken cutlets for baking?
        • Select boneless, skinless chicken breasts of uniform size and thickness for even cooking. Alternatively, purchase pre-pounded cutlets to save time.
      • What are the recommended temperature and timing guidelines for baking chicken cutlets?
        • Bake chicken cutlets at 400°F (200°C) for 15-20 minutes, flipping halfway through. Make sure the internal temperature hits 165°F (75°C) to ensure it’s safe to eat. Cooking times may vary slightly depending on the thickness of the cutlets.
      • How do I achieve a crispy coating on my baked chicken cutlets?
        • Dry the chicken cutlets thoroughly before breading to ensure optimal crispiness. Utilize dry ingredients such as breadcrumbs, Parmesan cheese, almond flour, or crushed pork rinds for the coating. Baking the cutlets on a wire rack promotes even air circulation and enhances crispiness.
      • What are some tips for storing and reheating baked chicken cutlets?
        • Store leftover baked chicken cutlets in an airtight container in the refrigerator for up to 4 days. To reheat, place them on a baking sheet and warm in a preheated oven at 350°F (175°C) for 10-15 minutes. Avoid overcooking to maintain moisture.
      • How can I make baked chicken cutlets more kid-friendly?
        • Season the chicken cutlets with kid-friendly flavors like ranch seasoning or serve them with a favorite dipping sauce. You can also use cookie cutters to cut the cooked chicken into fun shapes or create bite-sized strips for easier handling.
      • What are some healthy alternatives to traditional breading for baked chicken cutlets?
        • Explore healthier breading options such as almond flour, quinoa, or crushed pork rinds. These alternatives offer a crispy texture while being gluten-free or low in carbohydrates.