If there was ever a recipe that would have every home cook in awe of their abilities, the reverse sear tomahawk steak is the way to do it. This cut, characterised by a long rib bone that is exposed and well-marbled, should be given more than just a raw barbeque.
The reverse sear method has single-handedly changed how people at home cook with thick cuts of meat. all made possible in a single device, that too with a high level of reliability.
Unlike most searing where you bring oil to high heat, this searing method is a slow process that staggers the heat and results in a great crust any professional chefs would adore.
Today we will explore tips and tricks for making a killer reverse sear tomahawk steak once more; crispy on the outside and tender on the inside. From a celebratory dinner to just wanting to step up your steak game, these pro tips certainly will take your tomahawk from decent to out of this world.
Understanding the Reverse Sear Tomahawk Steak
In order to make the proper Reverse Sear Tomahawk Steak, there is need to understand the execution process.
Tomahawk steak is one of the most impressive types of steaks and can energize everyone in the kitchen and at the table. Here’s what makes it unique:
What Makes a Tomahawk Special
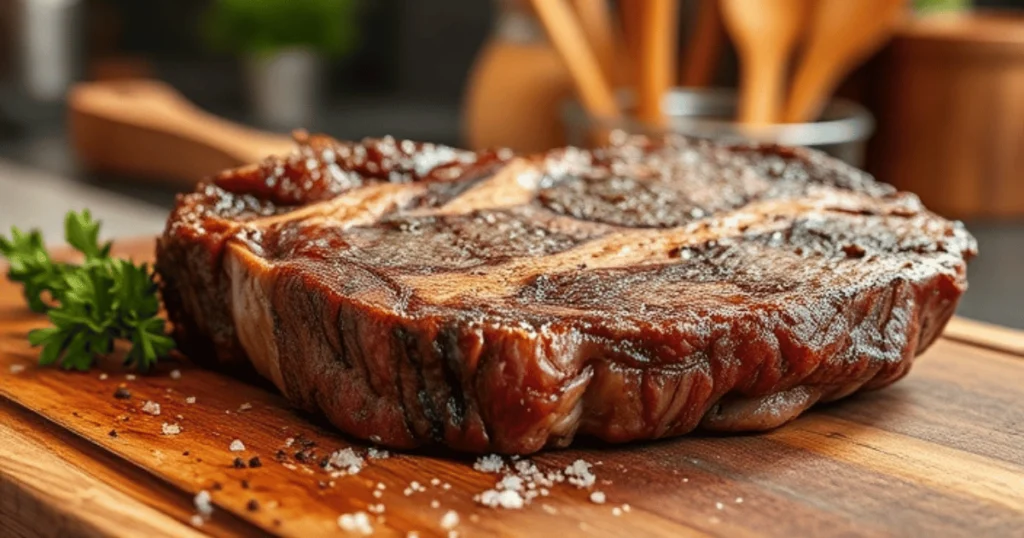
- The Bone: The most shocking thing is the long and beautiful bone implanted to the ribeye. This bone is usually 8-12 inches in size, looking like a tomahawk axe hence the name.
- Exceptional Marbling: In the same way that a ribeye does, the Tomahawk is characterized by a beautiful fatty cap which adds loads of flavor and makes for a superbly tender bite.
- Prime Real Estate: That is why the Tomahawk is essentially a ribeye steak where a large part of the rib bone is not trimmed. This provides aesthetic appeal and can always boost the cooking process as well.
Grading and Selection
- Look for High-Quality Grades: Opt for USDA Prime or Choice grades which have the best grade of muscle Buddy and palatable meat.
- Check for Marbling: When it comes to within a grade, marbling can be different, It is customary to select steaks with uniform distribution on readily apparent patches of fat within the meat.
- Consider Thickness: A good Tomahawk should be of at least 1.5 inches in thickness so that even the edges are well seared and tender from inside.
Cost vs. Regular Ribeye
- Premium Price: The regular Tomahawk will also cost a bit more than an ordinary ribeye partly because of the extra bone and the aesthetics.
- Value Proposition: Compared to this the Tomahawk is slightly expensive but it worth it in terms of the experience and uniqueness of the steak pricing itself for the number of consumers it would attract during occasions.
Essential Equipment and Tools
Temperature Control Devices:
- Oven Thermometer: A oven thermometer is a necessity to check whether the oven is operating in the correct temperatures or not. This is particularly true for the low-and-slow cooking after which it’s time to sear the meat during reverse sear.
- Meat Thermometer: Nothing can substitute for a good instant-read meat thermometer. An advantage is that it can be used to regulate how cooked the steak inside is as it cooks, so you can avoid overcooking the steaks.
Cooking Surfaces:
- Oven Racks and Pans: A heavy duty oven rack should be used at the low and slow cooking phase of the preparation process. A rimmed baking sheet placed at the rack bottom will collect any dripping from the food.
- Cast Iron Skillet or Grill: If one wants a great sear, they should season their cast iron skillet well or use a hot grill as well. This kind of surfaces produces very high heat to give foods a wonderful crispy, brown surface or caramelization.
Additional Tools Needed:
- Tongs: Crucial when flipping the steak to prevent burns when one is searing the steak.
- Wire Brush: This is used before browning burger or steak or any macho barbeque item on the grill or non stick skillet.
- Cutting Board: Functions for stability and safety after the steak has rested.
- Sharp Knife: In order to do this, the steak has to be made thinner across the width of the muscle fibers.A bone-in steak has connective tissue called a butt cap on its surface and will be covered by fat.
As you will see below, having these implements will help you cook a Reverse Sear Tomahawk Steak with a lot of confidence and ease.
The Science Behind Reverse Searing
Reverse searing is a concept based on the heat conduction and protein coagulation as the way of cooking perfectly good steaks. Let’s break down the science:
Traditional vs. Reverse Sear Method
- Traditional Method: In the traditional technique searing is conducted initially at high intensity to form a brown layer. Then the steak is cooked at a lower temperature to achieve the desired doneness of steak is completed. This method can make food to be cooked on the outside while still being raw on the inside of the fish.
- Reverse Sear Method: The reverse sear method does the exact opposite of this. The steak is then baked first in a low heat oven for some time to permit the heat to reach deep into the meat. This is because slow and gentle cooking process only cooks from the inside while to outside gets a nice brown color. The last intense cook leaves a superb layer of brown on an item while keeping it moist inside.
Temperature Control Benefits
- Even Cooking: As it takes time, heat heats up the steak gradually from all sides meaning that all parts of the steak are cooked at the same time as would be desired.
- Moisture Retention: Many people would think that using high heat would mean the steak would become juicy, but the slow heaters prevent moisture loss, making for a tastier steak.
- Precise Control: The slow cooking enables tenderizing and gives control of the inner part of the steak thus cooks it properly to the required tenderness.
Why It Works Better for Thick Cuts
Some foods are easier to desalinate than others and to serve thick cuts of meat such as the Tomahawk steak is a problem. Food exterior browns faster than the inside, and food is either under-cooked or burnt on the outside. The reverse sear method addresses this issue by:
- Even Heat Distribution: In this instance, there is controlled heating in the oven, allowing the heat to get to the core of the dense mass of the steak cut without browning the outside to crisp and black.
- Reduced Shrinkage: The low, sustained heat then allows for minimal muscle contraction – which causes shrinkage and loss of moisture.
- Enhanced Flavor: This further helps the enhanced and slow response of natural flavours and tenderness of the minute cuts of the meat through low-and-slow cooking strategy.
When you have the facts about reverse searing, you will be equipped to the work the technique flawlessly to give your steaks the best texture and tenderness.
The Cooking Process of Reverse Sear Tomahawk Steak
He could always make the best out of different dishes with the use of his reverse sear method, and what makes it magical is its process – precise and patience. This section splits each of the processes, which cannot go wrong if you need to obtain the real, authentic steakhhouse result, into several easy steps.
Initial Low-Temperature Phase
Based on the top conceptualisation of the reverse sear method of cooking, the initial slow cooking phase forms the bedrock of the method. This gentle approach guarantees the best control of the last doneness of your tomahawk steak in addition to ensuring even heating on the meat.
Optimal Oven Settings
To prepare the best reverse sear, preheat your oven to 250 degrees Fahrenheit controls the temperature. This may sound counter intuitive to most steak lovers, particularly using a temperature you’ll normally brush aside as being too low for cooking steak. If you have an oven that is hot or cold, then you need to be very accurate in this case. Put the seasoned tomahawk on a wire rack that you put in a rimmed baking sheet; this improves heat circulation around the food.
Timing Guidelines
This means that the actual amount of time it takes to cook the tomahawk will depend on how thick this piece of meat is and how pink you like it on the inside. As a general rule, expect:
- Rare (125°F): 1.5 to 2 hours
- Medium-rare (135°F): 2 to 2.5 hours
- Medium (145°F): 2.5 to 3 hours
Let me remind you that I’ve been generalizing here and this pertains to standard practice rather than a blanket law. You will notice that the tip steak or thickness of the uncongealed raw material will determine cooking times and that is the reason why temperature control is very important.
Temperature Monitoring
Before the steaks go into the oven, take a good meat thermometer, and place it into the center of the steak, but make sure not to place it in the fat or near the bone. For medium rare, pull the steak from heat when it is 10-15 degrees Fahrenheit below the desired temperature (which for us, is 120-125°F). It will rise slightly during the resting phase and final sear, internally The internal temperature The internal temperature
The Resting Phase
The resting phase of cooking is more than spending time waiting for the next culinary process – it helps the proteins in the meat to relax and the juices to re-organize. Let your tomahawk stay for 10-15 minutes at room temperature after you have taken it from the oven. At this time, this surface needs to be pat with dry paper towels – there’s no way one can get a perfect crust going to the next phase. You can also take time and prepare your searing station and other essential ingredients for basting.
The Final Sear
This is where the ART is done — to turn the nicely cooked inside into a wonderful looking bread.
Getting the Perfect Crust
Before, the skillet must be heated to a smoking point, which, in fact, is above 500°F (260°C). Put a very thin layer of high smoke point oil such as Avocado or Grapeseed oil. The most important thing to remember here is that before it goes in the pan, the surface of your steak must be bone dry – any residue of moisture will interfere with the process of browning. Put this tomahawk in the screaming hot pan, apply pressure on the meat so as to make sure the whole bottom of the steak gets in contact with the pan.
Butter Basting Technique
Add a large spoon of normal butter (about 3-4 tablespoons) when the steak has been seared for 45 seconds, along with crushed garlic and favourite herbs such as thyme and rosemary. When the butter is melted and starts foaming, turn the pan slightly to one side and constantly pour this flavorful butter over the steak. It also contributes amazing flavor which is of aspect to forming the desired crust.
Timing the Flip
Just as it is important that the burning should be carefully managed, timing is critical during the searing phase. A primary scald requires approximately 45 seconds to 1 minute exposure to direct heat. Try not to flip your food more than once especially if your goal is to have that crispy crust. After you have browned both sides, using the tongs pick up the tomahawk and place it on its side to brown the fat covering for 30-45 seconds or until crispy.
The entire searing process should not last for more than 3-4 minutes in their totality. Keep this in mind; you never actually cook the steak here, you simply want to have color, texture, and extra flavor going for you. When you are done, your tomahawk should put a deep mahogany crust on the outside, in addition to the edge-to-edge doneness that comes with cooking the meat in the oven.
Following searing, let the steak lie for 5-10 minutes before slicing it. The last rest brings the temperature down and lets the juices collect that way when you make the first incision the meat is well done on the outside and juicy inside.
The biggest strength of this reverse sear method, in my opinion, is its tolerance towards timing – although the meat has to be cooked for some time, have that perfect temperature every step of the way you are bound to screw it up less. Follow the mentioned steps to the latter, and you will be able to prepare delicious Reverse Sear Tomahawk Steak, worth a restaurant’s price, on a weekly basis for your dinner parties.
Common Mistakes and How to Avoid Them
In general, it is important to achieve the perfect cooking of Reverse Sear Tomahawk Steak and even some mistakes are critical. If these mistakes are familiar to you, you will be able to replicate the Steakhouse experience every time.
Temperature Control Errors
Temperature control is undoubtedly one of the most important strategies provided by the reverse sear method. A mistake most home cooks make is setting their oven temperature according to the thermal display, which can actually be 25-50% different. It is also important always to use a new oven thermometer for the measurements. One more mistake people make is putting the meat over the heating rods – the correct place for a rack is in the middle of a Neff oven so that heat circulates evenly.
Second one main temperature mistake is done during the searing stage. It also makes for getting your pan not hot enough to properly sear them leading to poor crust and possible overcooking. Cook your cast iron with high heat – if you cannot hold your hand 6 inches above the cooking surface for more than a second, it’s not hot enough.
Seasoning Mistakes
Even when it comes to seasoning, there are numerous mistakes you can make. The first mistake is cardinal – not seasoning hugely enough – a cut of meat this thick requires a good dose of salt and spice. Bake season from a height of 8-12 inches for even distribution, all across the pan.
Second, mistakes that are made often are again related to timing and, more specifically, seasoning. The salt takes time to get absorbed in the meat. Season at least 40 minutes before cooking – and preferably the night before. It also helps the salt to make the right infiltration to get to the core of the piece of meat and increase its taste. Do not use fine table salt – instead try using kosher or sea salt when seasoning your food.
Timing Issues
Any attempt at a fast delivery of the various steps of the reverse sear process will just lead to disappointment. Common timing mistakes include:
- Not bringing the steak to room temperature (it takes about 1-2 hours to do so)
- Stressing the slow-cooking process or the low temperature phase
- With regards to the second limitation, the authors failed to allow adequate rest time between the phases.
- Cooking for longer time which ultimately means overcooking the perfectly cooked interior.
Resting Period Problems
One of the mistakes consist of reducing or omitting the resting periods. The time is a break after the low temperature cooking process which would ease the proteins tight structure nd maintain the necessary temperature. The last thing a food preparer does after searing is to rest, not cutting will lead to more juice loss and a dry steak.
Serving and Presentation
Slicing Techniques
Slicing of the food portions is important in color displays as well as when consuming it. When preparing meat, should order it that the grains of the flesh be in an opposite direction, and use a sharp blade in order to give a smooth and clean incision. For a tomahawk, first cut the meat on the edge of the bone using the back of your knife. Next, cut the meat into 1/2-inch thick portions with all the pieces placed at an angle that would reveal ‘doneness’ perfectly.
Plating Tips
Everything looks more appetizing when served by dressed up wait staff. Consider these approaches:
- He preferred to cook on a large plate in order to retain heat.
- Place slice in a fanned out formation with each piece slightly overlapping the other.
- Arrange the bone in a staged manner on the plate
- Make room for accompaniments without over powering.
- Can be decorated with other natural herbs or compound butter.
- Spray some high-grade olive oil to make the hair shiny
Accompaniment Suggestions
A perfectly cooked tomahawk deserves thoughtful accompaniments:
- Roasted bone marrow
- Grilled asparagus or broccolini.
- Truffle mashed potatoes
- Sautéed wild mushrooms
- Caramelized shallots
- Roasted garlic heads
- Micro greens or watercress for the bright contrast
Tips from Professional Chefs
Expert Insights
Professional chefs emphasize several key points for perfect execution:
- Quality matters – source your meat from reputable butchers
- Invest in proper tools, especially thermometers and heavy-duty cast iron
- Practice temperature control without relying on timers
- Learn to judge doneness by touch and visual cues
- Understand the importance of carryover cooking
Restaurant Secrets
Behind-the-scenes techniques from professional kitchens:
- Pre-heat serving plates in a low-temperature oven
- Keep compound butter ready for finishing
- Use a torch for hard-to-reach areas during searing
- Maintain different temperature zones on your cooking surface
- Rest steaks on a wire rack to prevent steam from softening the crust
Flavor Enhancement Techniques
Professional chefs employ several methods to maximize flavor:
- Dry-aging at home using specialized bags
- Creating custom spice blends for different beef grades
- Infusing butter with multiple aromatics during basting
- Using smoked salt for seasoning
- Adding bone marrow butter for extra richness
- Finishing with flaky sea salt and freshly cracked pepper
- Incorporating umami-rich ingredients like aged soy sauce or fish sauce in minimal quantities
These advanced techniques can help transform a great steak into an unforgettable dining experience, rivaling the quality of high-end steakhouses while maintaining the satisfaction of cooking it yourself.
Conclusion
Probably this is the reason why reverse sear tomahawk steak cooking method has been embraced by many steak lovers once you prepare the tomahawk steak by cooking it through reverse sear you will know why. That is why sous vide steak is that in every detail it is one of the best ways to cook a steak evenly from the center to the edge and has a beautiful crust. Nonetheless, it might take a considerable amount of time to accomplish all those steps, yet it’s adequate to invest more time and efforts to achieve the highest level of thoroughness.
Don’t forget that when it comes to grilling, practice makes perfect – each time you prepare a tomahawk this way, you will just get better at the motions and the timing. Then having these techniques in you cooking skill set, you will be in a position to prepare steakhouses’ like meals at home.
Frequently Asked Questions
Q: With Reverse Sear Tomahawk Steak, how early should I marinade it?
A: You should also know that it is possible to season your tomahawk up to 24 hours before using it. By dry-brining, you make the chicken tastier, and more importantly, you achieve better results as for moisture. At the bare minimum, season 40 minutes before cooking to allow the salt to work into the meat sufficiently.
Q: What is the best thickness for tomahawk when doing a reverse sear?
A: The recommended thickness for the insulation material is between 1,1/2 and 2,1/2 inches. Reverse sear works effectively for steaks that have thin cuts than for those that have cuts that are thicker than average.
Q: Is it safe for me to use this method in say an open grill in a compound?
A: Actually, it is very convenient to use a grill for both phases. Create a dual-zone heat source, and cook with indirect heat at 225-250°F in the beginning, then, grill with direct high heat for searing.
Q: What should I do if I don’t have cast iron skillet?
A: When possible, a cast iron pan is perfect but any pan with a heavy bottom that can well handle high heat is recommended. Otherwise, very high temperature on the grill can also be used for achieving the aims of the searing phase.
Q: How long can I re-heat the steak before searing it when is cooked at a low temperature for a long time?
A: The perfected steak can be left at the room temperature for about an hour to an hour and a half only after the initial sear. This flexibility qualifies it to be used especially during parties. You just need to make sure that it is well dried before searing it.
Q: If I didn’t broil the steak first, why did it not get the good sear that I wanted?
A: A weak appearance of the crust is the consequence of either moisture on the surface of the meat or inadequate heat. Make sure the steak is as dry as you can before the process and make sure your pan is very hot.
Q: Can I reverse sear tomahawk steak that I had frozen?
A: Despite that, that can be done, it is not advisable. Use your refrigerator’s cold for thawing your steak this may take you up to 24-48 hours and after that bring it to room temperature.
Q: How should I store my meals so that I can reheat them later?
A: Storing the leftovers in an airtight container and placing the container in the fridge will help it last up to 3 days. To reheat, warm gently in a 250 F oven until you get it to the temperature of your choice. Do not microwave because it becomes overcooked when done so.
Q: Can one consume steak at raw temperatures and is there any difference between grain fed and grass fed beef?
A: When it comes to whole muscle cuts such as a tomahawk steak, consuming a raw meal is not a problem because bacteria, which are pathogenic, are always found on the surface; and, they die during the process of searing The tomahawk steak. But, adhere regional food hygiene measures and individual choices.
Q: Is it possible to cook the steak with butter instead of oil in the first stages?
A: It is best to use smoke point oil for the first sear of the steak and the butter to baste the steaks later on. While using butter alone, it will stick due to the high temperatures necessary in order to form a good sear.
Q: How much should one be willing to part with for a quality to-am-hawk steak?
A: It will cost between $25-45 per pound for Choice grade and $50-100+ per pound for Prime grade tomahawks depending on the region and quality. It may most often come in the range of 1.25 to 1.75 kilograms, or at most 3.5 lbs.
Q: How else can I tell that the meat is done if not for a meat thermometer?
A: It is best to use a meat thermometer, however, here are finger test measures; Rare is equivalent to the feel on cheek, medium-rare is the feel on the chin and the medium to that of the tip of the nose. However, this method is not accurate and requires experience in selection.
Leave a Reply